
DIY Tomcat & Fatcat Notes
In addition to our DIY Polecat Guide we’ve also added some extra notes to help readers go a step further & fabricate their own version of our Tomcat & Fatcat units - materials, tools & construction are similar to Polecat with the main difference being the additional & more complex work to form Access Holes & Shelf Compartments
Introduction
We’ve decided to write up a short Tomcat/Fatcat guide in addition to the DIY Polecat guide as we know there are people very keen to make a version of our Hicat® unit themselves or look to get a local tradesman to fabricate a unit.
The same DIY Kit that we supply for Polecat can be purchased for your DIY Tomcat & Fatcat noting that rather than MDF offcuts being included there are extra U-Nail Staples for the larger diameter end cap assembly & shelves to be fixed.
Fabrication Guide
Unlike our DIY Polecat guide we have not produced a step-by-step guide but more of a walk through on pointers - this is on the basis that if you are going to make your own unit then you’ll probably have your own ideas on how you will approach making your version of our Hicat® like Andy did with his DIY Tomcat.
Reading the DIY Polecat guide will give you a good understanding of the various fabrication techniques required to complete this project so the fundamental difference is the core size & the additional skill sets & cost required to form the access hole compartments for a tube or wide tube version of our Hicat® - the guide below relates to our Tomcat 305mm internal diameter & Fatcat 400mm internal diameter units using the same laminated tubes that we fabricate with but we have also looked at using flexible MDF sheeting as well to form the cores.
We think if you intend to line the unit internally then it will be easier to fabricate the unit in two halves if you are using a one piece tube - it is possible to install shelves & line the tube with carpet without splitting it as we do with our SixToo™ unit but it will require a different approach in terms of templating & skill sets.
If you do intend to use sections of tube then join them it is possible to line the sections of tubes without splitting them but again depending on how the carpet is being formed around access holes & internal lining it may still be easier to fabricate in two halves then join the sections.
End Caps & Shelves
The same Polecat End Cap assembly is used for the larger units just sized up to the bigger diameter - feet, grommet & wrapped edge details are the same so the only difference is that you will need more staples to fix the end cap assembly to the tube ends, which come with the DIY Kit for the larger diameter units.
Full Shelves are relatively simply to trim & cut to the applicable tube sizes but Climb-Through Shelves are definitely a step up in complexity if you intend to line the unit internally as it the carpet will need to be tailored around the shelf openings - a good compromise is to go for a Worm Hole Shelf to avoid having to cut out the internal lining around the Climb-Through Shelves noting that the Worm Hole works best on the larger Fatcat diameter unit.
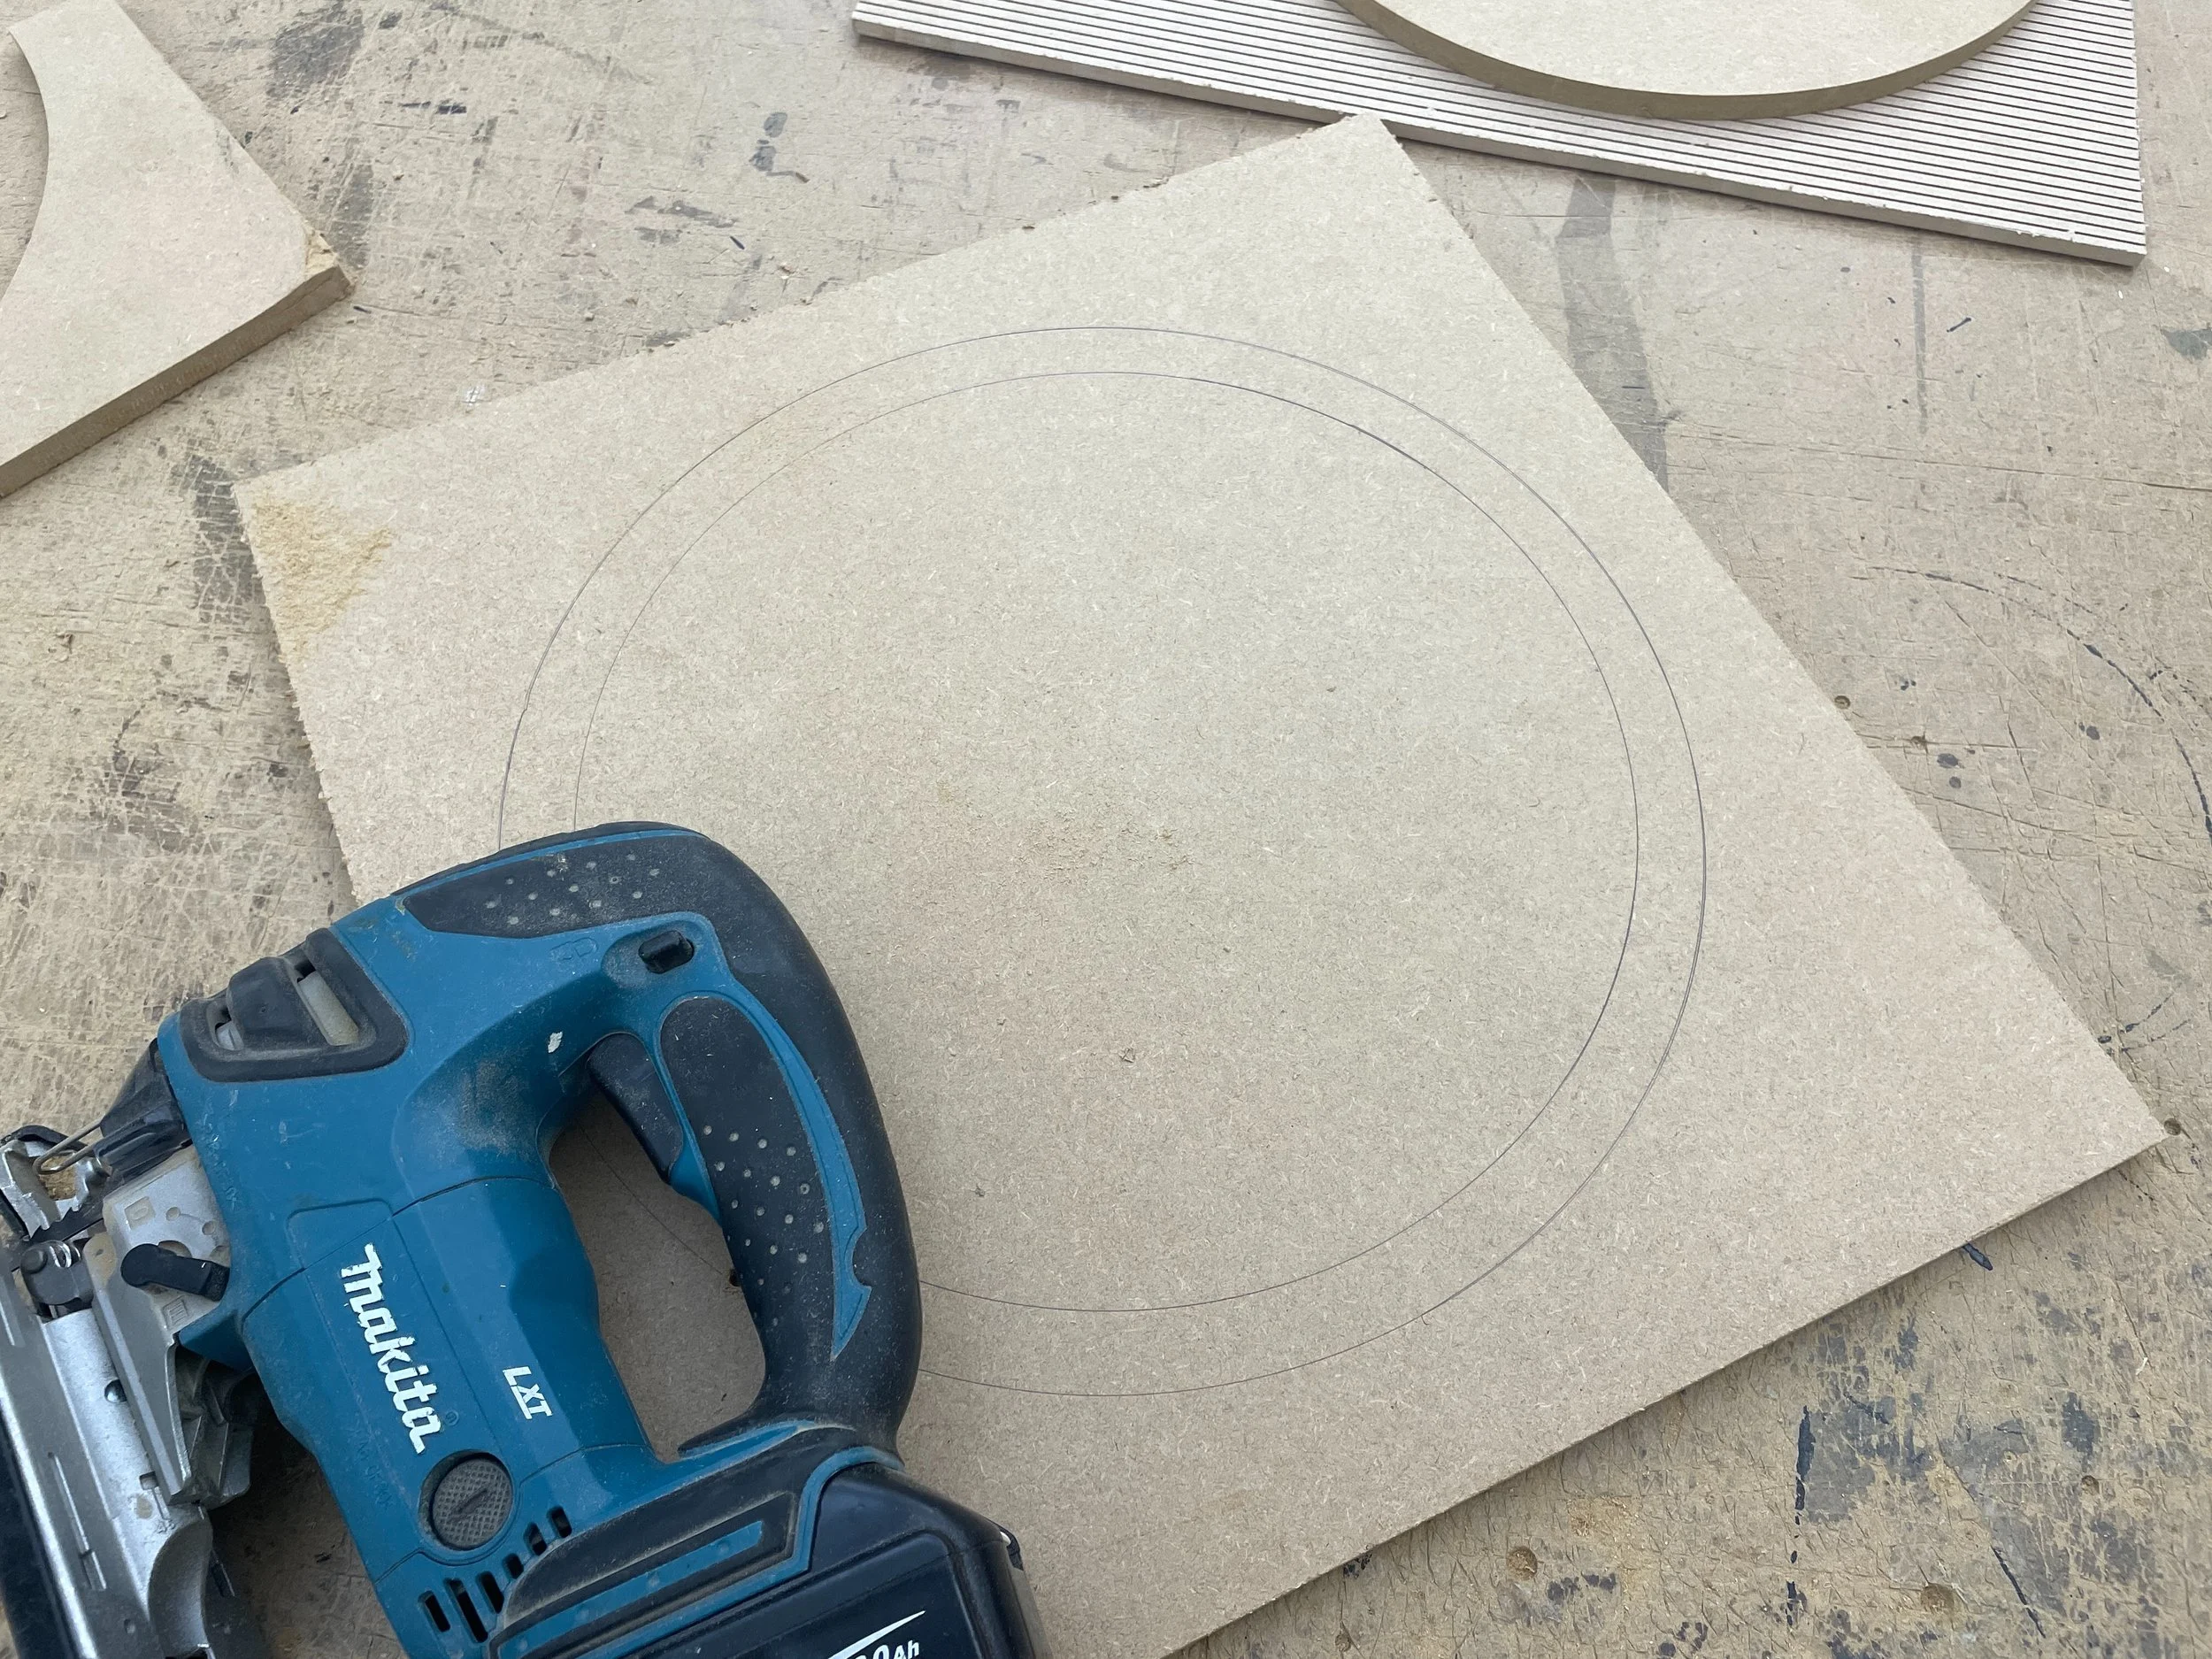
We cut our shelves from 9mm MDF at a diameter 4mm smaller than internal tube diameters to give us some movement when assembling the units - apertures in Climb-Through & Worm Hole Shelves are cut out a 200mm diameter, which gives a hole of approximately 180mm once the shelf is wrapped in our normal 15mm deep carpet.
Core Options
If you’ve read the DIY Tomcat blog you will see that in this guide Andy uses a 12” Quick Tube cardboard concrete former for the core on his unit, which is available to purchase online in the USA - at the time of writing there are a couple of online retail outlets in the UK that can supply the same tube & retailers in the States that will ship to the UK but the 4’ long 4 pack costs more than purchasing individual Tomcat & Fatcat sized tubes from Essex Tubes, our supplier.
We have also looked at using Flexible MDF to form the core using 606mm tall x 1220mm wide boards, which is cheaper in terms of materials but there is much more work involved as you need to cut rings to form the tube then fix sections together - the only real advantage to using flexible MDF is that you can fabricate a core to a specific size noting that based on the standard 1220mm wide board size, which actually cuts down to a 1160mm once the un-ribbed border section is removed, a core diameter of 360mm can be fabricated.
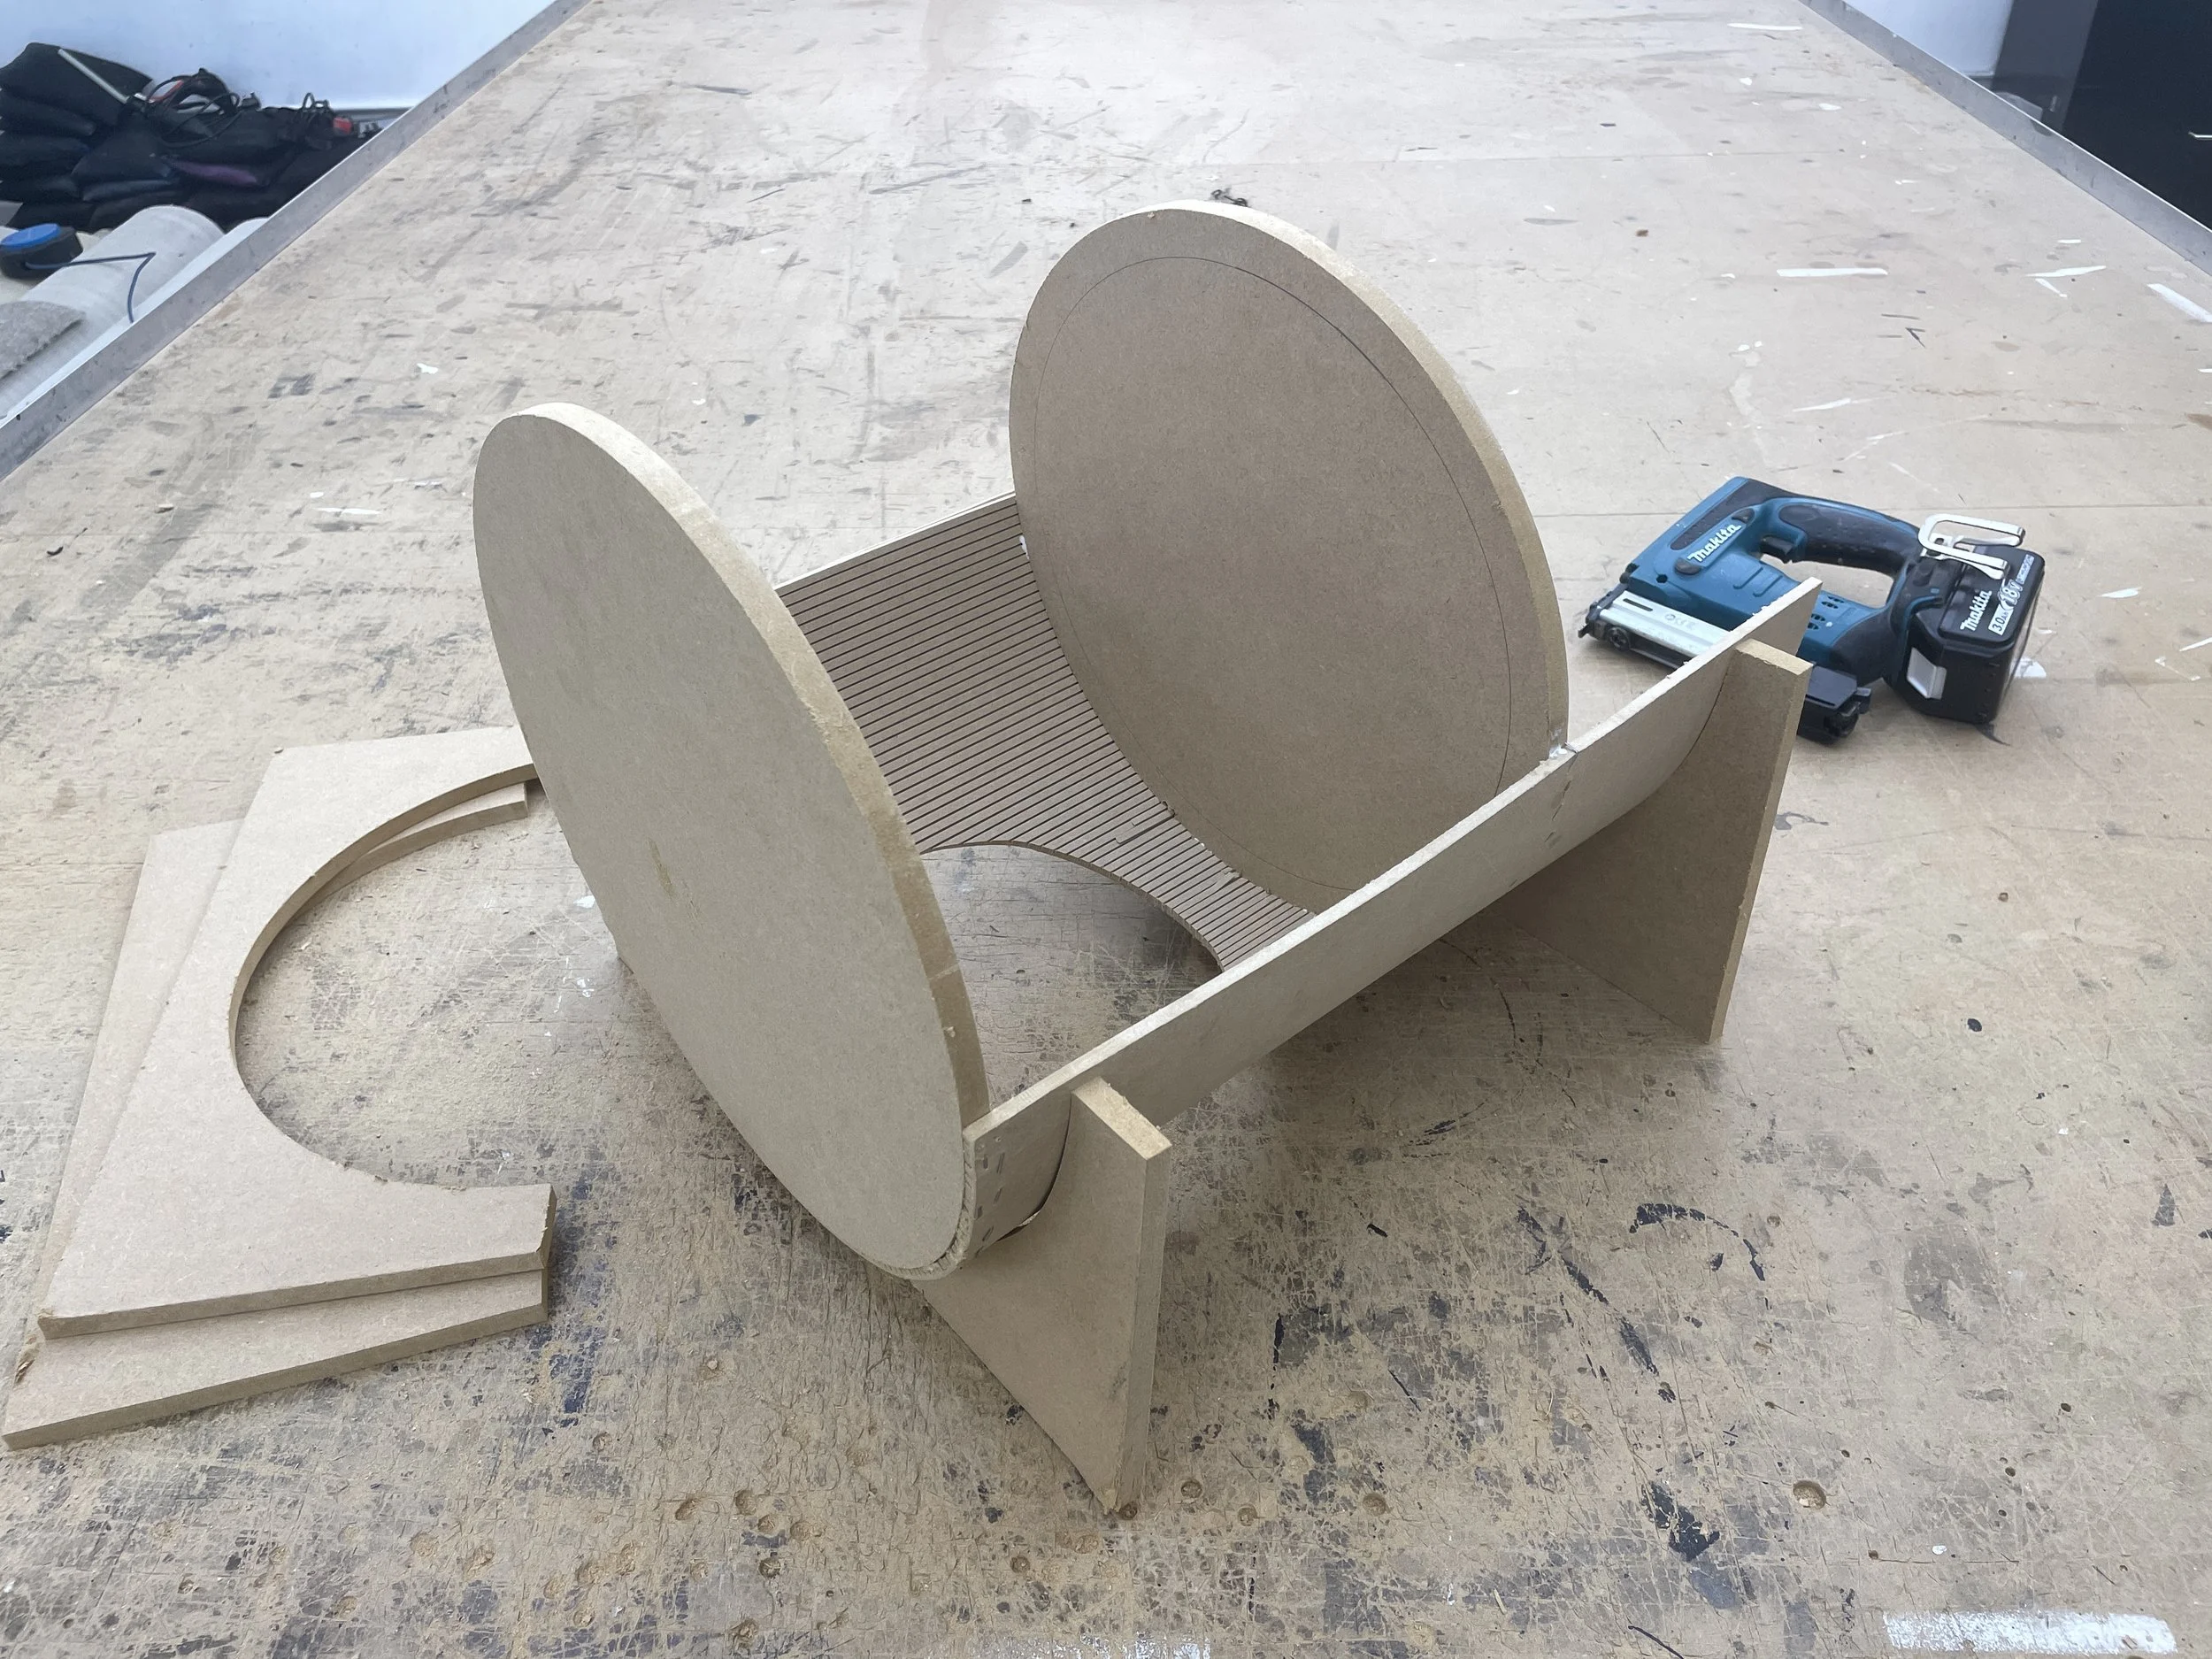
We mocked up a small section (see photos below) to test the circumference measurement using the 400mm Fatcat Access Hole Template to cut out the Access Hole, which worked fine - we then used two shelves to form one half of the flexible MDF core.
When cutting out shelves we cut from a square MDF board approximately 100mm larger than the shelf size to be used - this is so the offcuts from the shelf can be cut into halves & used as jigs to help form the first half section of flexible MDF after allowing for the thickness of the MDF sheet. We marked up another circle that was 30mm larger than the shelf before cutting so that after the first sets of jigs were used we could cut to the outer circle & use the same jigs to hold the 15mm thick external wrap under the tube when forming Access Holes.
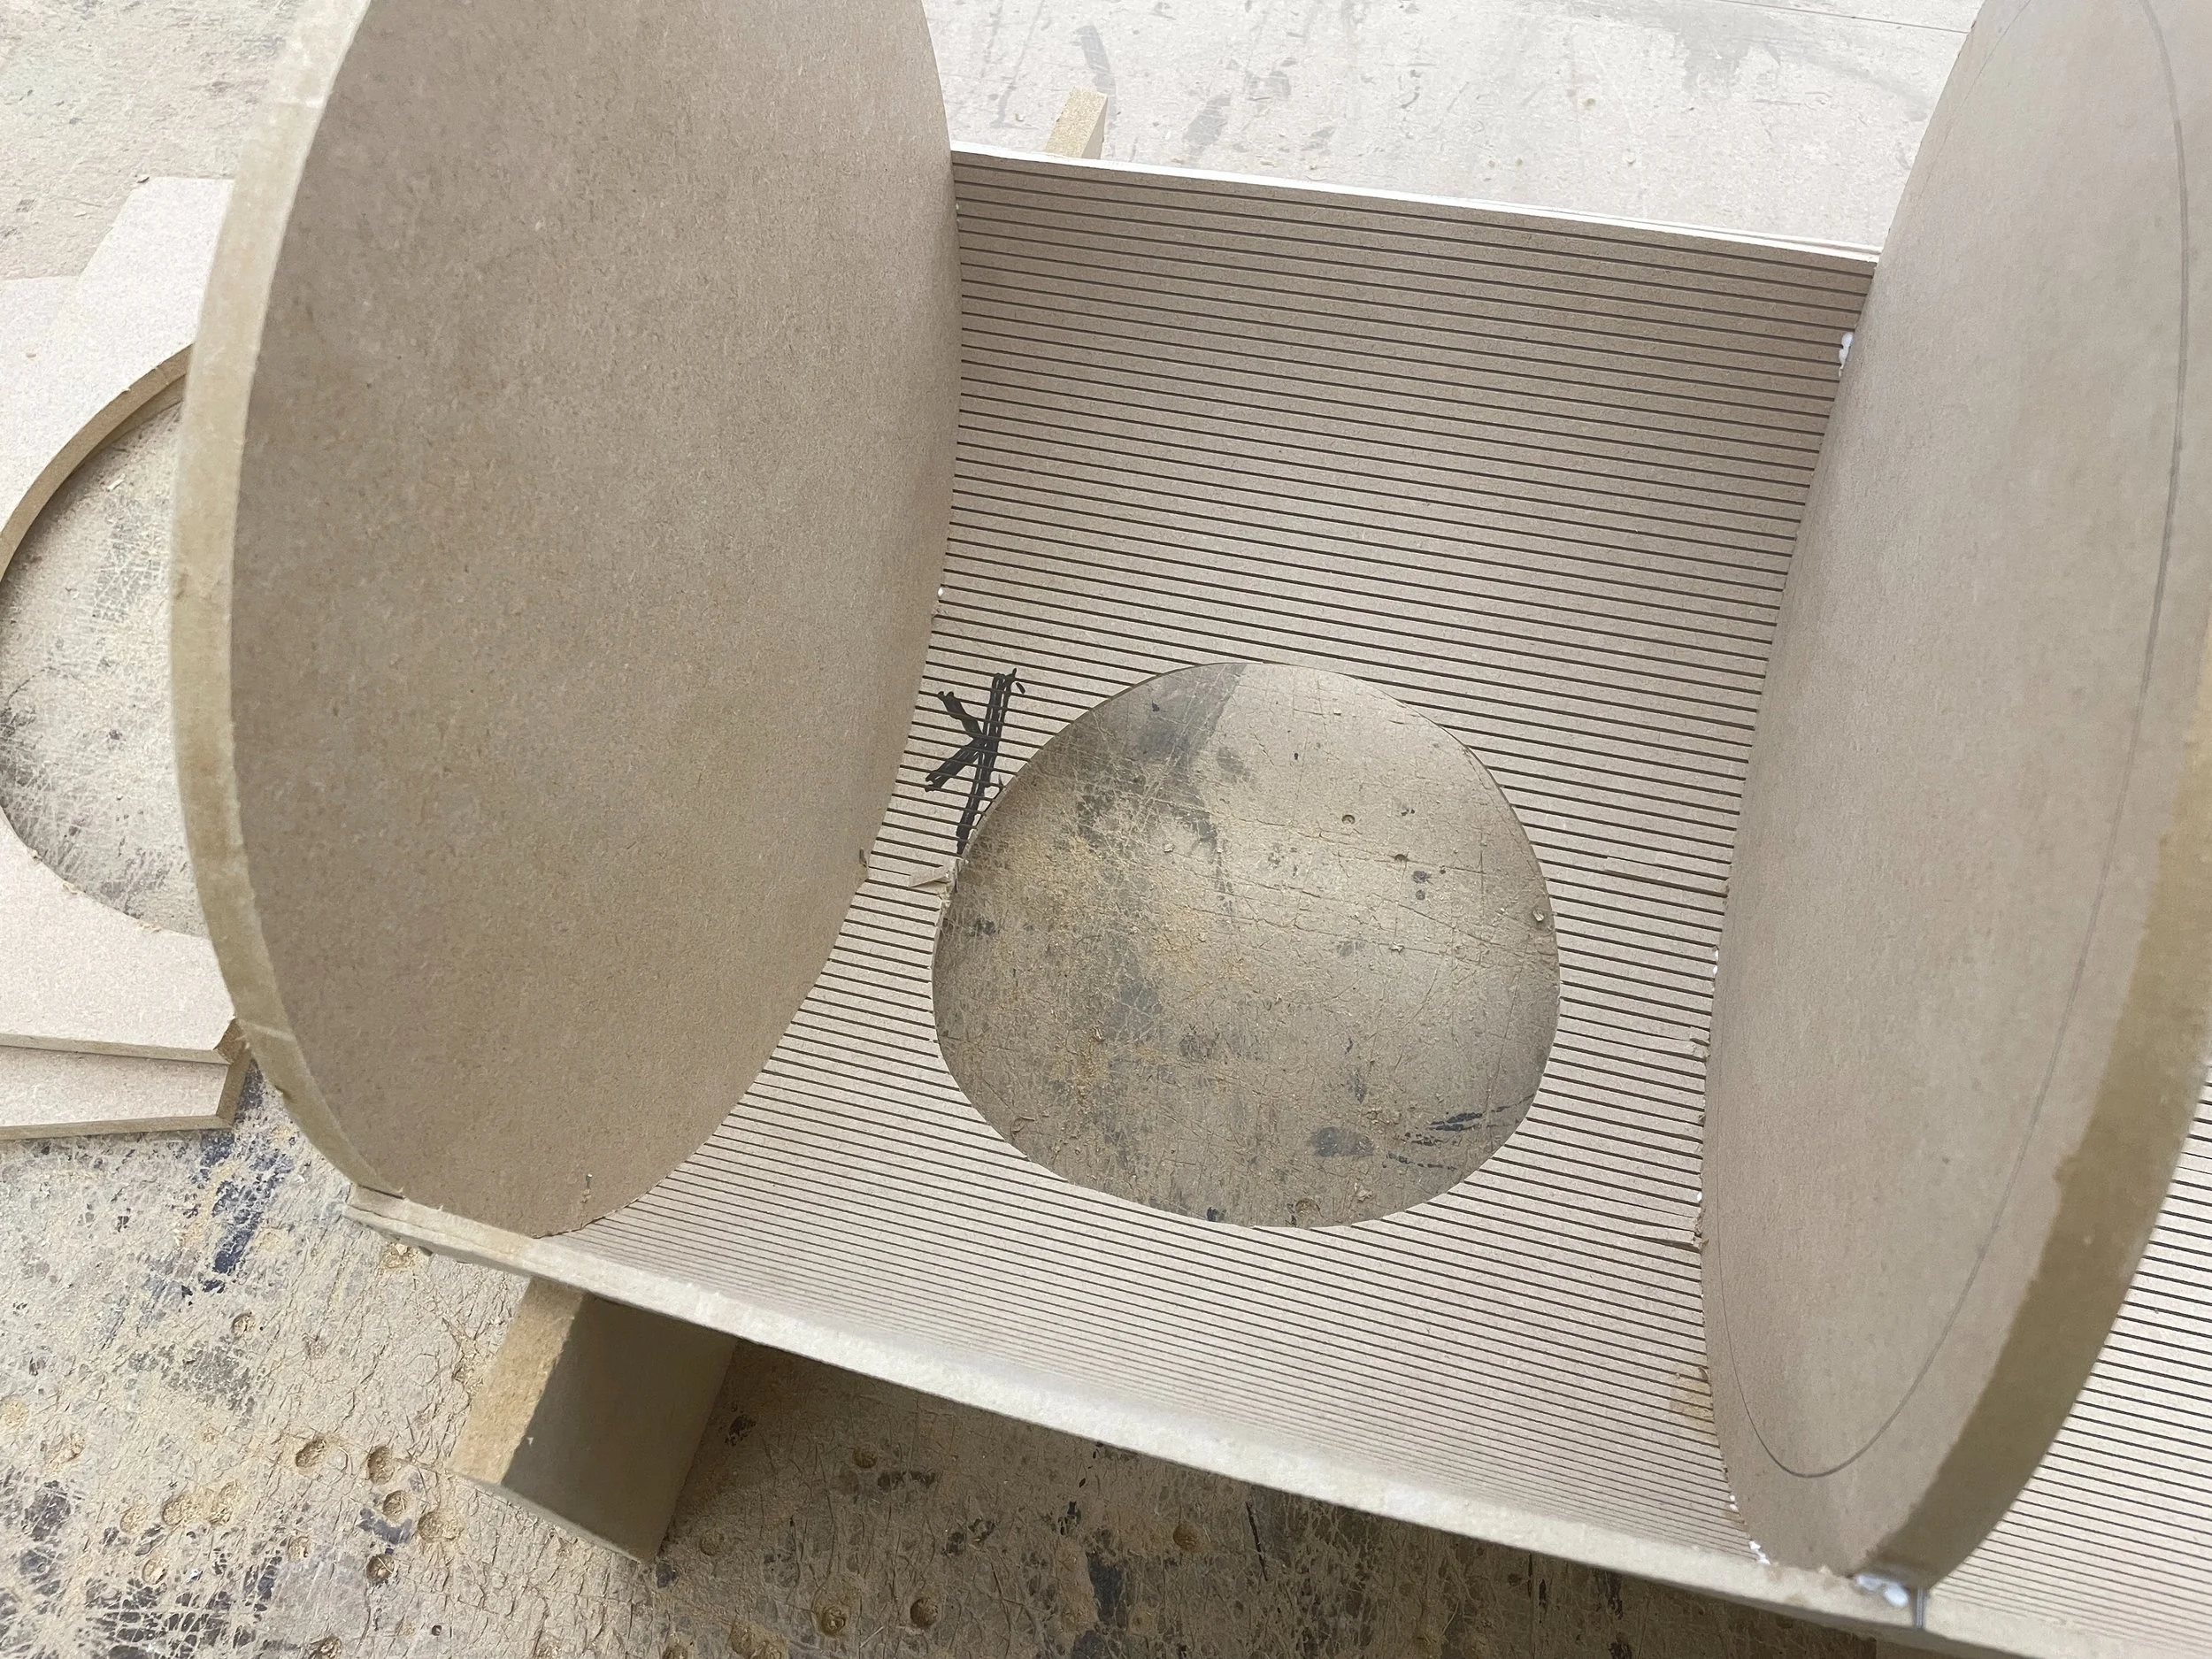
It’s important to note that when positioning the Access Hole cutouts & Shelves you need to leave at lease 80mm clear between the Access Hole & Shelves so there is enough space to fold the external finish into the core & then bond the internal lining around it - the shelves in our mock-up are positioned too close to the access hole as indicated by the arrow in the photo below.
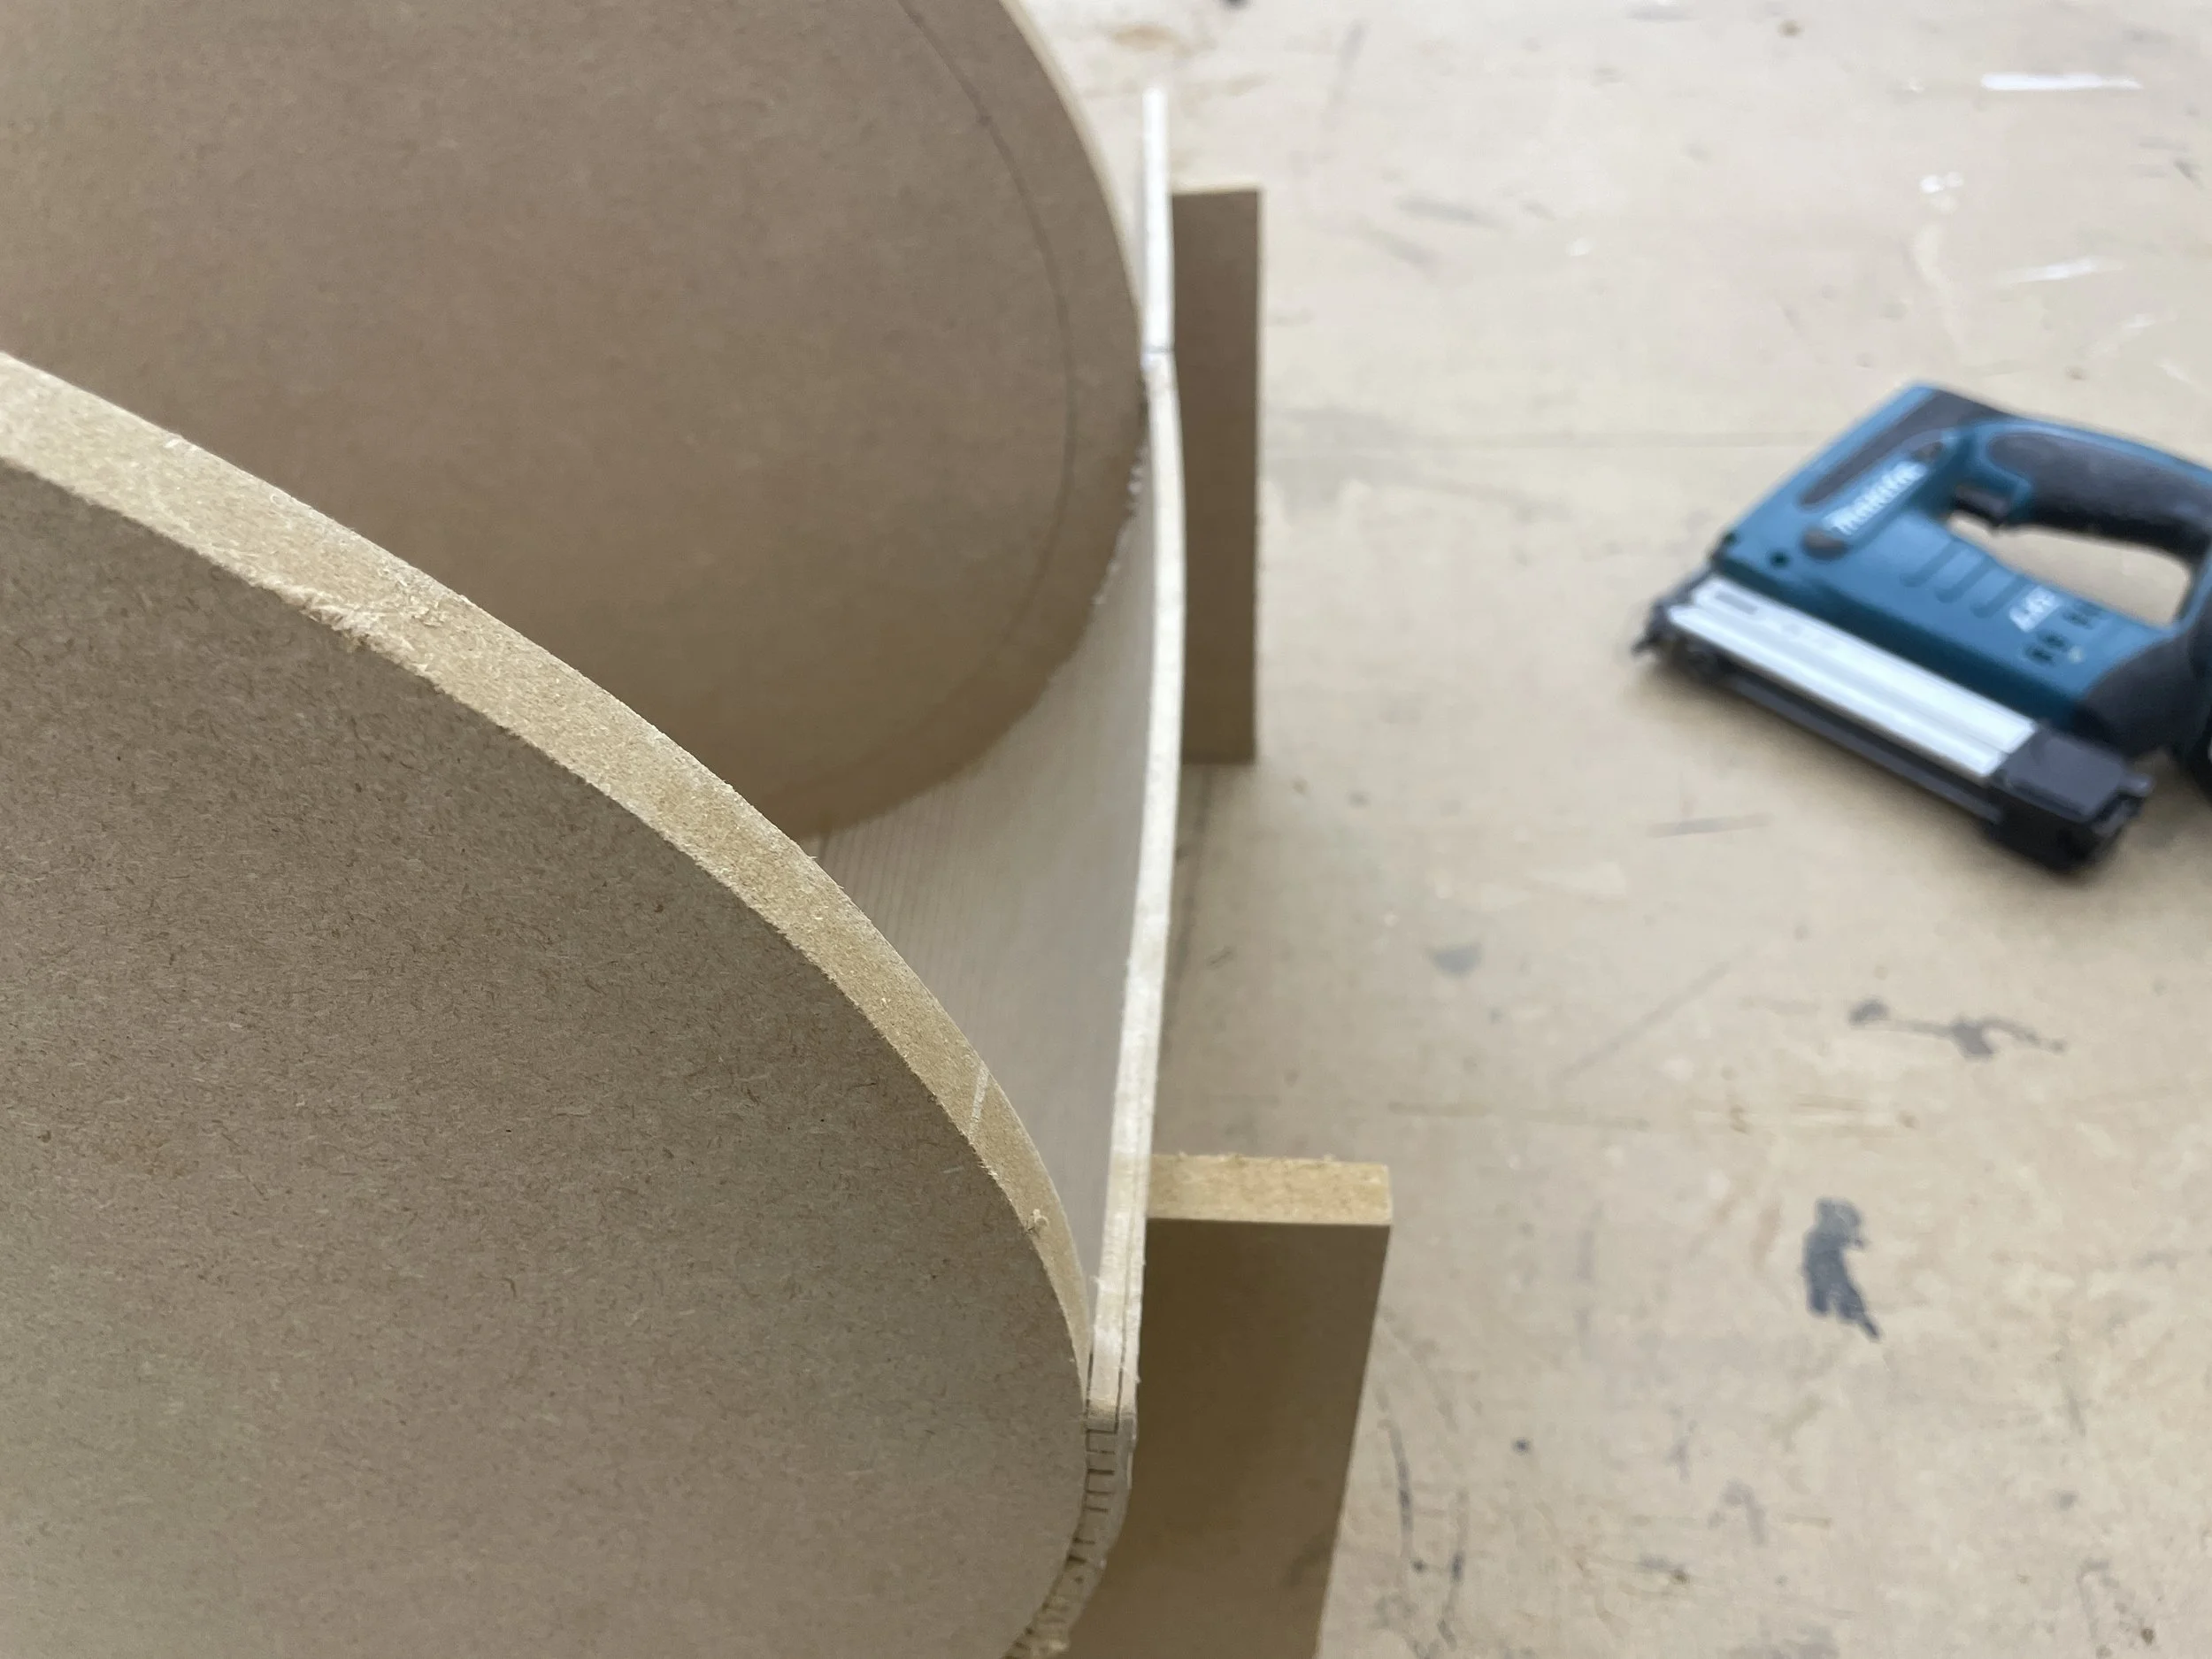
While mocking up the core we also noticed that the flexible MDF does give a bit on the cut halves so think that 370mm is a good size for compartments taking into account the 80mm gap between Access Hole & Shelves as noted above - you can tension the two halves together when assembling then tape the seams to help reduce these bulge points.
Shelf & jig mark-up
Mock up section
Shelves positioning in relation to Access Hole
Flexible MDF bowing
If you want to go the whole hog & use the same laminated cardboard tubes that we use to fabricate our Tomcat & Fatcat units Essex Tubes are able to supply single tubes but these will come at a premium - so readers have some indication on pricing Essex Tubes have advised on the following pricing to London & East England addresses plus collection from Tilbury:
Collection from Tilbury, Essex
Tomcat Ø305mm x 3000mm x 6mm (£96)
Fatcat Ø400mm x 3000mm x 6mm (£103)
Delivery to London SE1
Tomcat Ø305mm x 3000mm x 6mm (£136)
Fatcat Ø400mm x 3000mm x 6mm (£145)
Delivery to Peterborough PE15
Tomcat Ø305mm x 3000mm x 6mm (£258)
Fatcat Ø400mm x 3000mm x 6mm (£265)
Obviously these prices are more than our wholesale prices but as noted in the DIY Polecat page we are not really set up to offer our stock for sale.
For comparison purposes the link above to the UK retailers is selling a Quick Tube 4 pack of 4’ long 12” diameter tubes for £264.
The link to the US retailer is selling the same pack for £172 excluding import taxes & duties.
B&Q sell 1220mm x 607mm flexible MDF for £21 a sheet.
Compartment Lining
Finishing the Access Holes internal & lining the core is the trickiest part of this DIY project & as noted above if you are going to fabricate the unit with Climb-Through Shelves rather than Full or Worm Hole Shelve the difficulty increases significantly in terms of patterns finishing - once the external wrap is bonded onto the Access Hole core half cuts are made from the inside to the Access Hole internal patterns, then the carpet folded, trimmed & bonded using a hot melt glue gun.
We leave a 30mm gap between sections for the shelf fitment based on a 15mm pile height carpet & 9mm MDF shelf but as noted above it may be prudent to increase the shelf thickness to 12mm if you are going to use flexible MDF to give wider fixing points through the tube & beef up the construction - whatever core method you use always make sure that carpet patterns for your internal sections are cut & bonded in the same direction so that the pile runs the same way as this forms a neat seam when the two halves are joined.
When both halves of the core are lined we assemble the tube & staple into the shelves to fix both halves together then do the final wrap - u-nails are best for this if you don’t have a stapler & don’t forget to mark-up shelf positions on the outside of the tube before assembling.
The DIY Polecat guide can be followed from this point onwards as the fabrication process is basically the same.
Access Hole Templates
The following MDF templates can be used to set out & form the Access Hole apertures & cut out pattern for the internal finish for 305mm & 400mm internal diameter tubes - they are formatted to A4 page size & should be printed actual size 1:1.
As noted above if you are using flexible MDF for you core & decide on the 360mm diameter unit you can use the Fatcat template below - if you’re using the 12” Quick Tubes the Tomcat template should be used.


Good luck with your project & if you have any questions regarding the above notes please get in touch.