
DIY C-Panel
If you are looking to make a wall mounted cat climber or scratcher then this DIY guide to making your own version of one of our Cat Wall™ Tiles is the place to start - if you’ve nabbed one of our Up For Grabs carpet giveaways you’re ahead of the game
The guide is more of a basic overview compared to our DIY Polecat Guide as the fabrication is more straight forward & requires less skill, fewer tools, & less know to complete - you will still need to have a careful think on the selection of materials in relation to whether you are making a scratcher or climber in terms carpet choice & how this impacts on MDF thickness as explained below.
A DIY Kit of battens, fixings & tool can be purchased using the link at the bottom of the page to help complete this DIY project.
The price of the DIY C- Panel Kit is £24 - delivery is calculated at checkout & please get in touch if your country isn’t listed & we can provide a Delivery Quote.
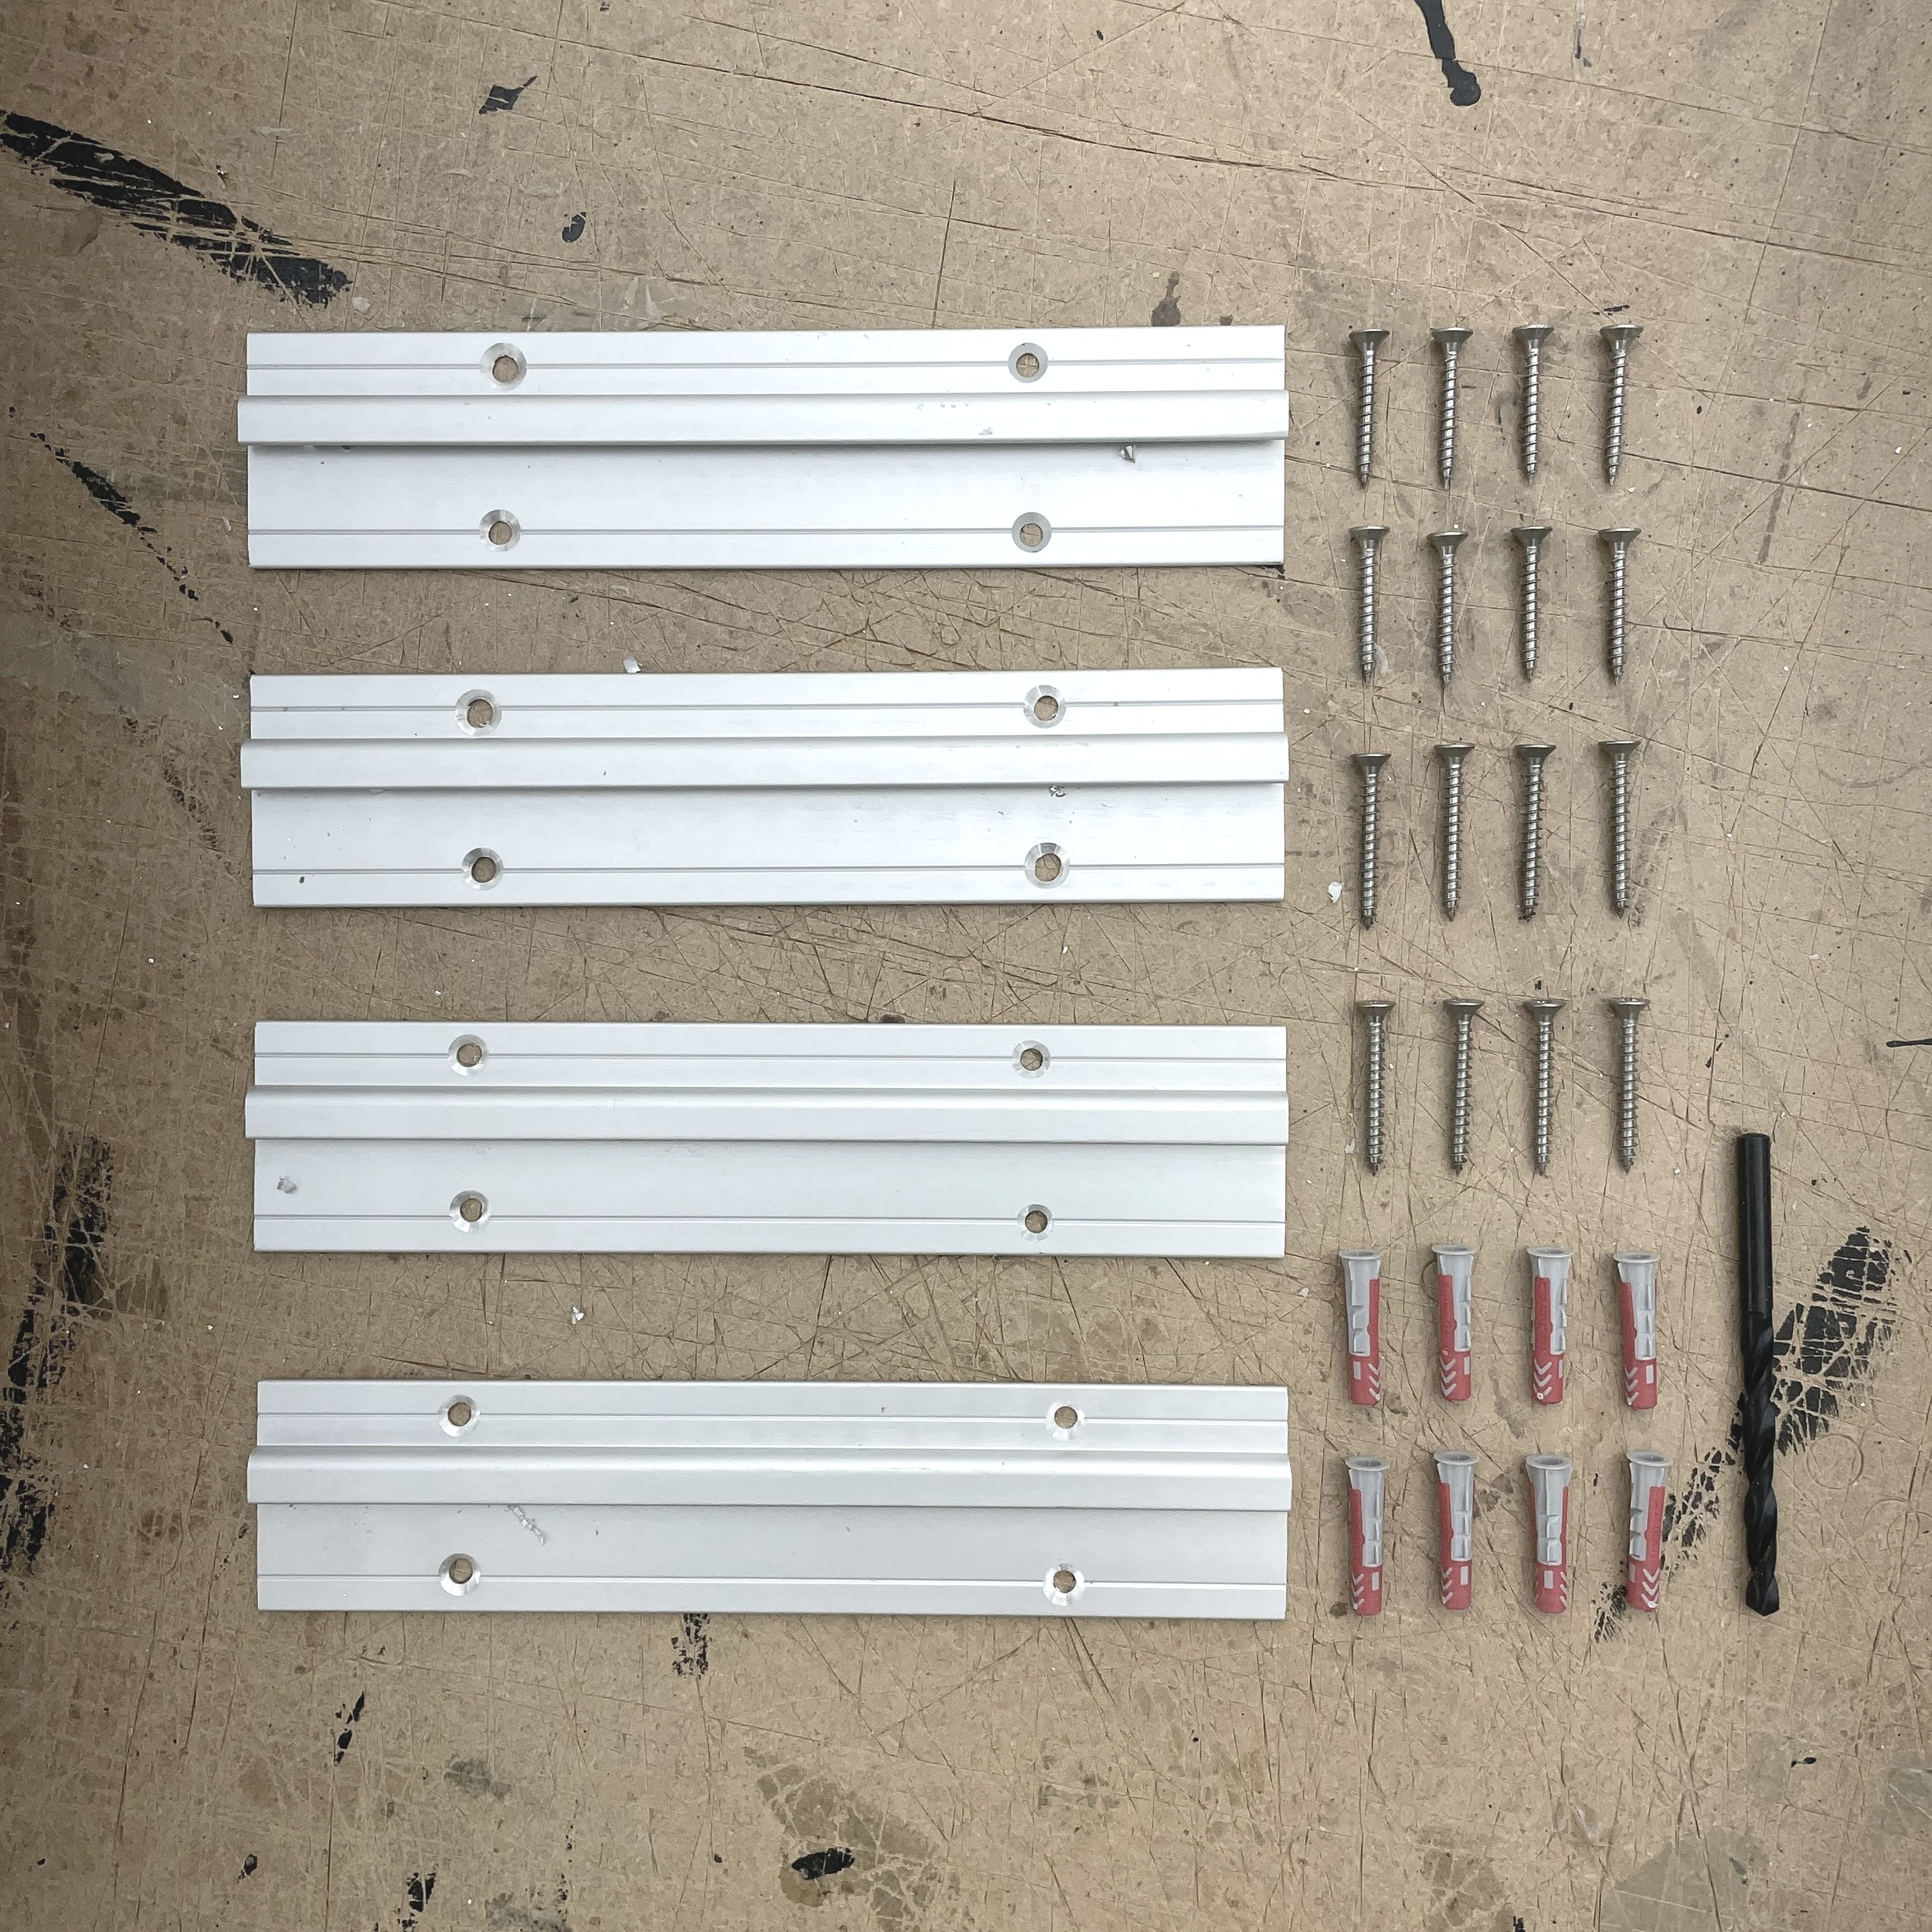
The DIY kit includes the following parts for the fabrication & install - we've also listed the materials, tools & other bits that you will need to complete your DIY project:
Fabrication
2 200mm Aluminium Battens
8 Short Screws
Install
2 200mm Aluminium Battens
8 Long Screws
8 Universal Wall Plugs
1 Drill Bit
Construction Materials
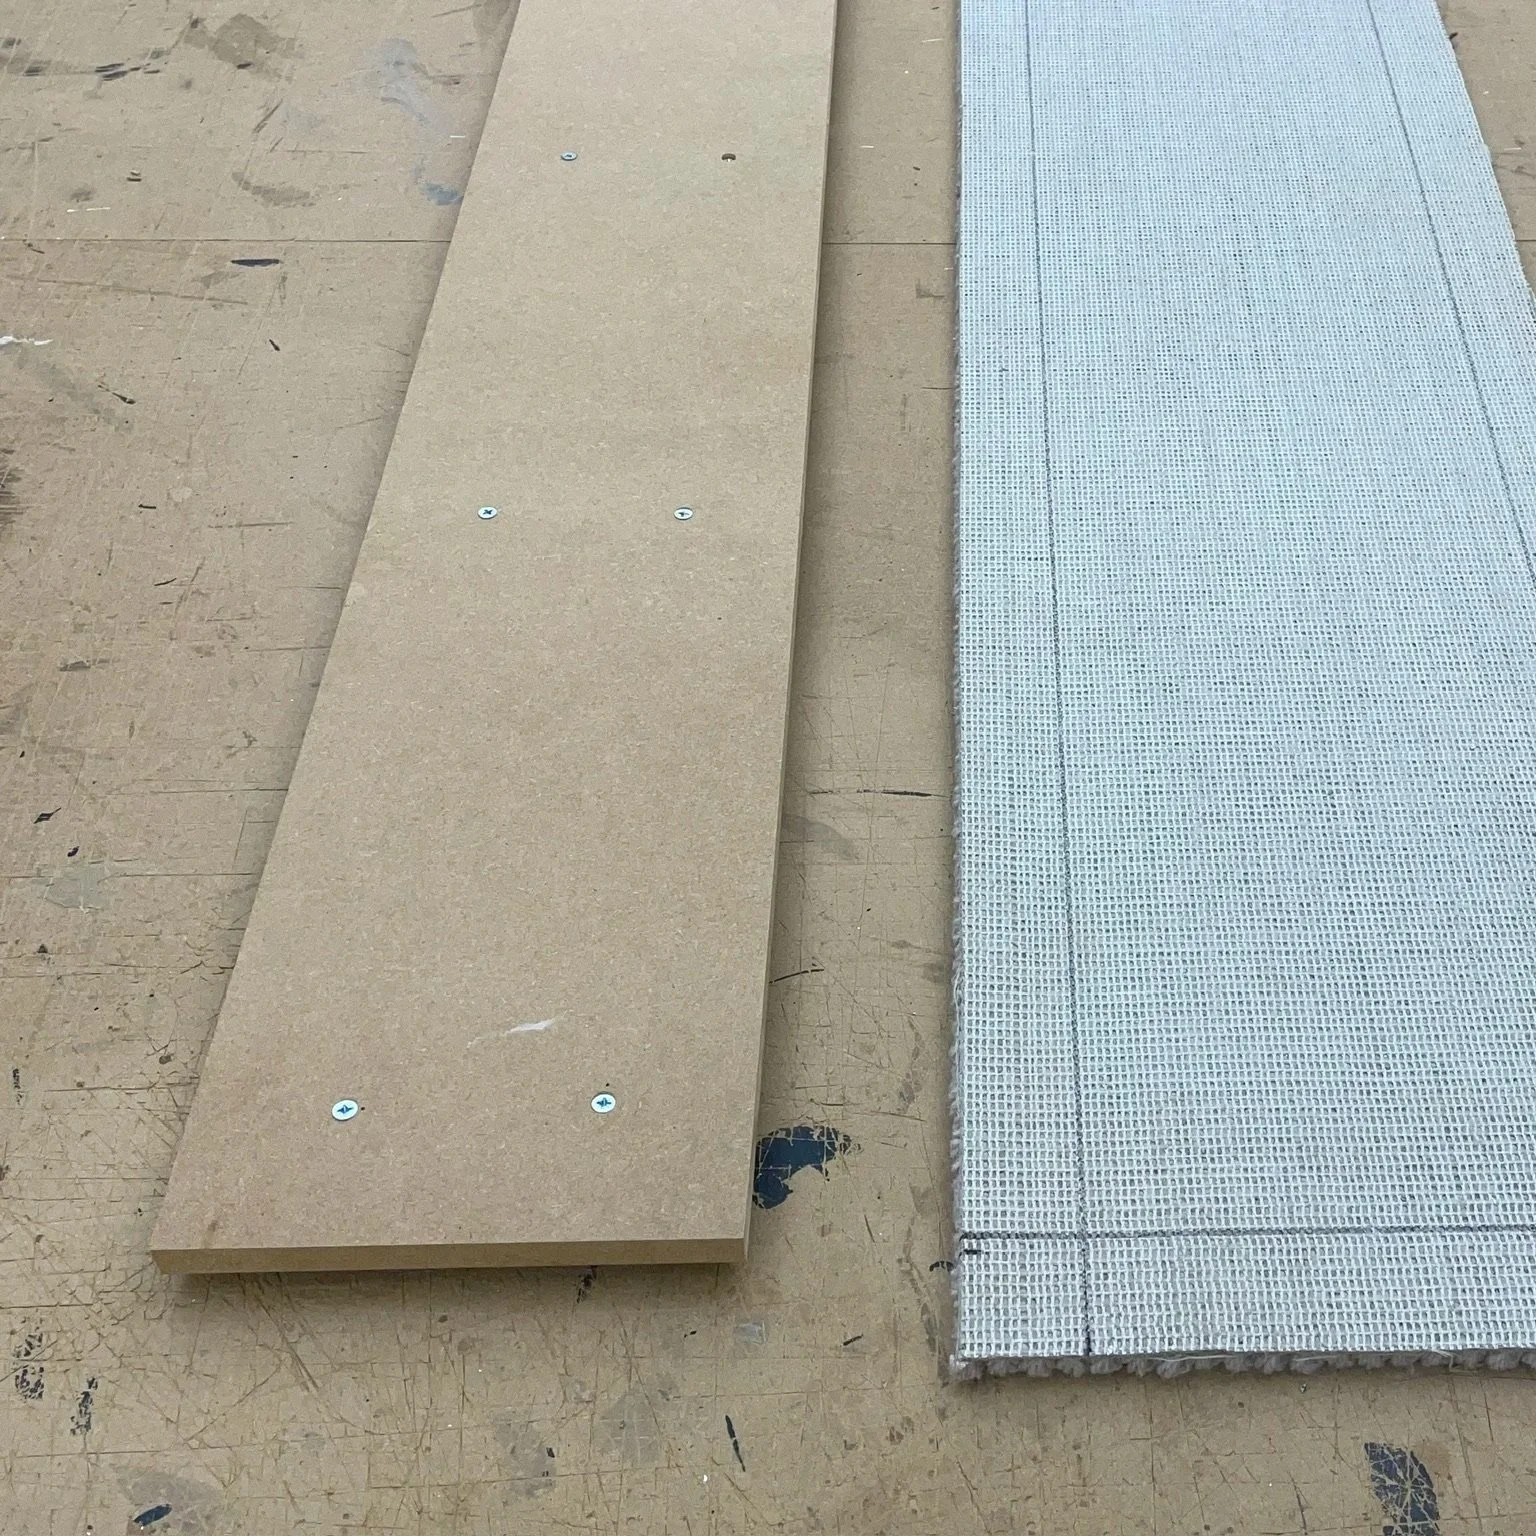
MDF (front & back panels)
Carpet (finished panel size plus plus allowance for wrap around edges)
Contact Adhesive
Wood Screws (for back fixing boards)
Tools & Utensils
Saw
Philips Screwdriver (PZ1 size)
Secateurs
Utility Knife
Tape Measure
Pencil
Overview
The DIY pack includes the same type of fixing that we use for making & installing our Cat Wall™ products, which can be installed onto plasterboard, timber or masonry walls noting that a special masonry drill may be required for a masonry walls - the supplied battens are 200mm long so a C-Panel between 300-500mm wide is recommended but we can cut a double width batten as a bespoke option if you want to go wider.
There are also different wall panel designs that you can use with this DIY Kit with the simplest being a single board that has carpet bonded to the front face with exposed edges, a single board that has the carpet bonded to the front face & sides, & the C-Panel design in this guide, which uses a front & back board that the carpet is wrapped around it - if you are going down the first & second routes you will need shorter screws to fit the battens noting that narrower carpet will obviously be suited to these options with our AVM Wool Up For Grabs give aways being perfect for these projects as the stiff backing really lends itself to being bonded on a single face.
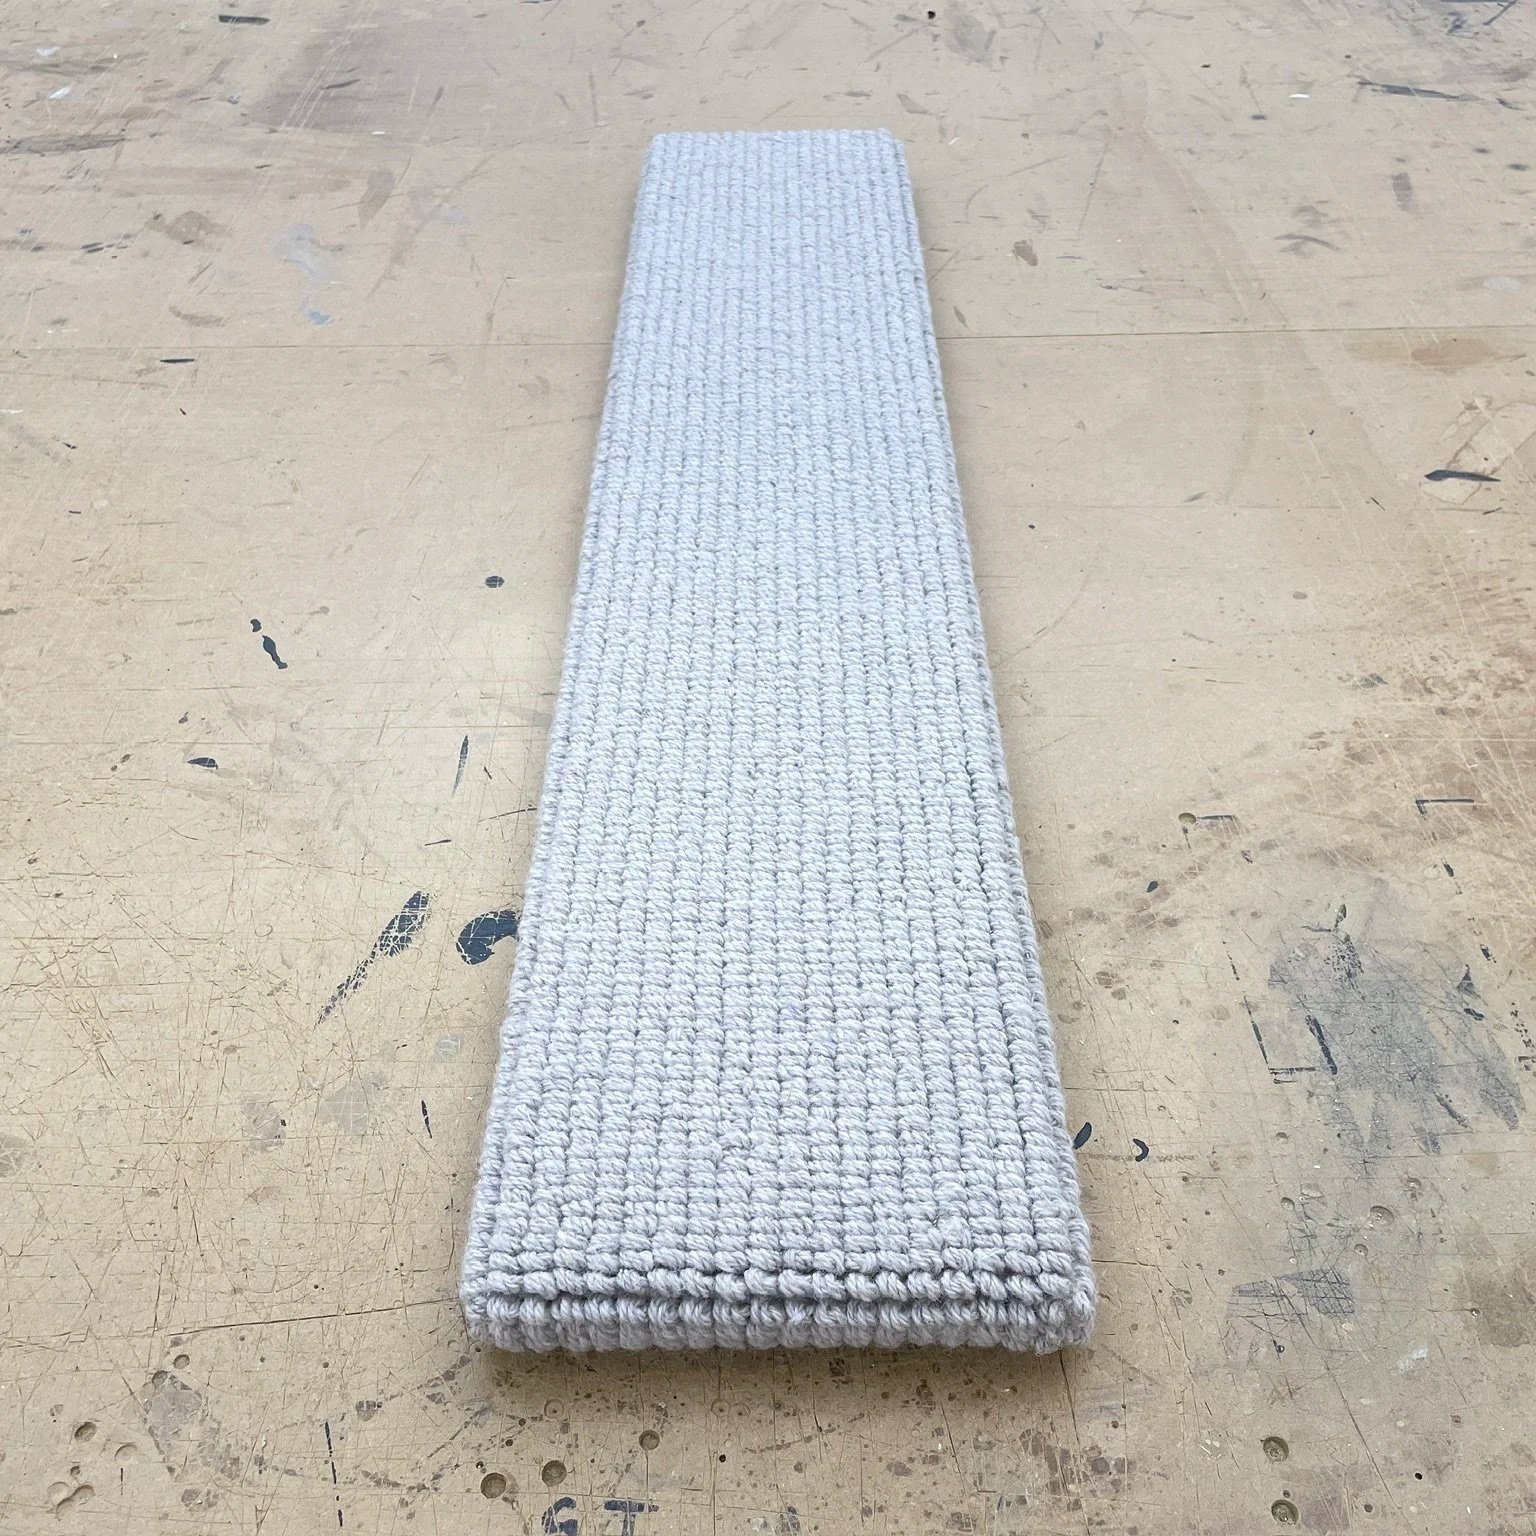
Before you even start thinking about getting out your tool box you will need to look at a few critical fabrication decisions around material selection & fixing techniques based on the carpet that you have selected - as noted in out Buying Guide we use a coir or wool boucle style carpet with a large looped weave for our climbers as this is best for climbing but if you are looking at making a scratcher then a harder smaller looped weave carpet like sisal will probably be better but the scratching option is down to personal feline choice so anything goes.
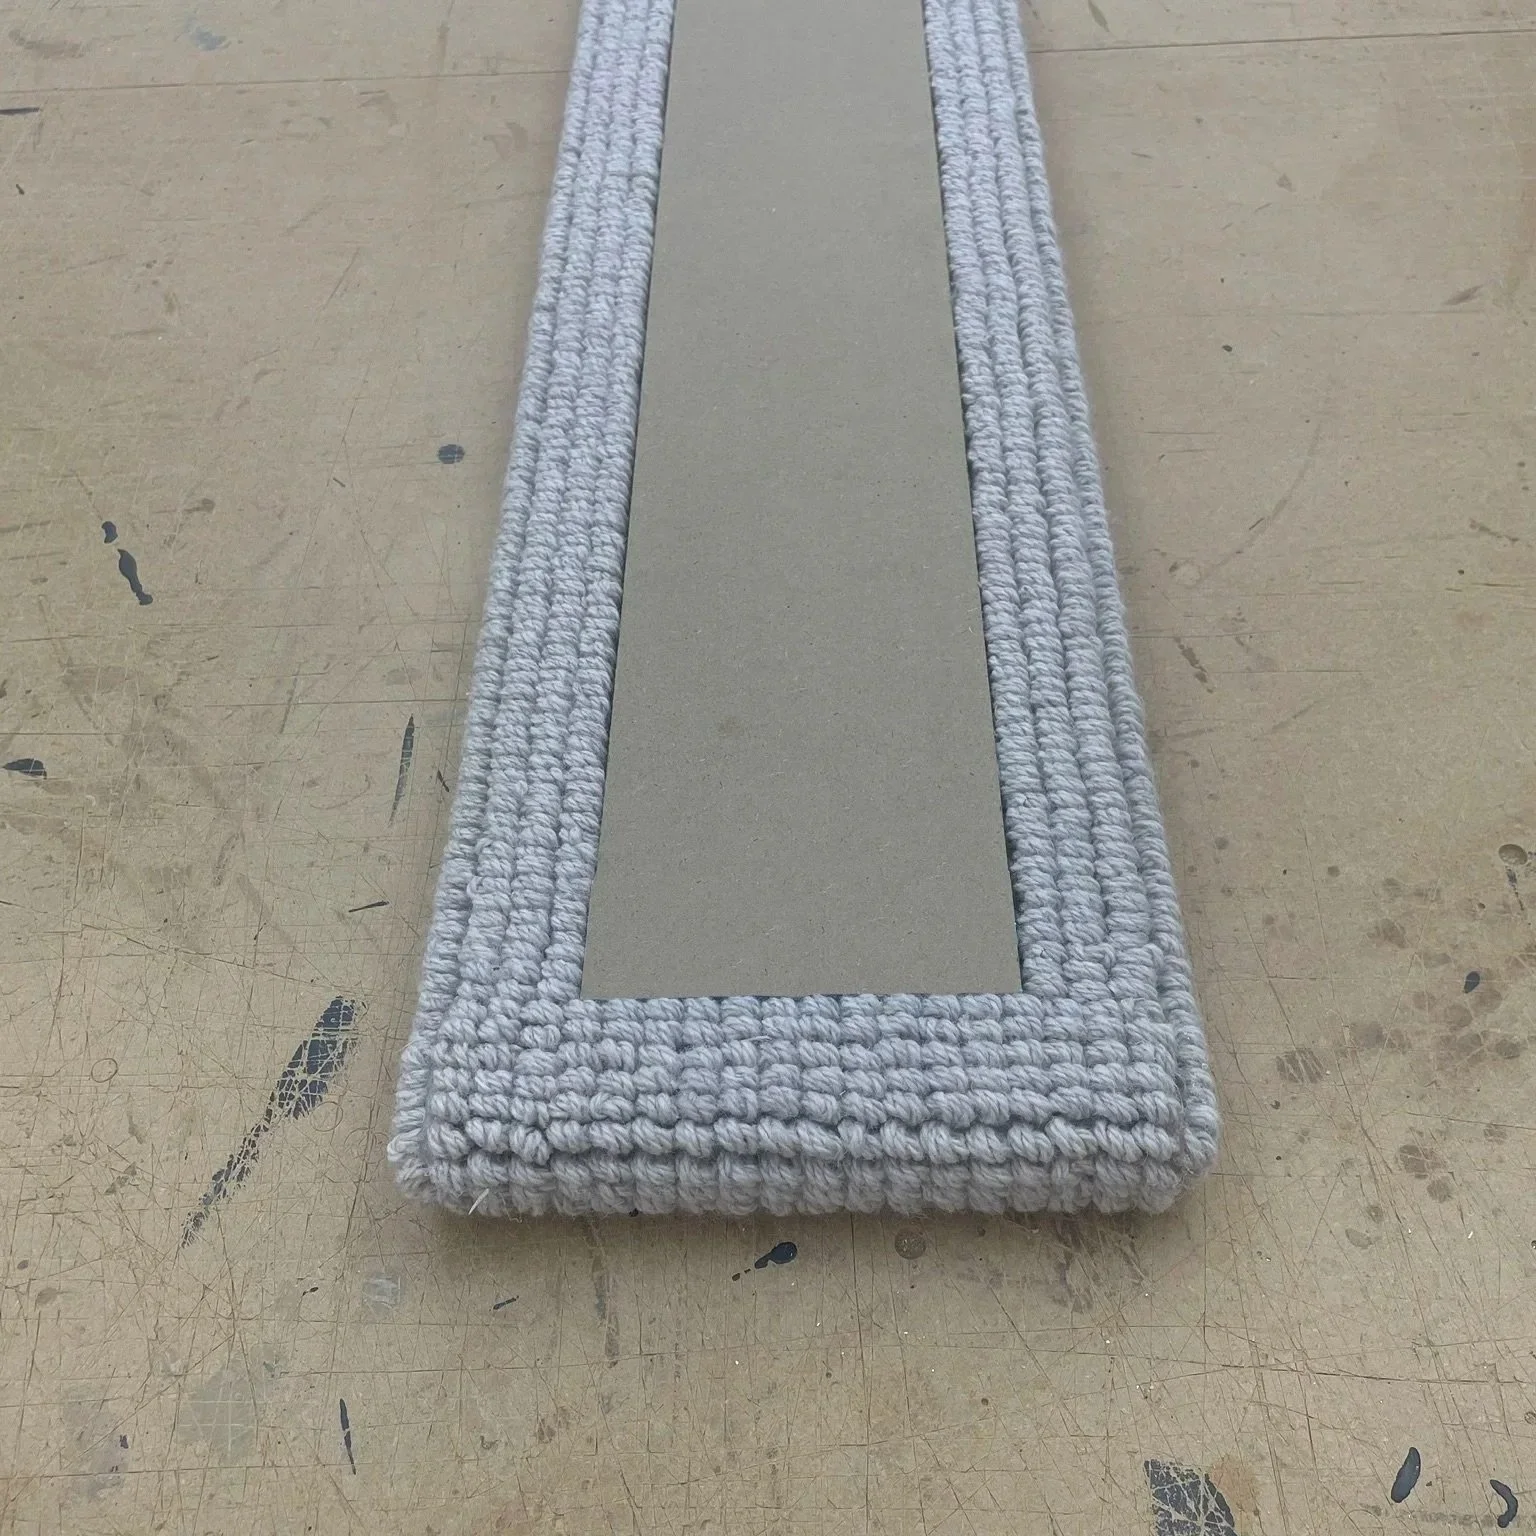
Once you’ve selected your carpet you need to work out how much wrap around you will need when forming the wrapped edges around the front board - we have a 4cm wrap on our Cat Wall Tiles using coir & AVM Wool but if you are using a stiffer backed carpet then you may need more of a wrap so it’s best to test the flexibility of the carpet before making any cuts & working out the size of the back board.
We like to get the wrapped edge as a whole rib up against the back board edges but this is purely cosmetic & doesn’t actually impact on the functionality of the panel so if you don’t want to spend time finessing the dimensions to get this exact you can just leave excess carpet around the wrap then cut to the back board size before fixing.
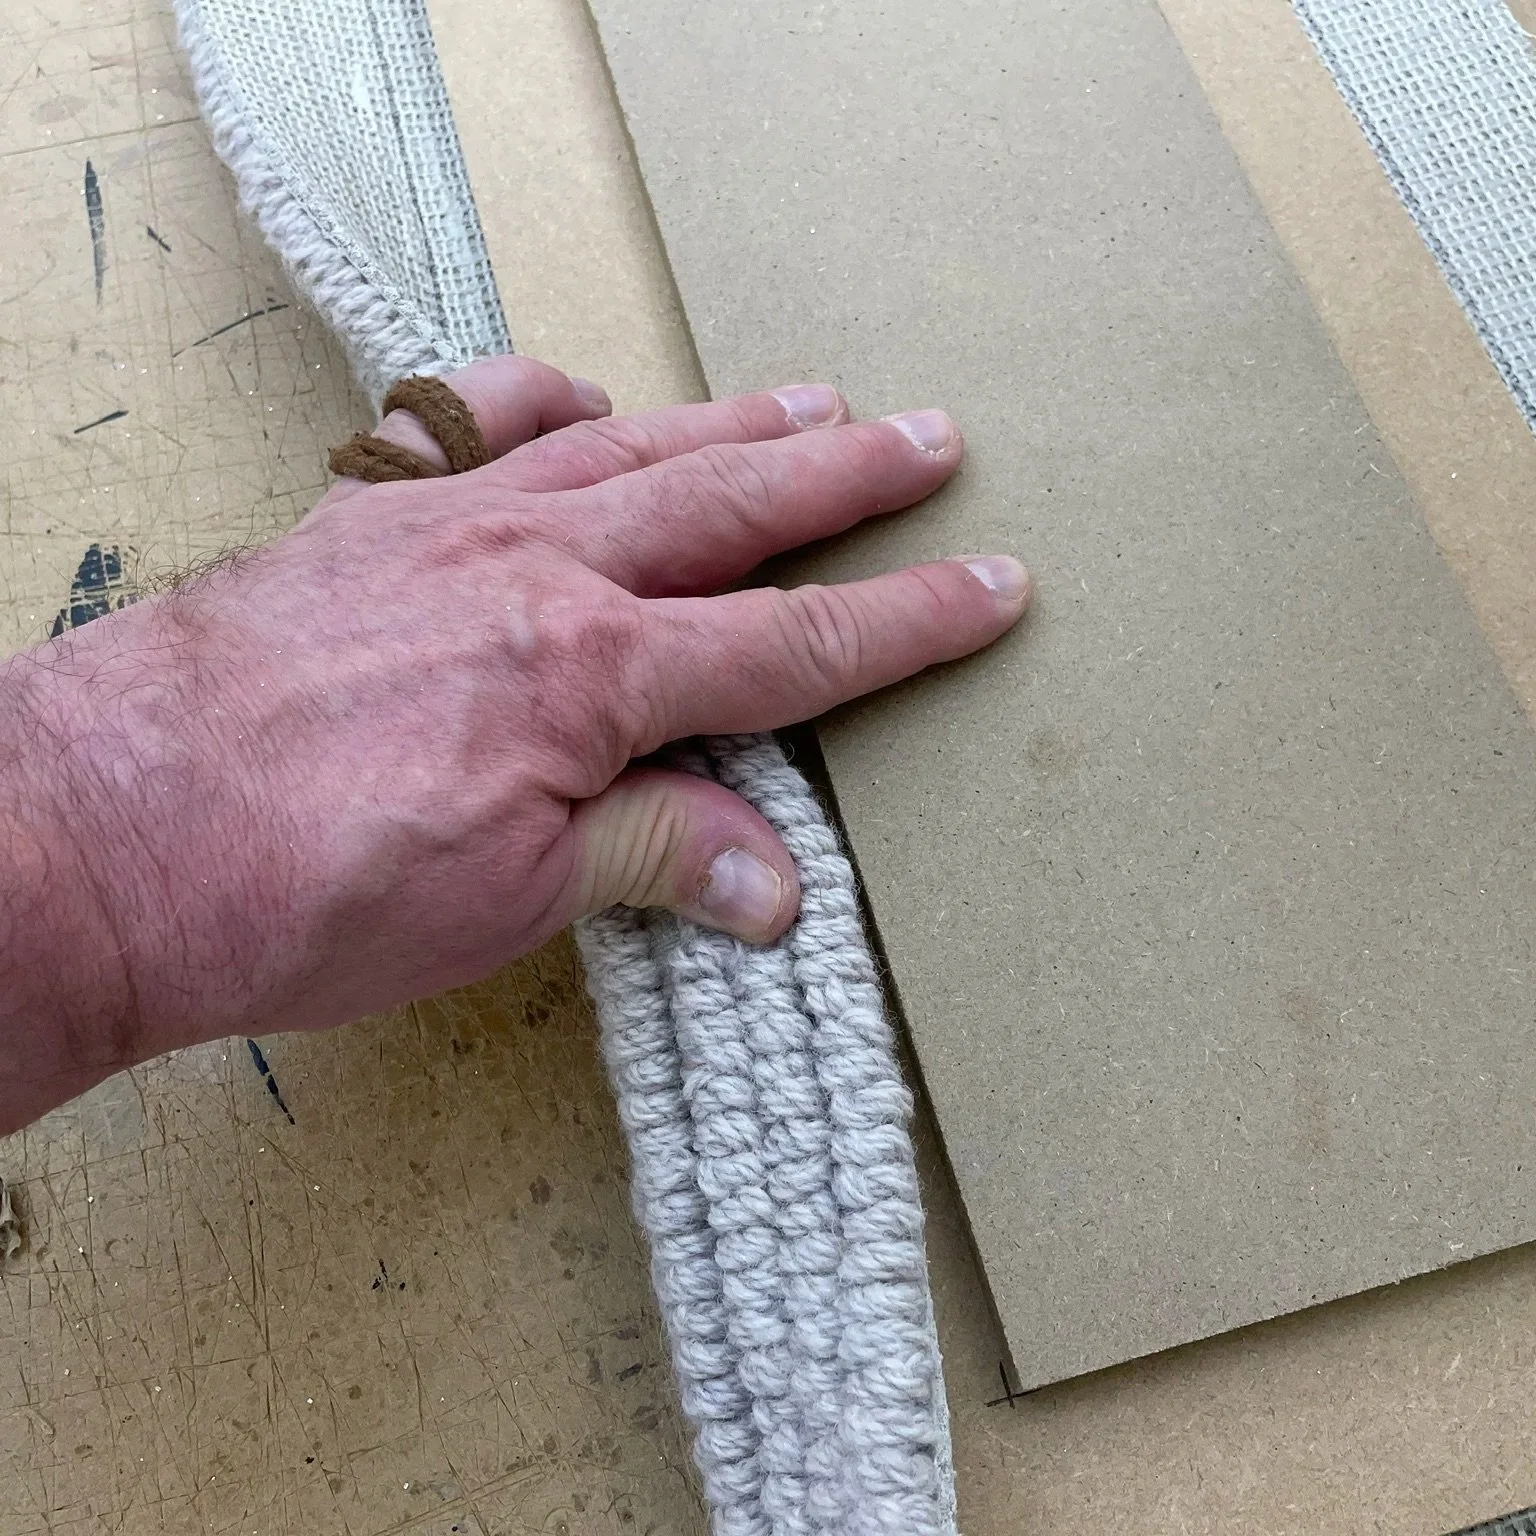
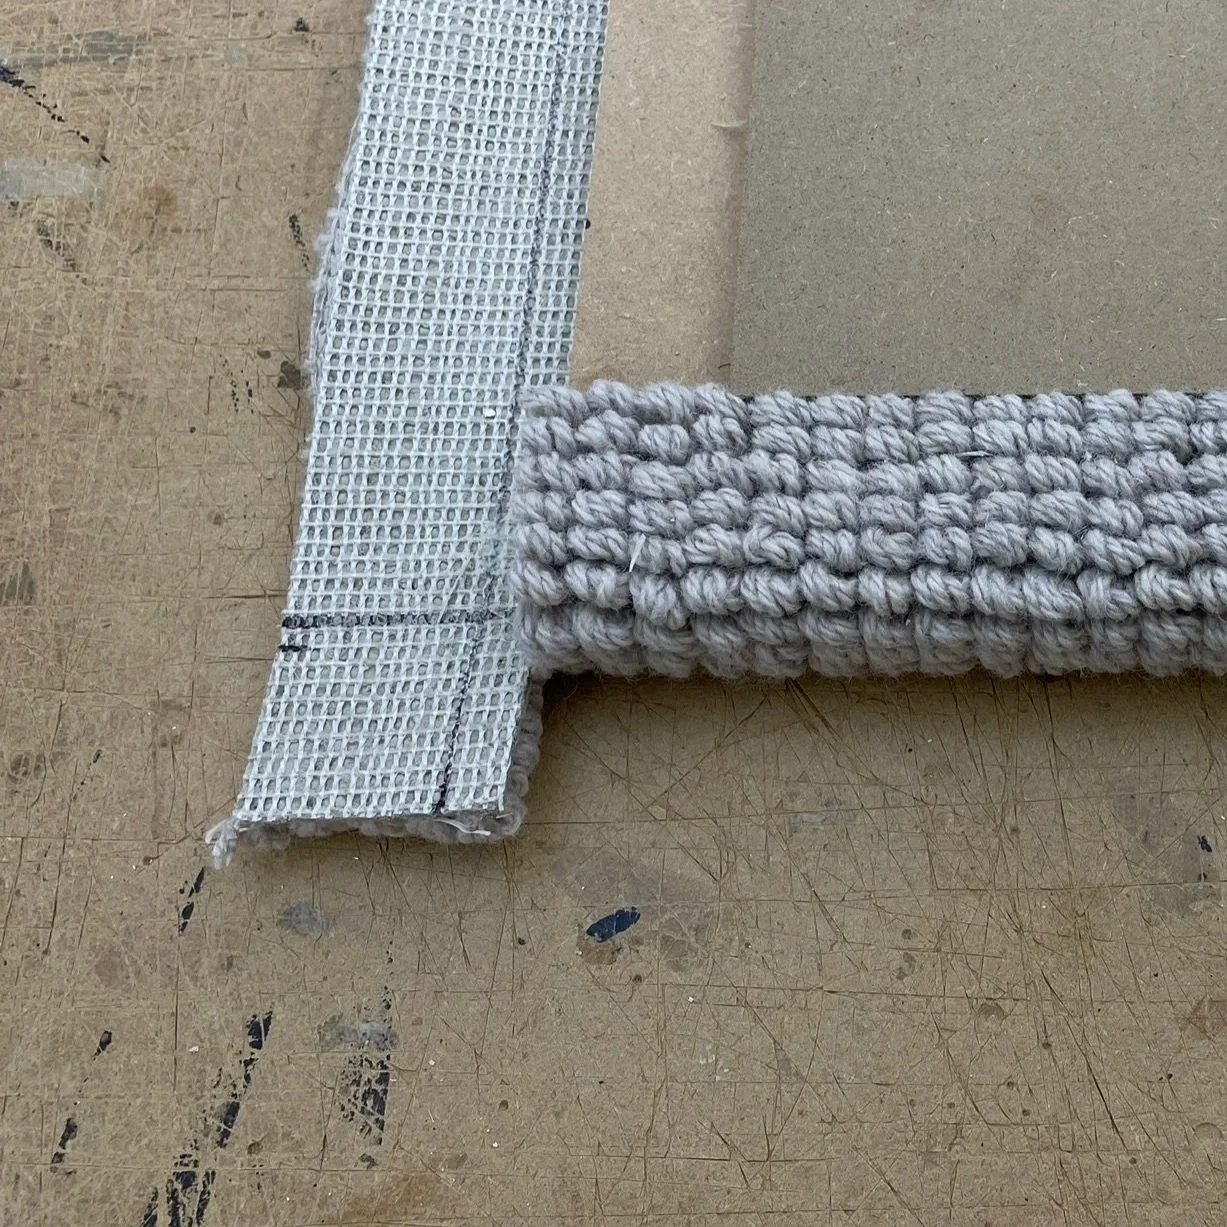
If you’re going the full ribbed seam wrap route on the the back board then you will need to spend some time testing the carpet folding so that you can take measurements for cutting both boards - if you are not worried about the aesthetics it’s still best to test the folding & cut the front board in relation to vertical ribs & MDF edges as these should be aligned centrally & folded on the line of least resistance.
The thickness of the MDF boards is also important as a thicker front board will be easier to wrap & look better plus will also gives more ease of climbing at the sides of the panel for grip - the batten fixing screws are 30mm so we use an 18mm front board & a 12mm back board, the latter being the same thickness as the carpet to get an even seam join but again this is purely cosmetic & not essential so buying 9mm MDF that you can cut two front boards from & glue together & a third 9mm panel for the back board will work.
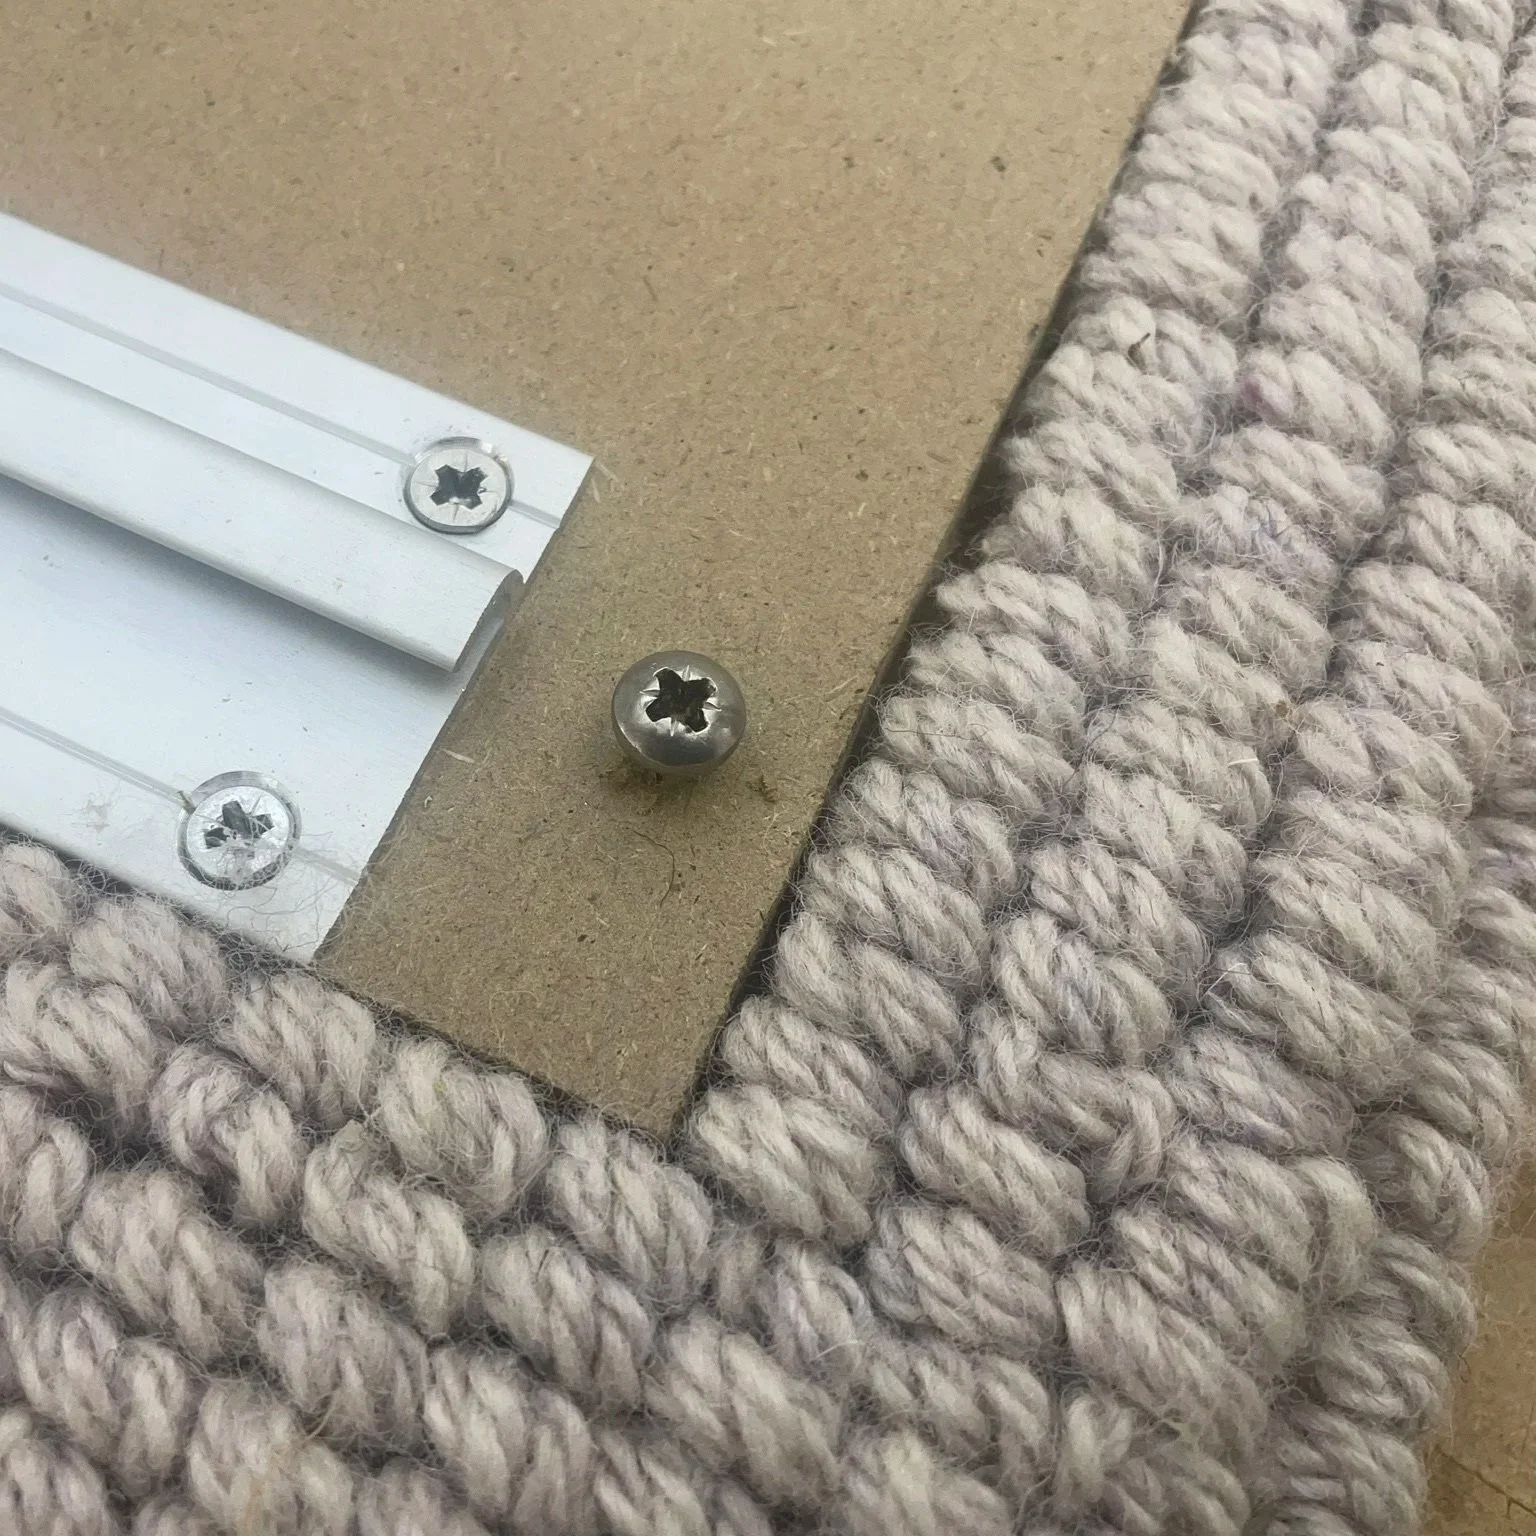
Another point to remember when sizing the boards is that there is a safety feature that you can build into the design to make sure that the panel can’t slide off the wall battens when installed - this requires a small space to be left between the back batten & wrap around detail so that a screw can be fixed to stop the panel from sliding therefore a 220mm wide back board is the minimum you should be working to if you want this feature but you also have the option of fixing screws at either end of the battens on the wall to re-create this feature.
When we bond our carpet to the boards we use non-toxic solvent free parquet floor glue for coir & a vinyl carpet glue for AVM Wool then do the side & wrap around fixing with a hot melt glue glue - this process obviously requires different glues & some specific techniques to carry out (including specialist tools) so we recommend using a eco friendly contact adhesive for the DIY fabrication as it is less costly but more importantly much easier to use.
Fabrication Notes
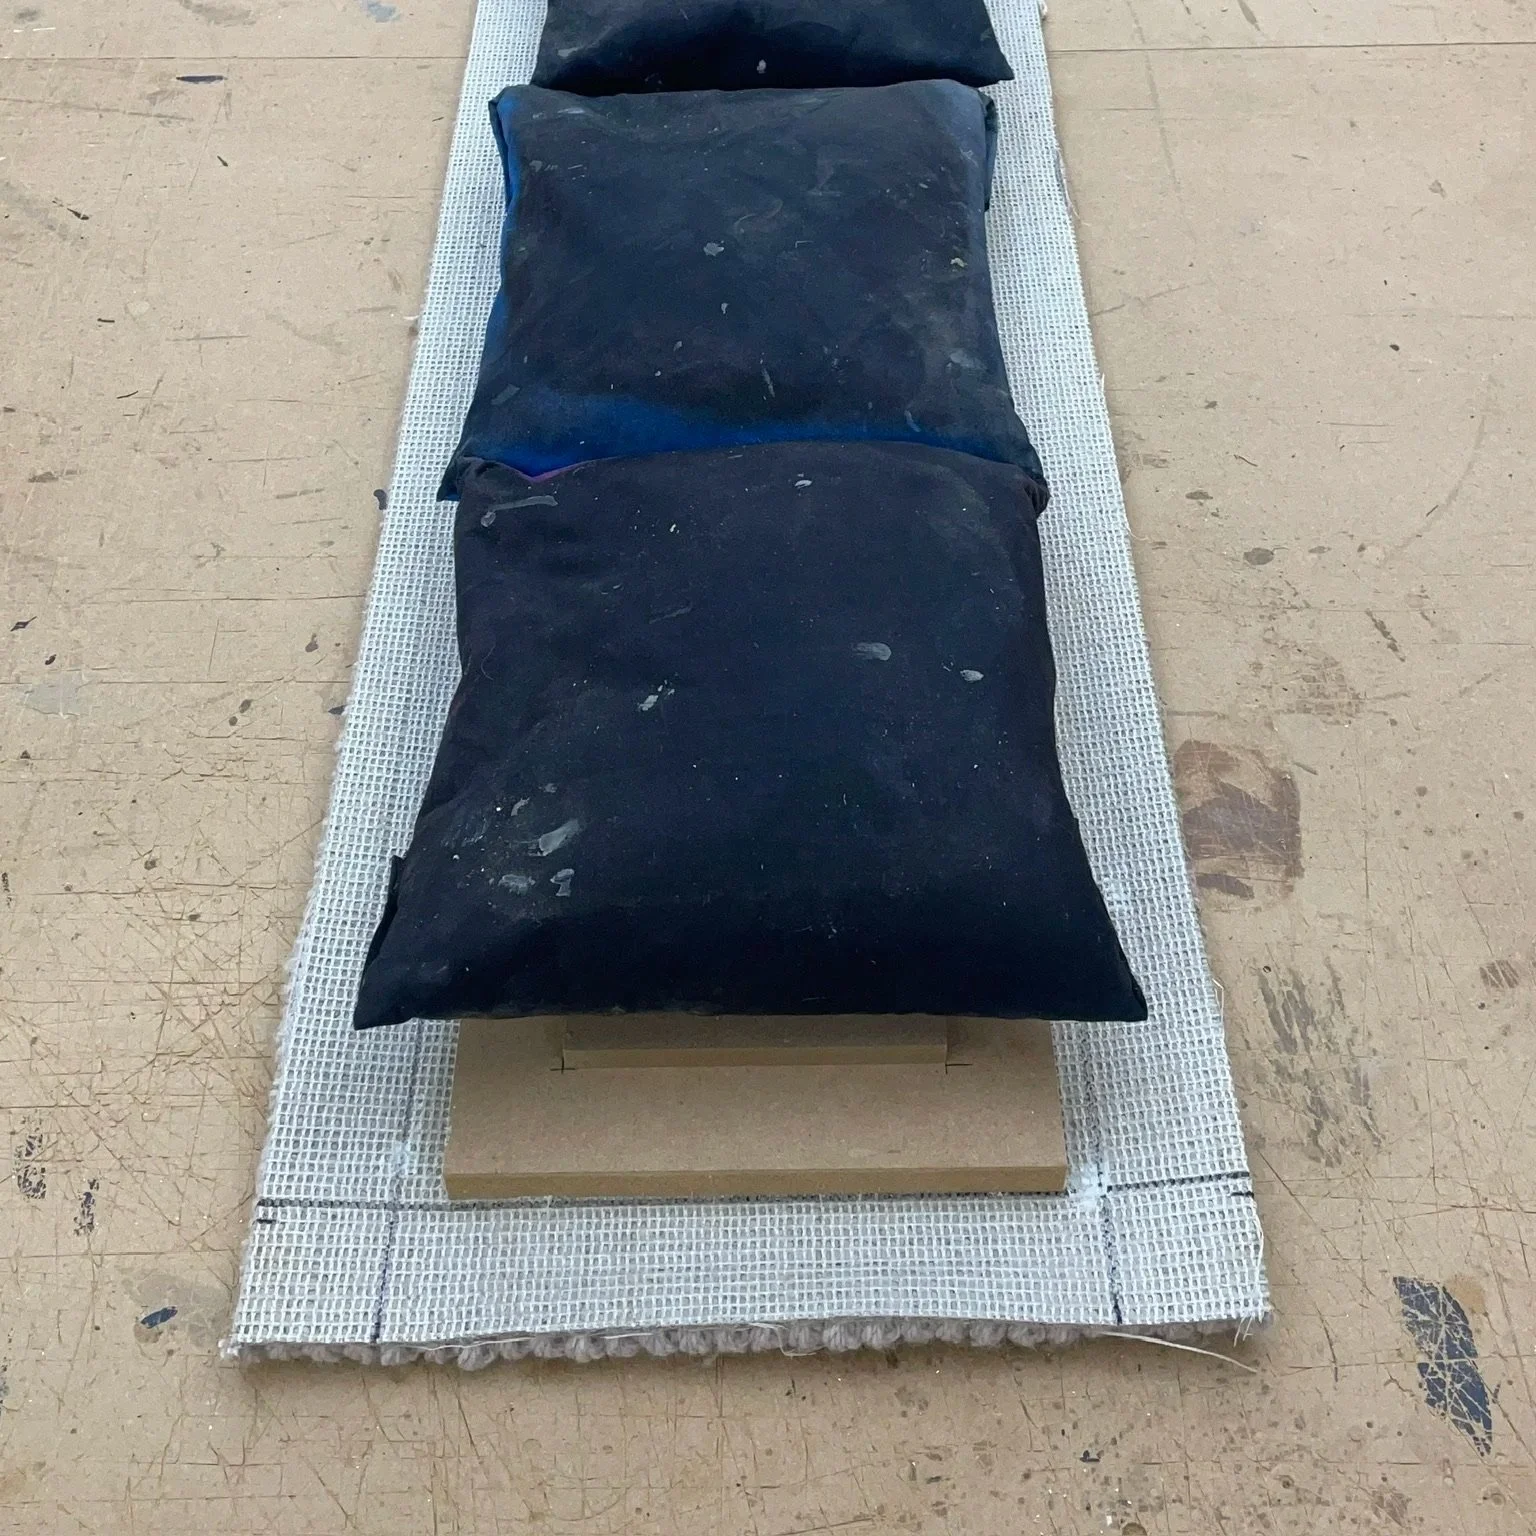
Once you’ve cut your back boards to the required sizes based on MDF/carpet thicknesses & wrap around detail, glue the boards together - once bonded back fix with screws.
If you haven’t already done it as part of the prep, mark-up the board positioning on the carpet in relation to the intended folds - even if you’re not going down the aesthetic route of having even ribbed seams it’s still best to mark-up the carpet so you can align the boards in relation to vertical ribs & MDF edges where you’ve tested the folds for least resistance.

Glue the back board to the carpet - press down on the front panel to make sure you’ve got a good bond then leave to set under some weights until the glue has cured.
Now test the wrap folds up to the back board - this is the moment of truth if you’ve gone for the ribbed seam detail but if you haven’t you can just use the edges of the back board to cut the carpet wrap to size before gluing.
Fold & glue the carpet around the edges - we do each of the four folds in two stages at the studio bonding the edge first then when it’s secured we fold the wrap around to the back but using contact adhesive you might be able to do this in one stage.
Fix the top & bottom folds first then fold the side - it’s best to trim back to the edges of the top & bottom seams after you bonded the side wraps so you can cut down to the closest rib.
Depending on the carpet used you might want to think about dressing the corners of the panel with glue to help with wear & tear - if you have a hot melt glue gun this is ideal but you can also touch up any exposed cuts or lose threads with normal glue.

Fix the battens to the back board at the top & bottom edges making sure they are both the same way up.
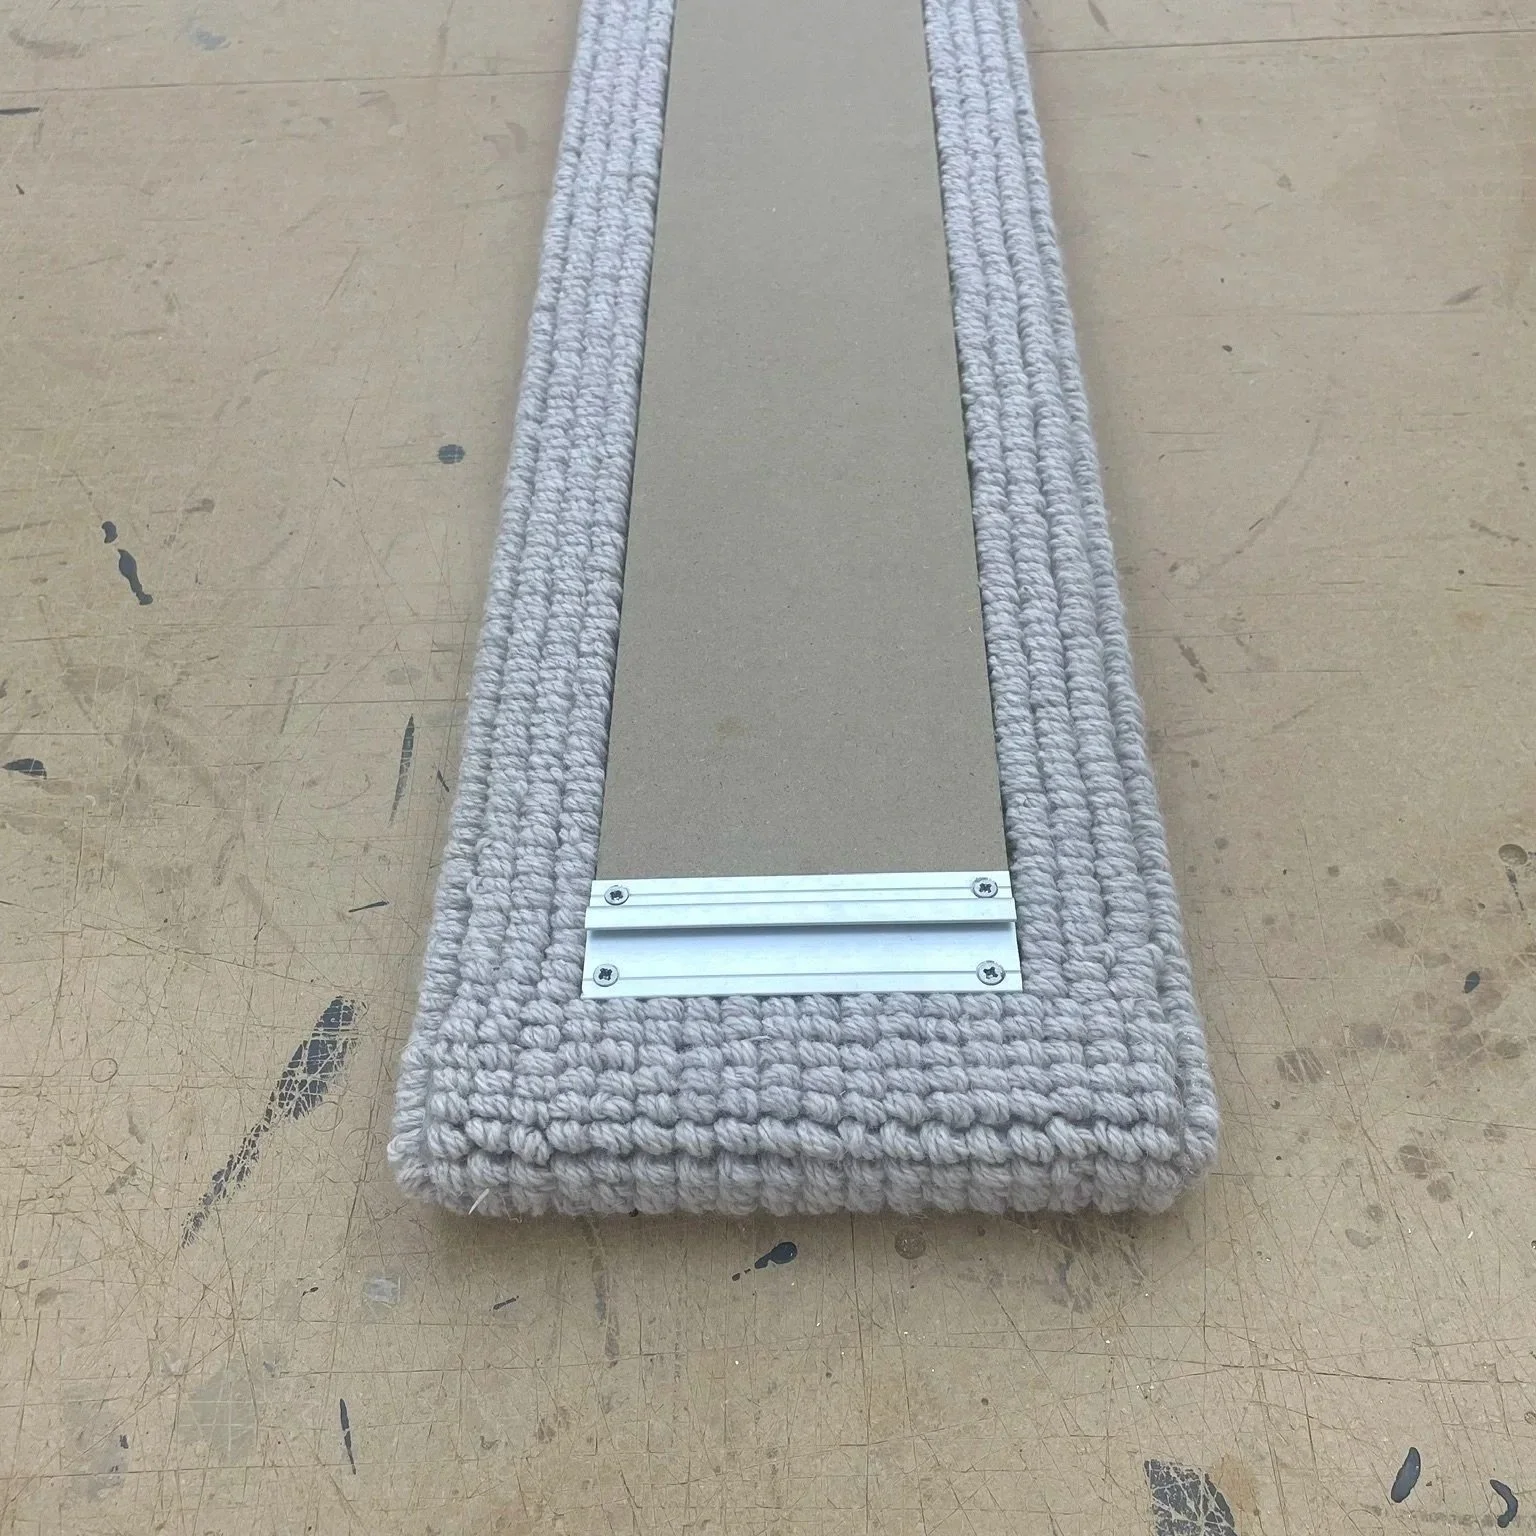
As noted in the introduction if you’ve elected to design in the batten safety feature fix a screw at both ends to stop the panel sliding - if you have flush battens we recommend following the install instructions to re-create this safety feature on the wall instead.
Stand back & admirer your handy work.
Installation
Please refer to our DIY C-Panel install page for installation instructions.
NB Please note that although we obviously carry stock of MDF & carpet we are unable to sell these materials to customers (sorry) but we do sometimes have carpet offcuts that are offered free-of-charge - please sign up to our newsletter below if you would like to hear about these offers.