Tomcat DIY Adaptation
A customer recently took delivery of their Hicat® but unfortunately they had made a mistake in measuring up for their Floor-To-Ceiling Tomcat but it hasn’t ended in tears, just lots of purring - Sateen measured up in one corner of the room expecting it to be the same in the opposite corner but as mentioned in our Customer Notes ceilings can vary in height across a room so she was left with a Tomcat that was 4cm too long for the proposed location.
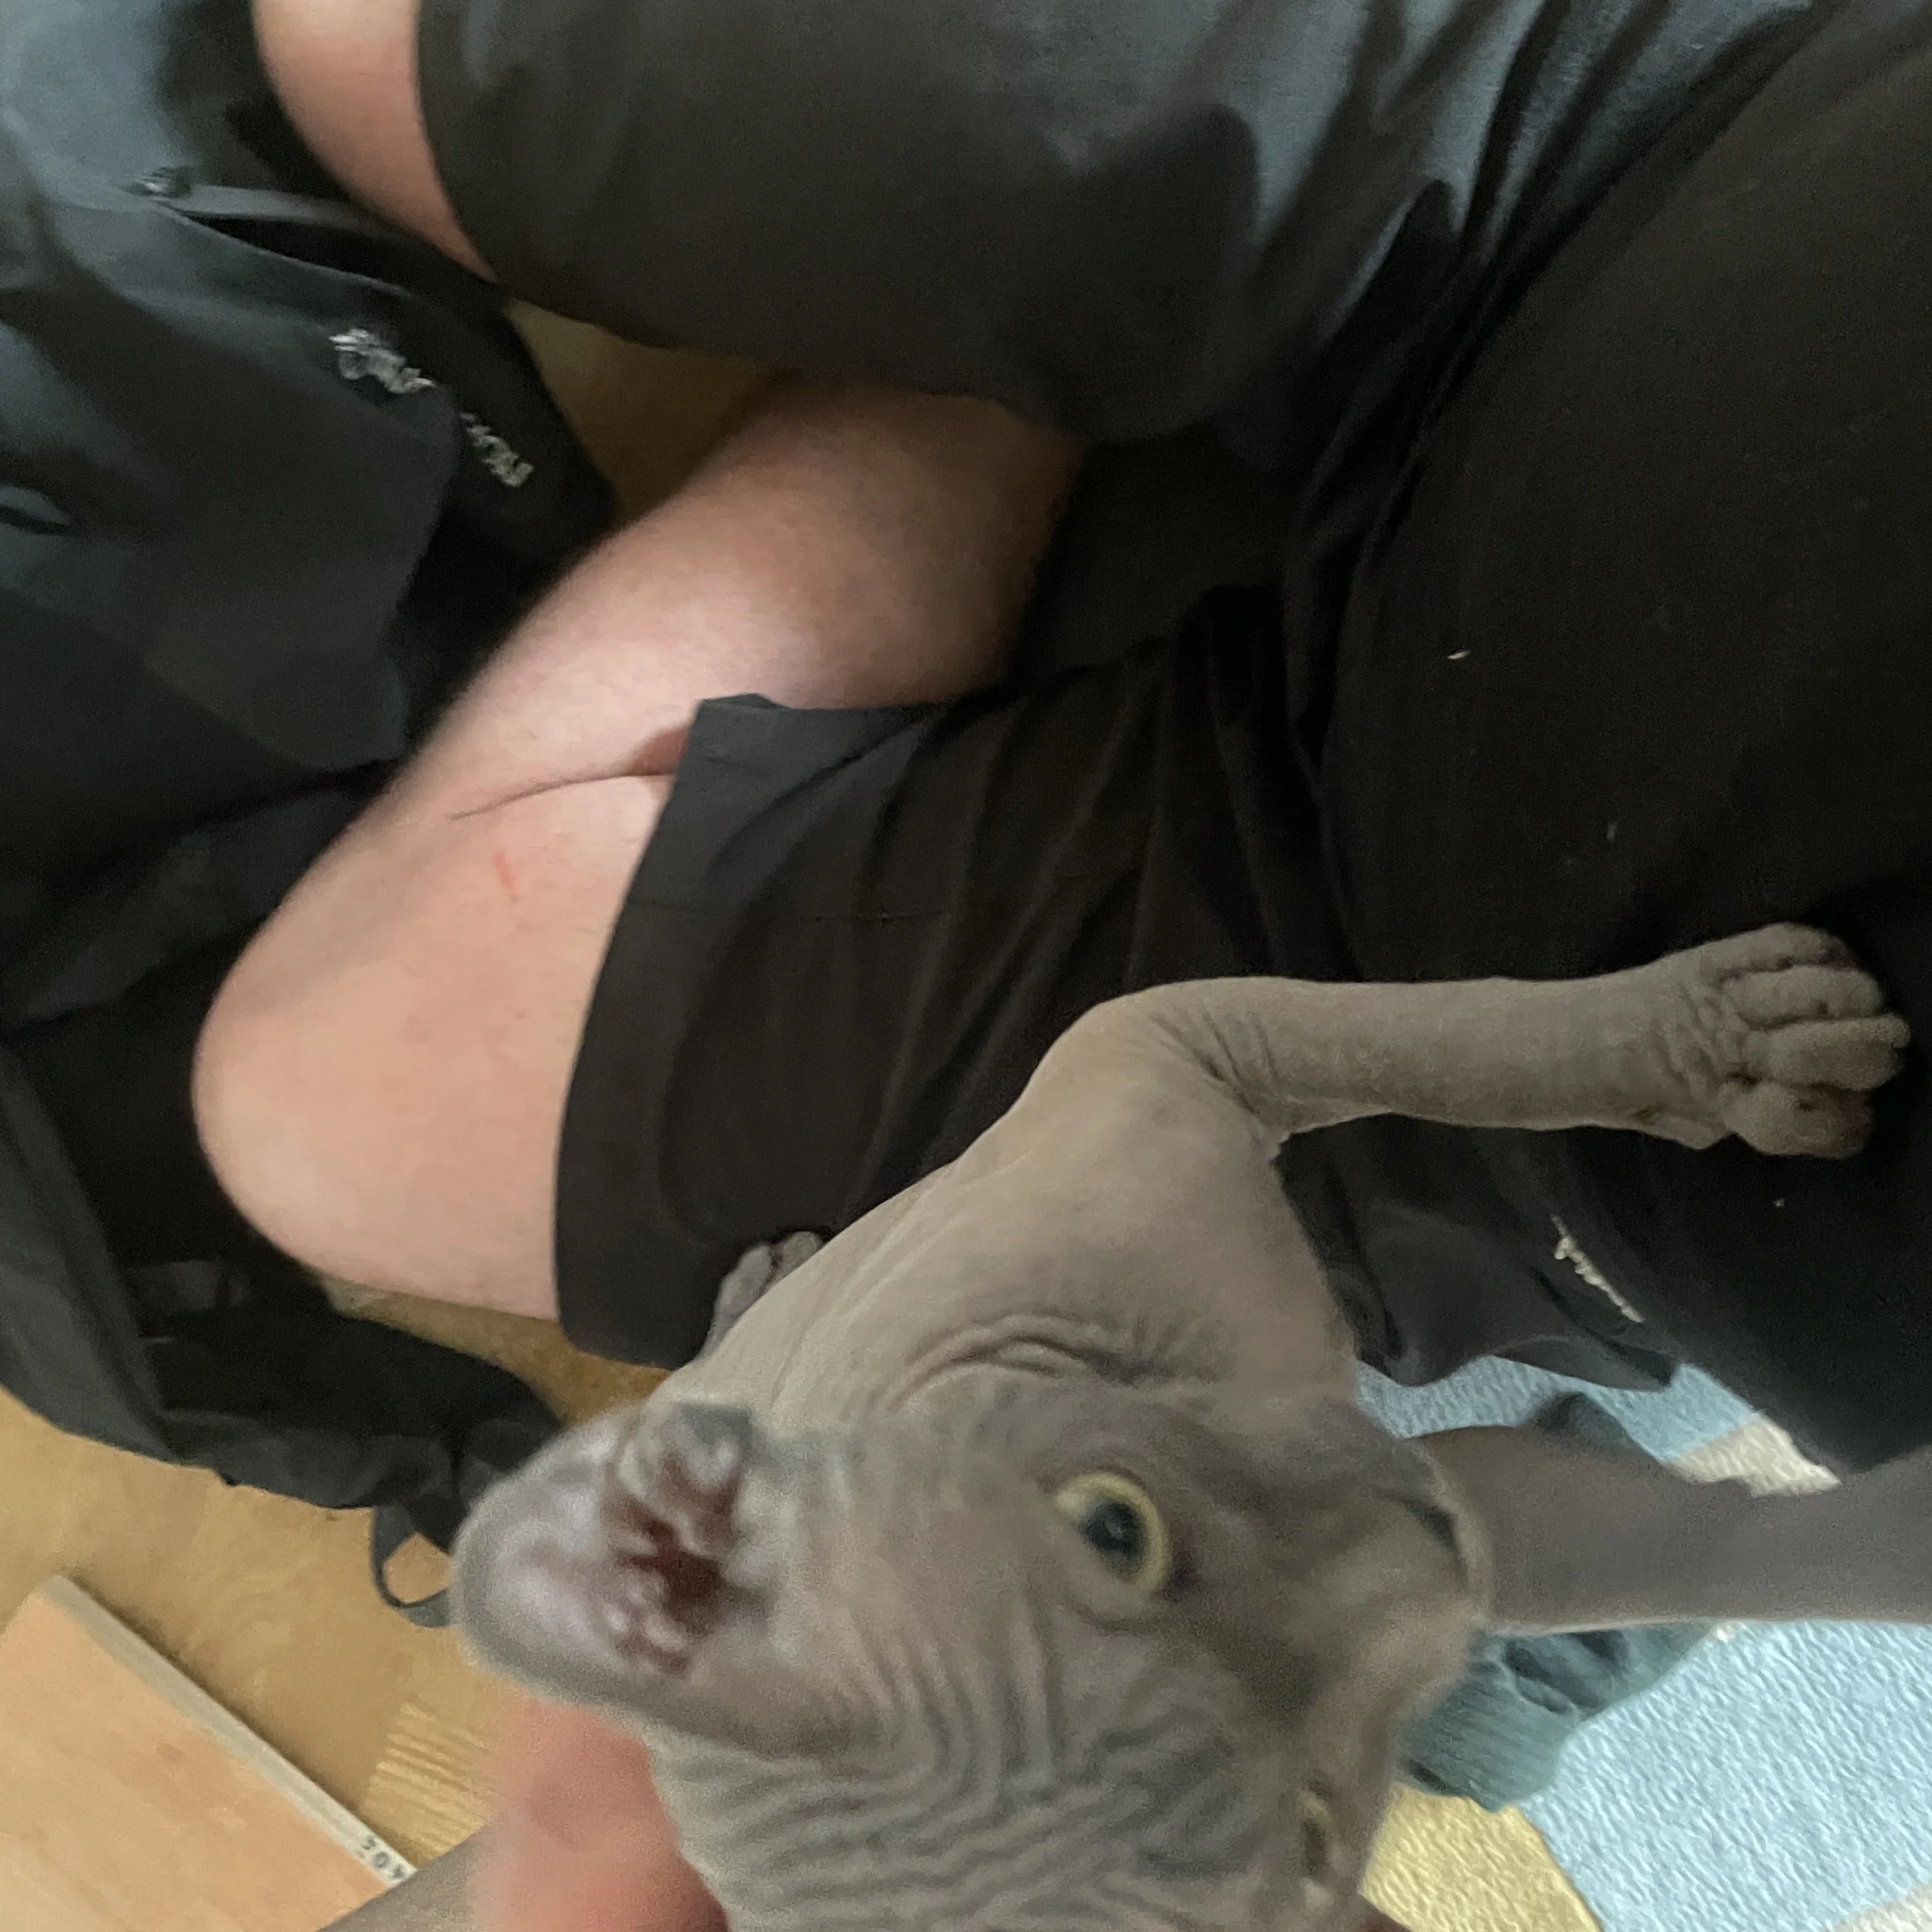
Sateen found our DIY Hicat Adaptation page but wasn’t comfortable that she was able to carry out the work on her own so got in touch & with some work juggling, we managed to pop by to Sateen before our Winter Break to carry out the adaptation for her & her new kittens Mochi & Mandu.
With Sateen on David Bailey duties (thank you) we photographed the various stages so that we can update our DIY Adaptation page when we return from our break but also have a customer in the United States who is about to carry out the same exercise so have quickly cobbled together the following notes to help them as there are a couple of steps in the published instructions that can be improved on.
As there was only a 4cm difference in height we were able to remove the excess height from the bottom of the Tomcat without impacting on Access Holes & therefore carry out the easier Option 1 adaptation - we will expand more on the different techniques when we update the DIY Adaptation page noting both Coir & AVM Wool steps.
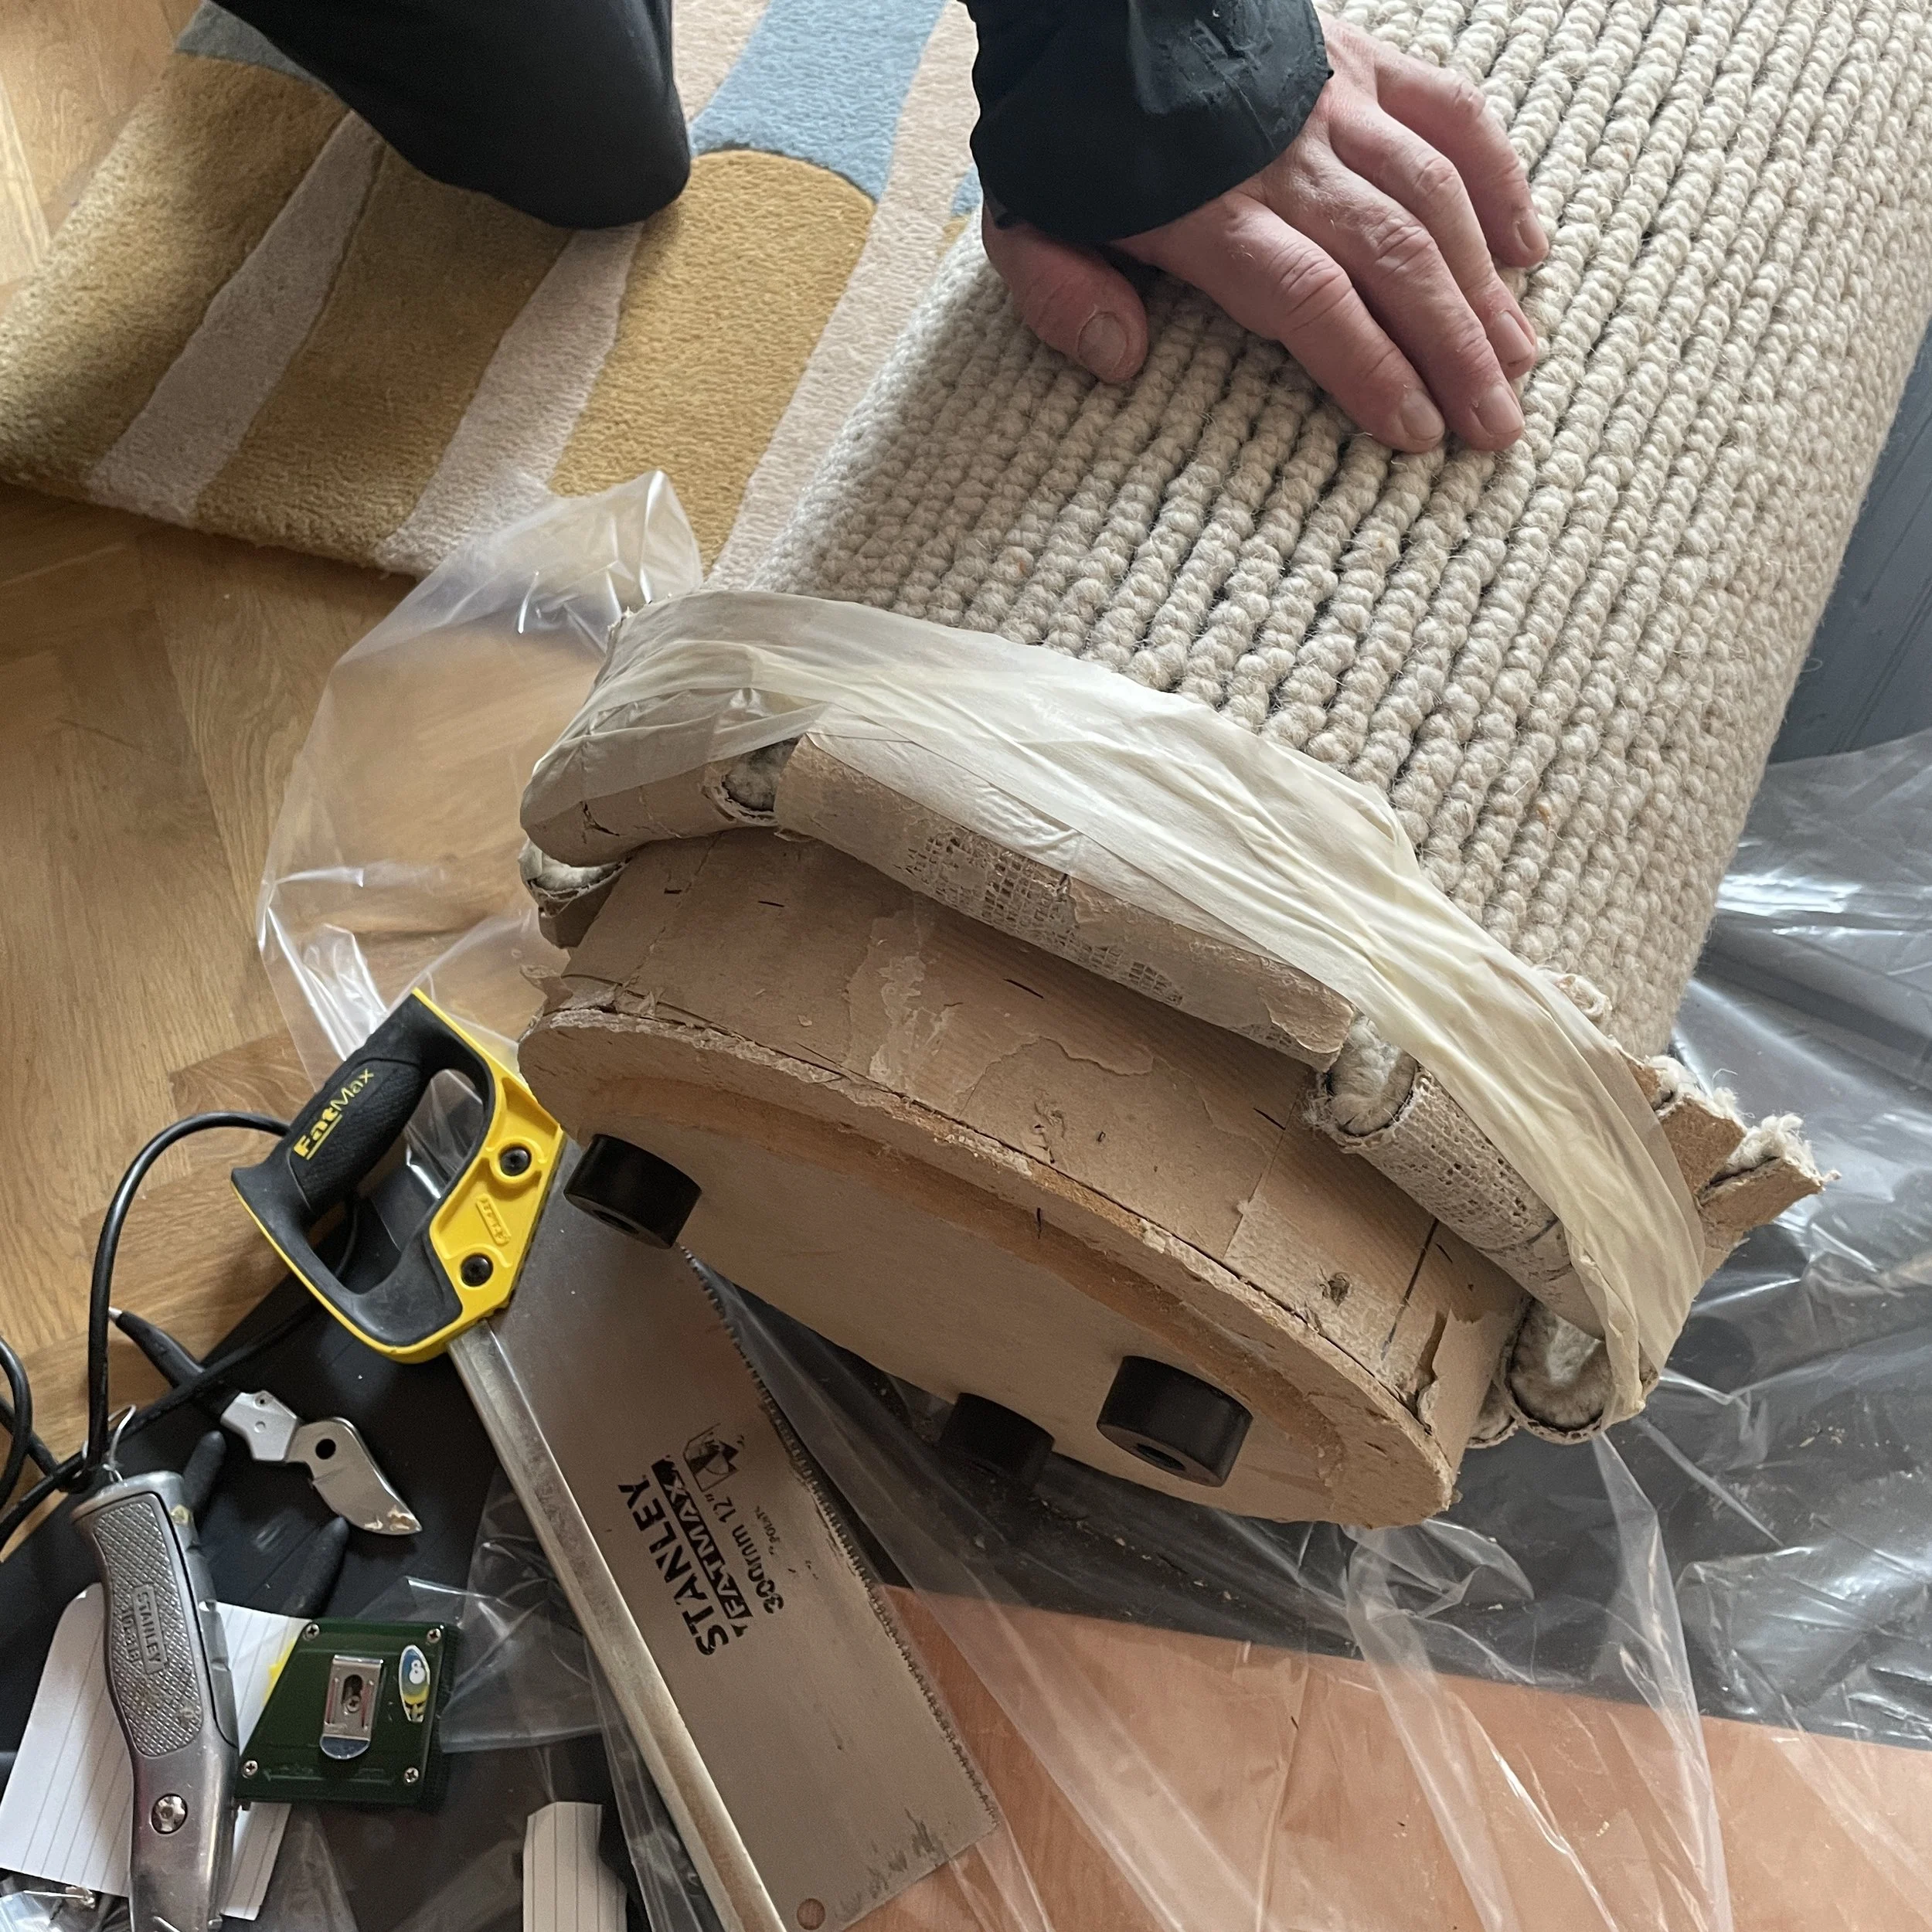
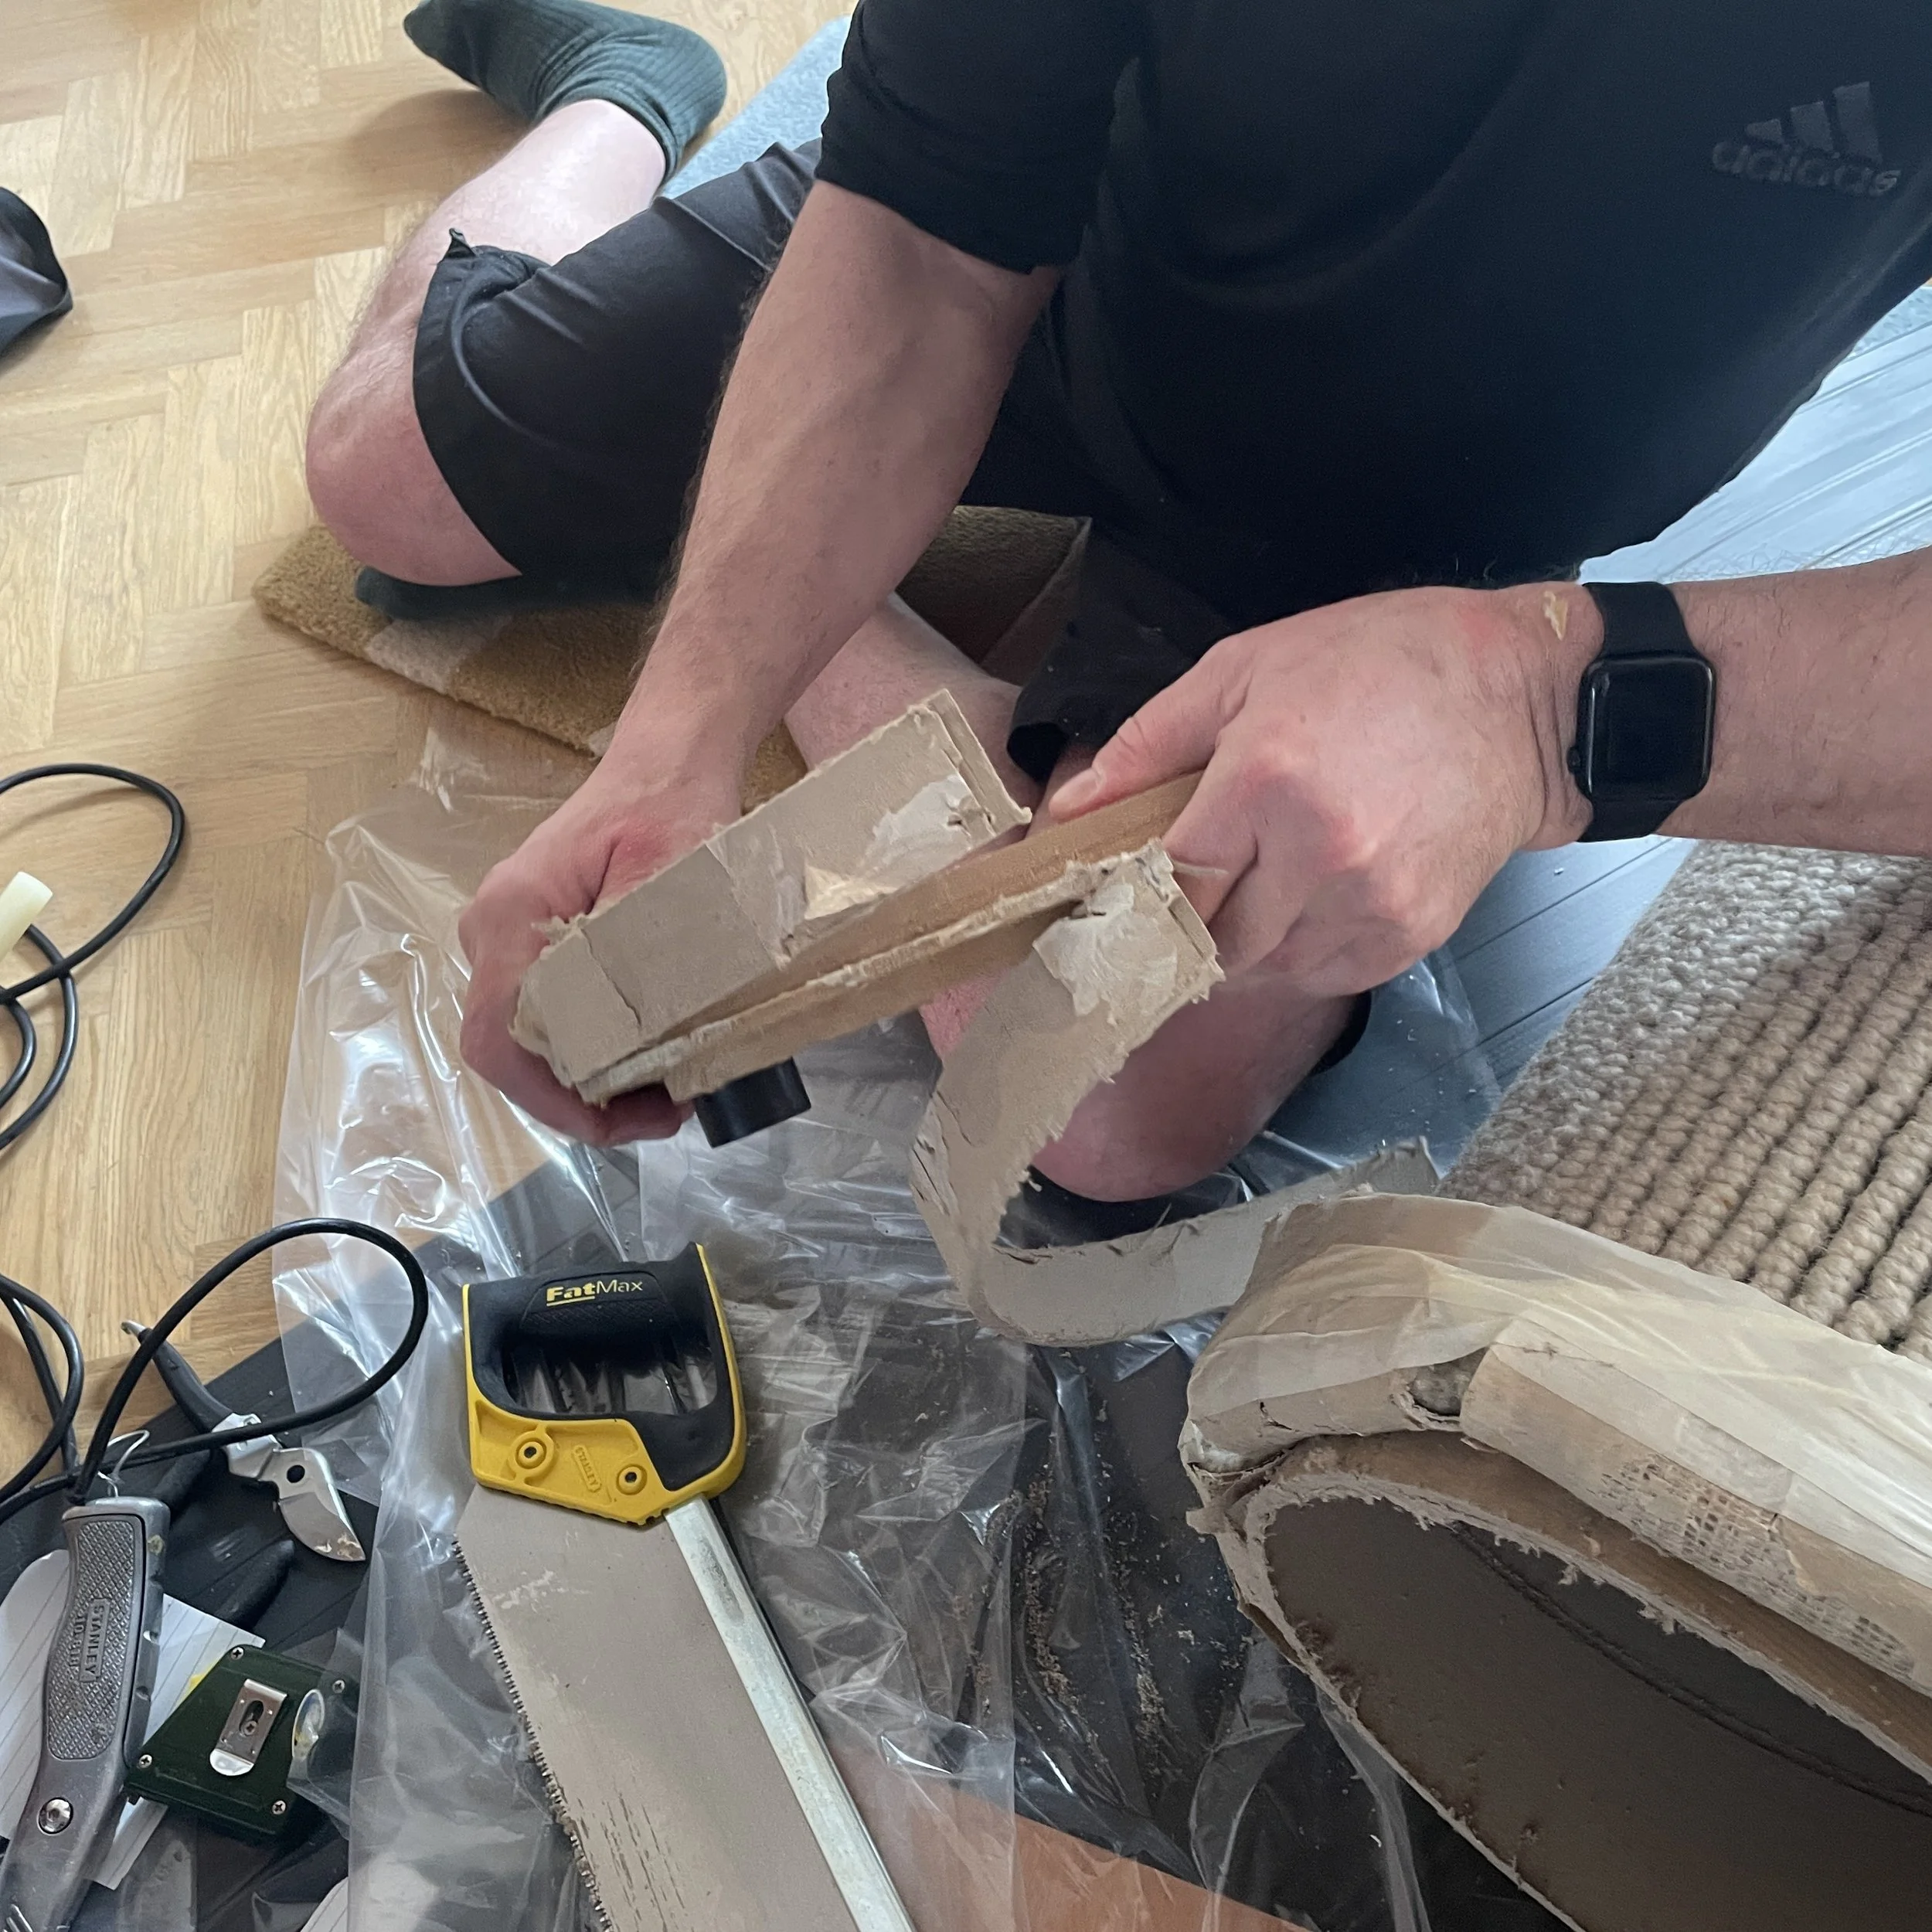
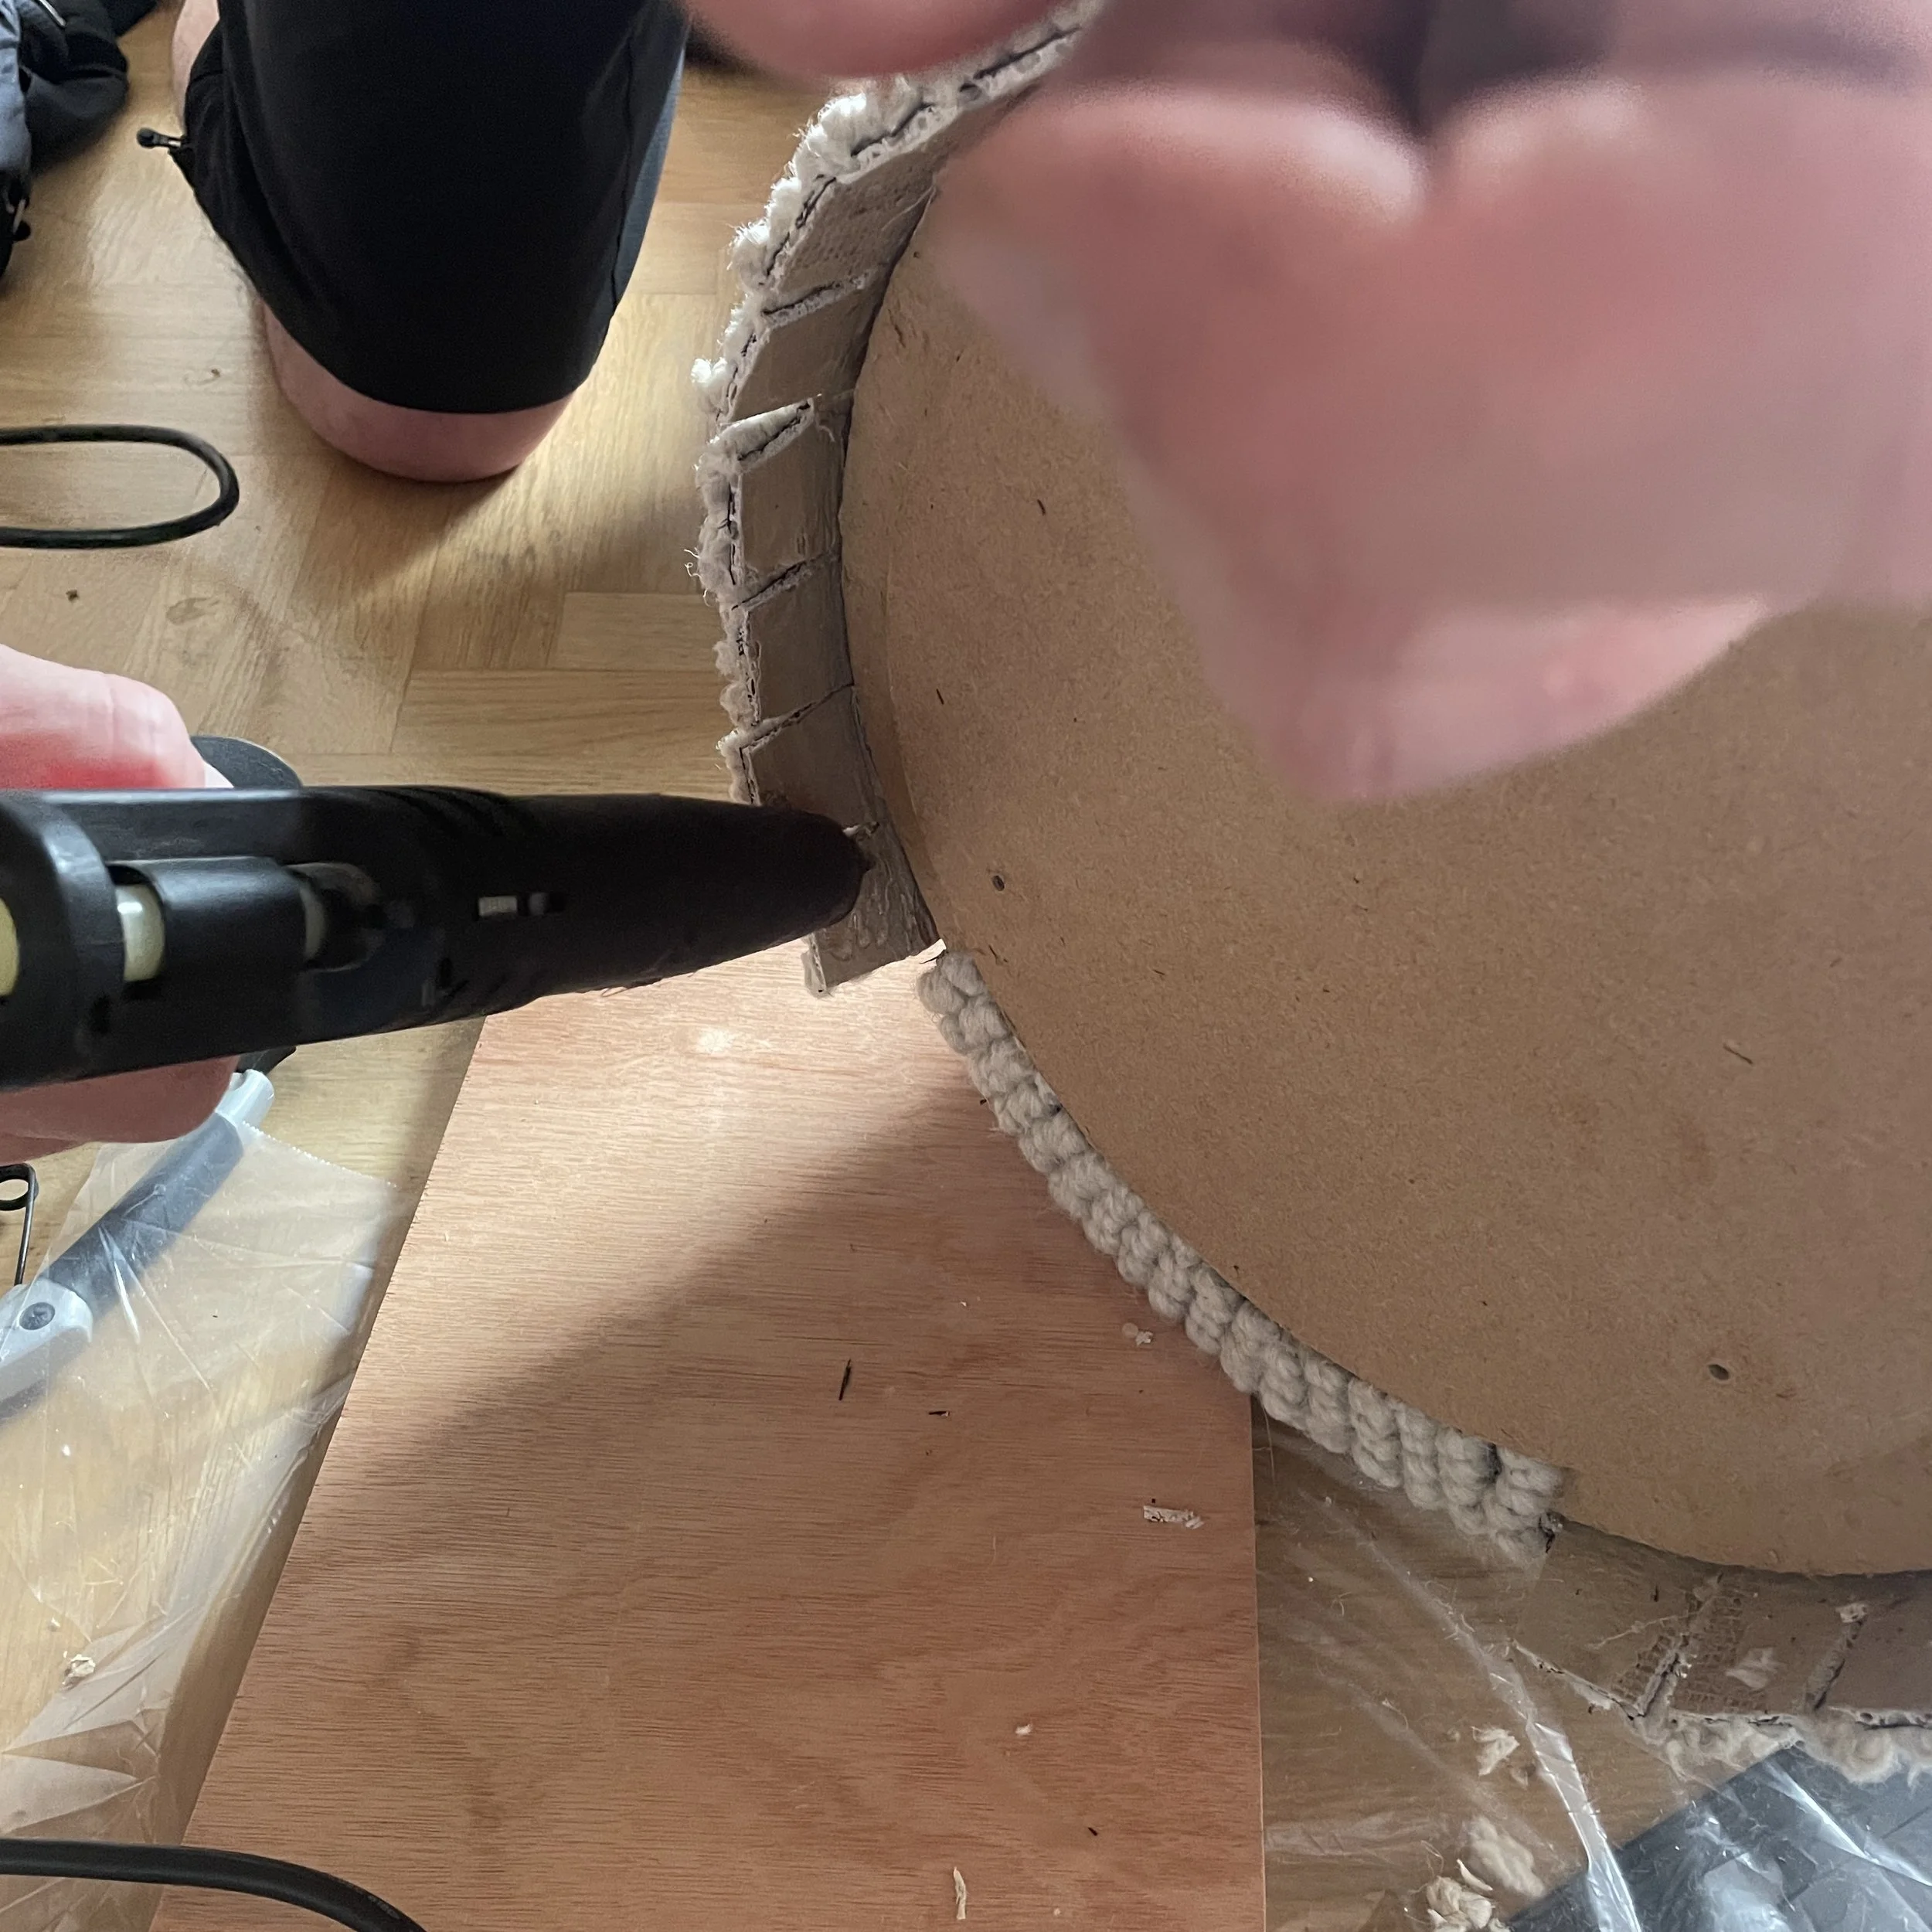
Whatever DIY option you carry out it’s best to unwrap the end caps after you’ve measured up the necessary cuts as it’s easier to do this with the cap installed using secateurs to lever out the wrap - we only had secateurs with us on our visit so used the secateur blade to prise out the staples but a flat headed screwdriver would be a better tool for doing this.
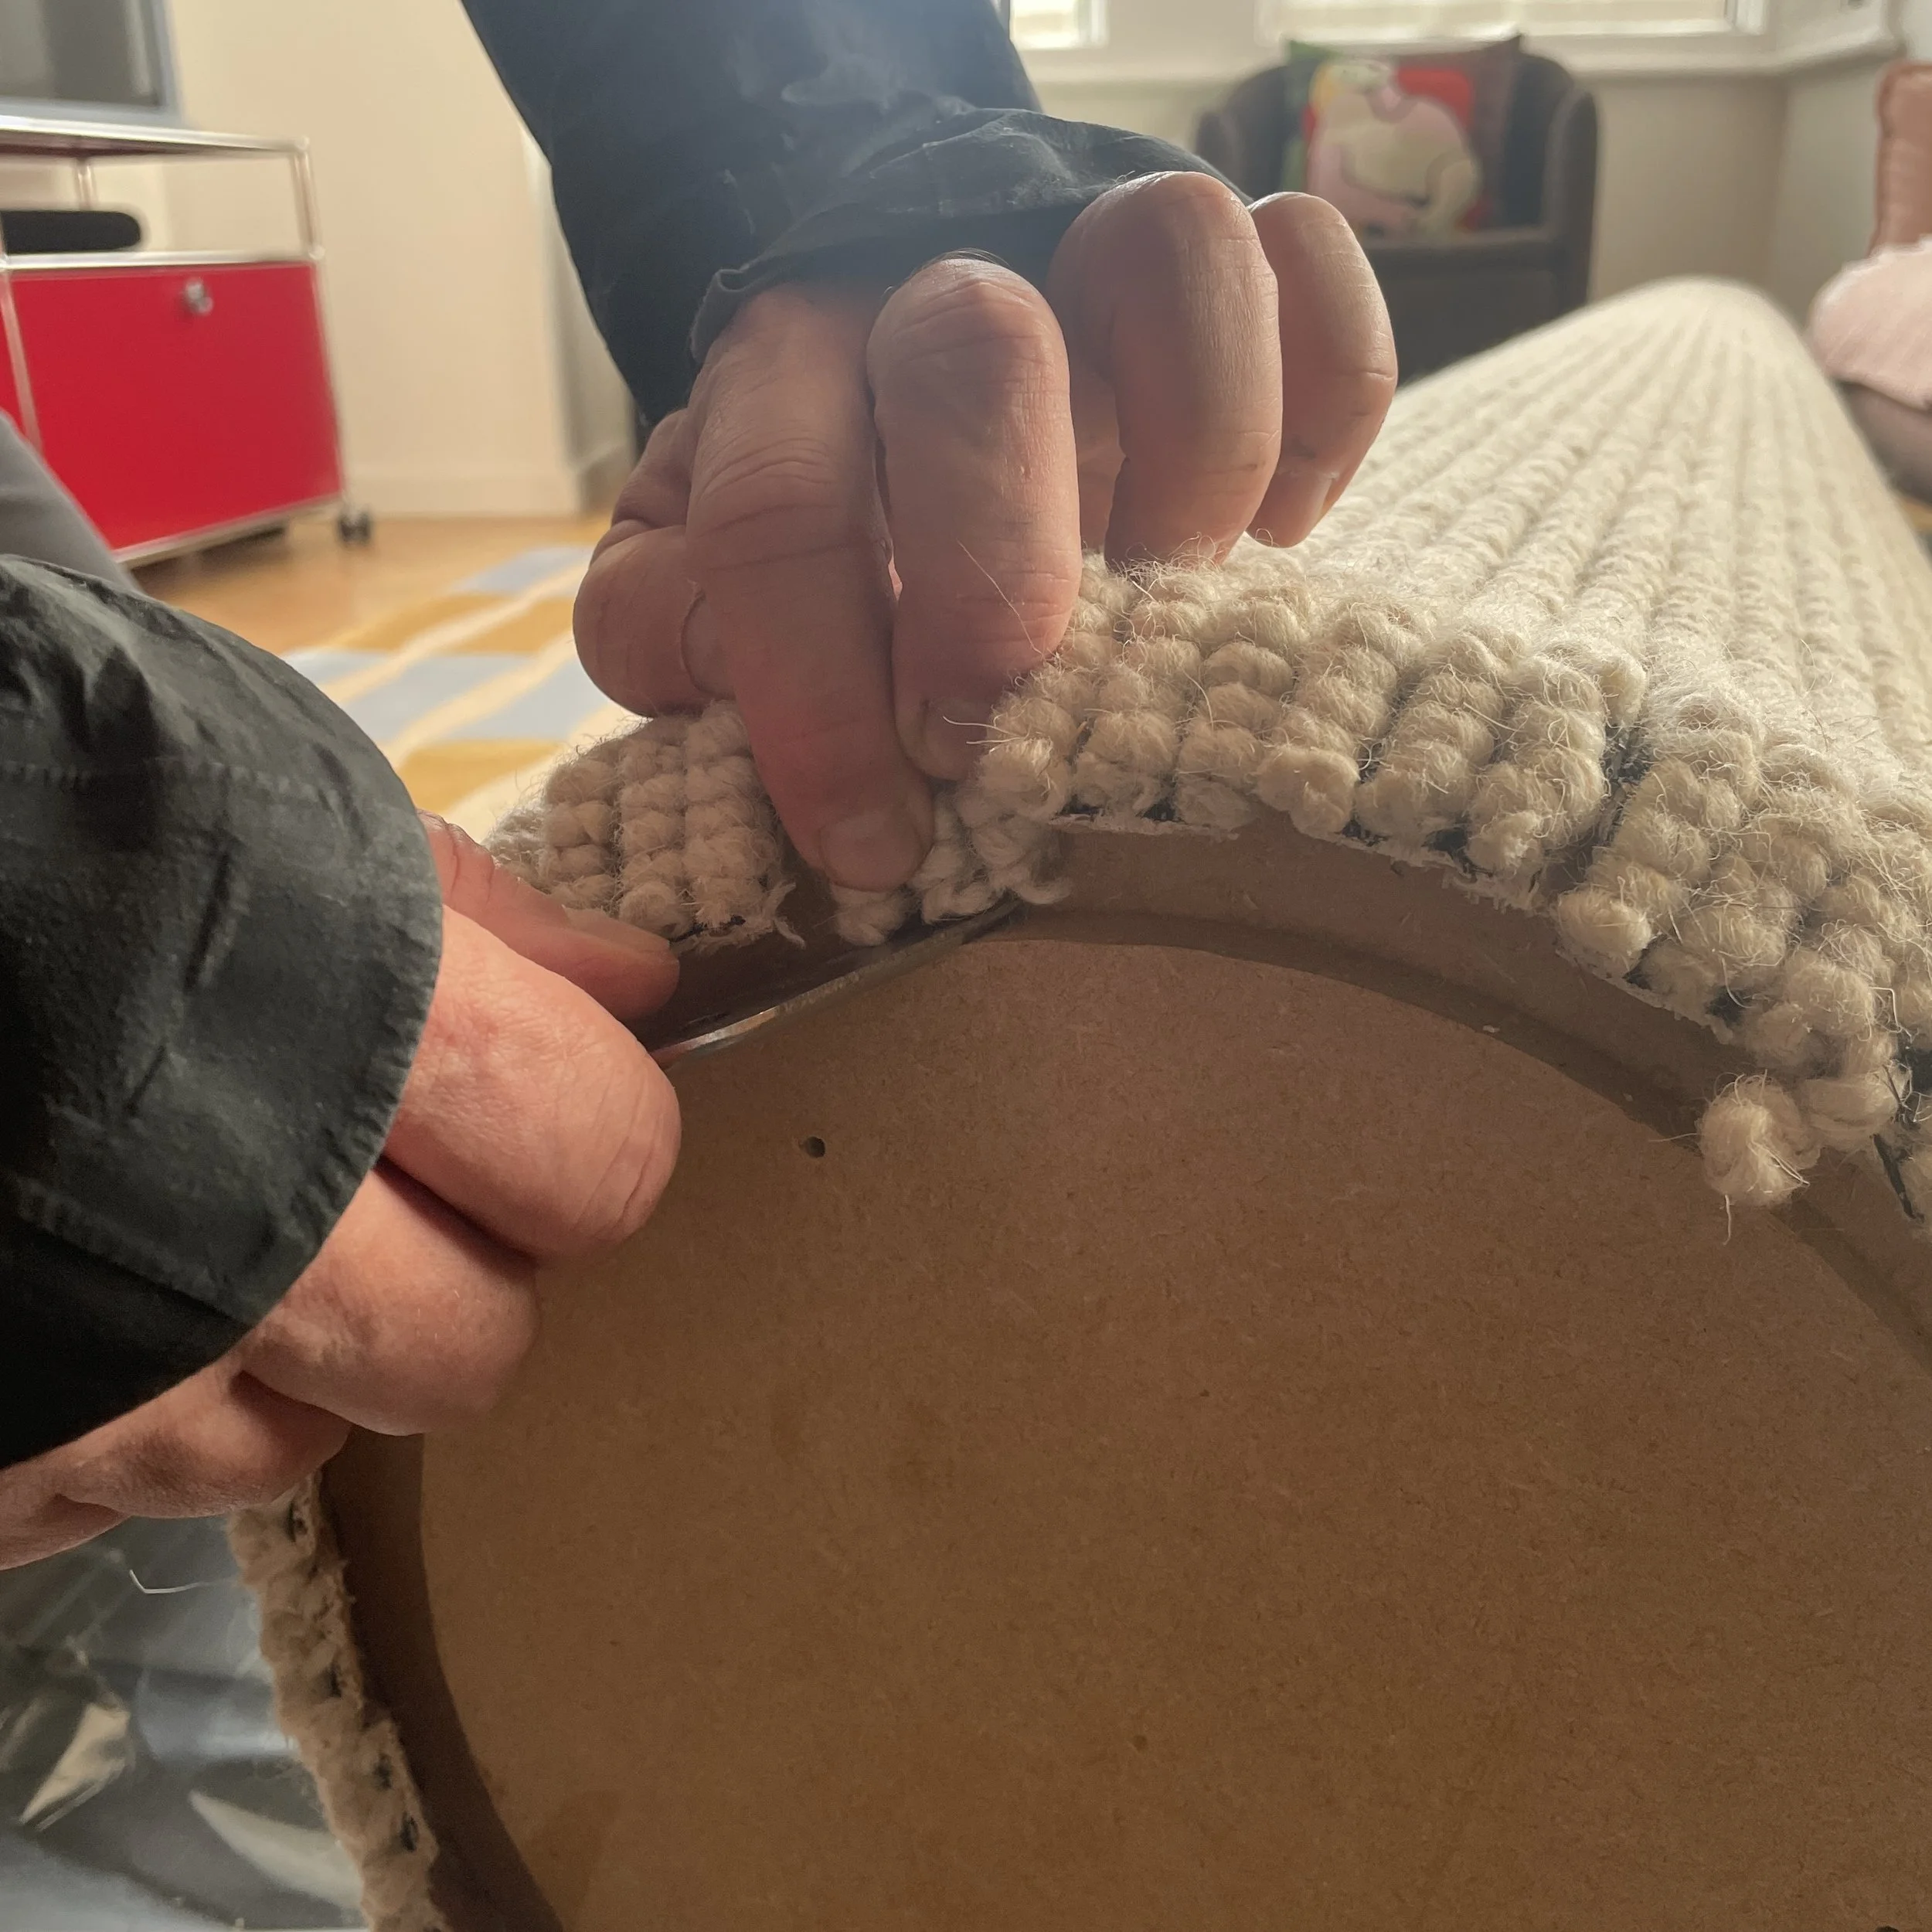
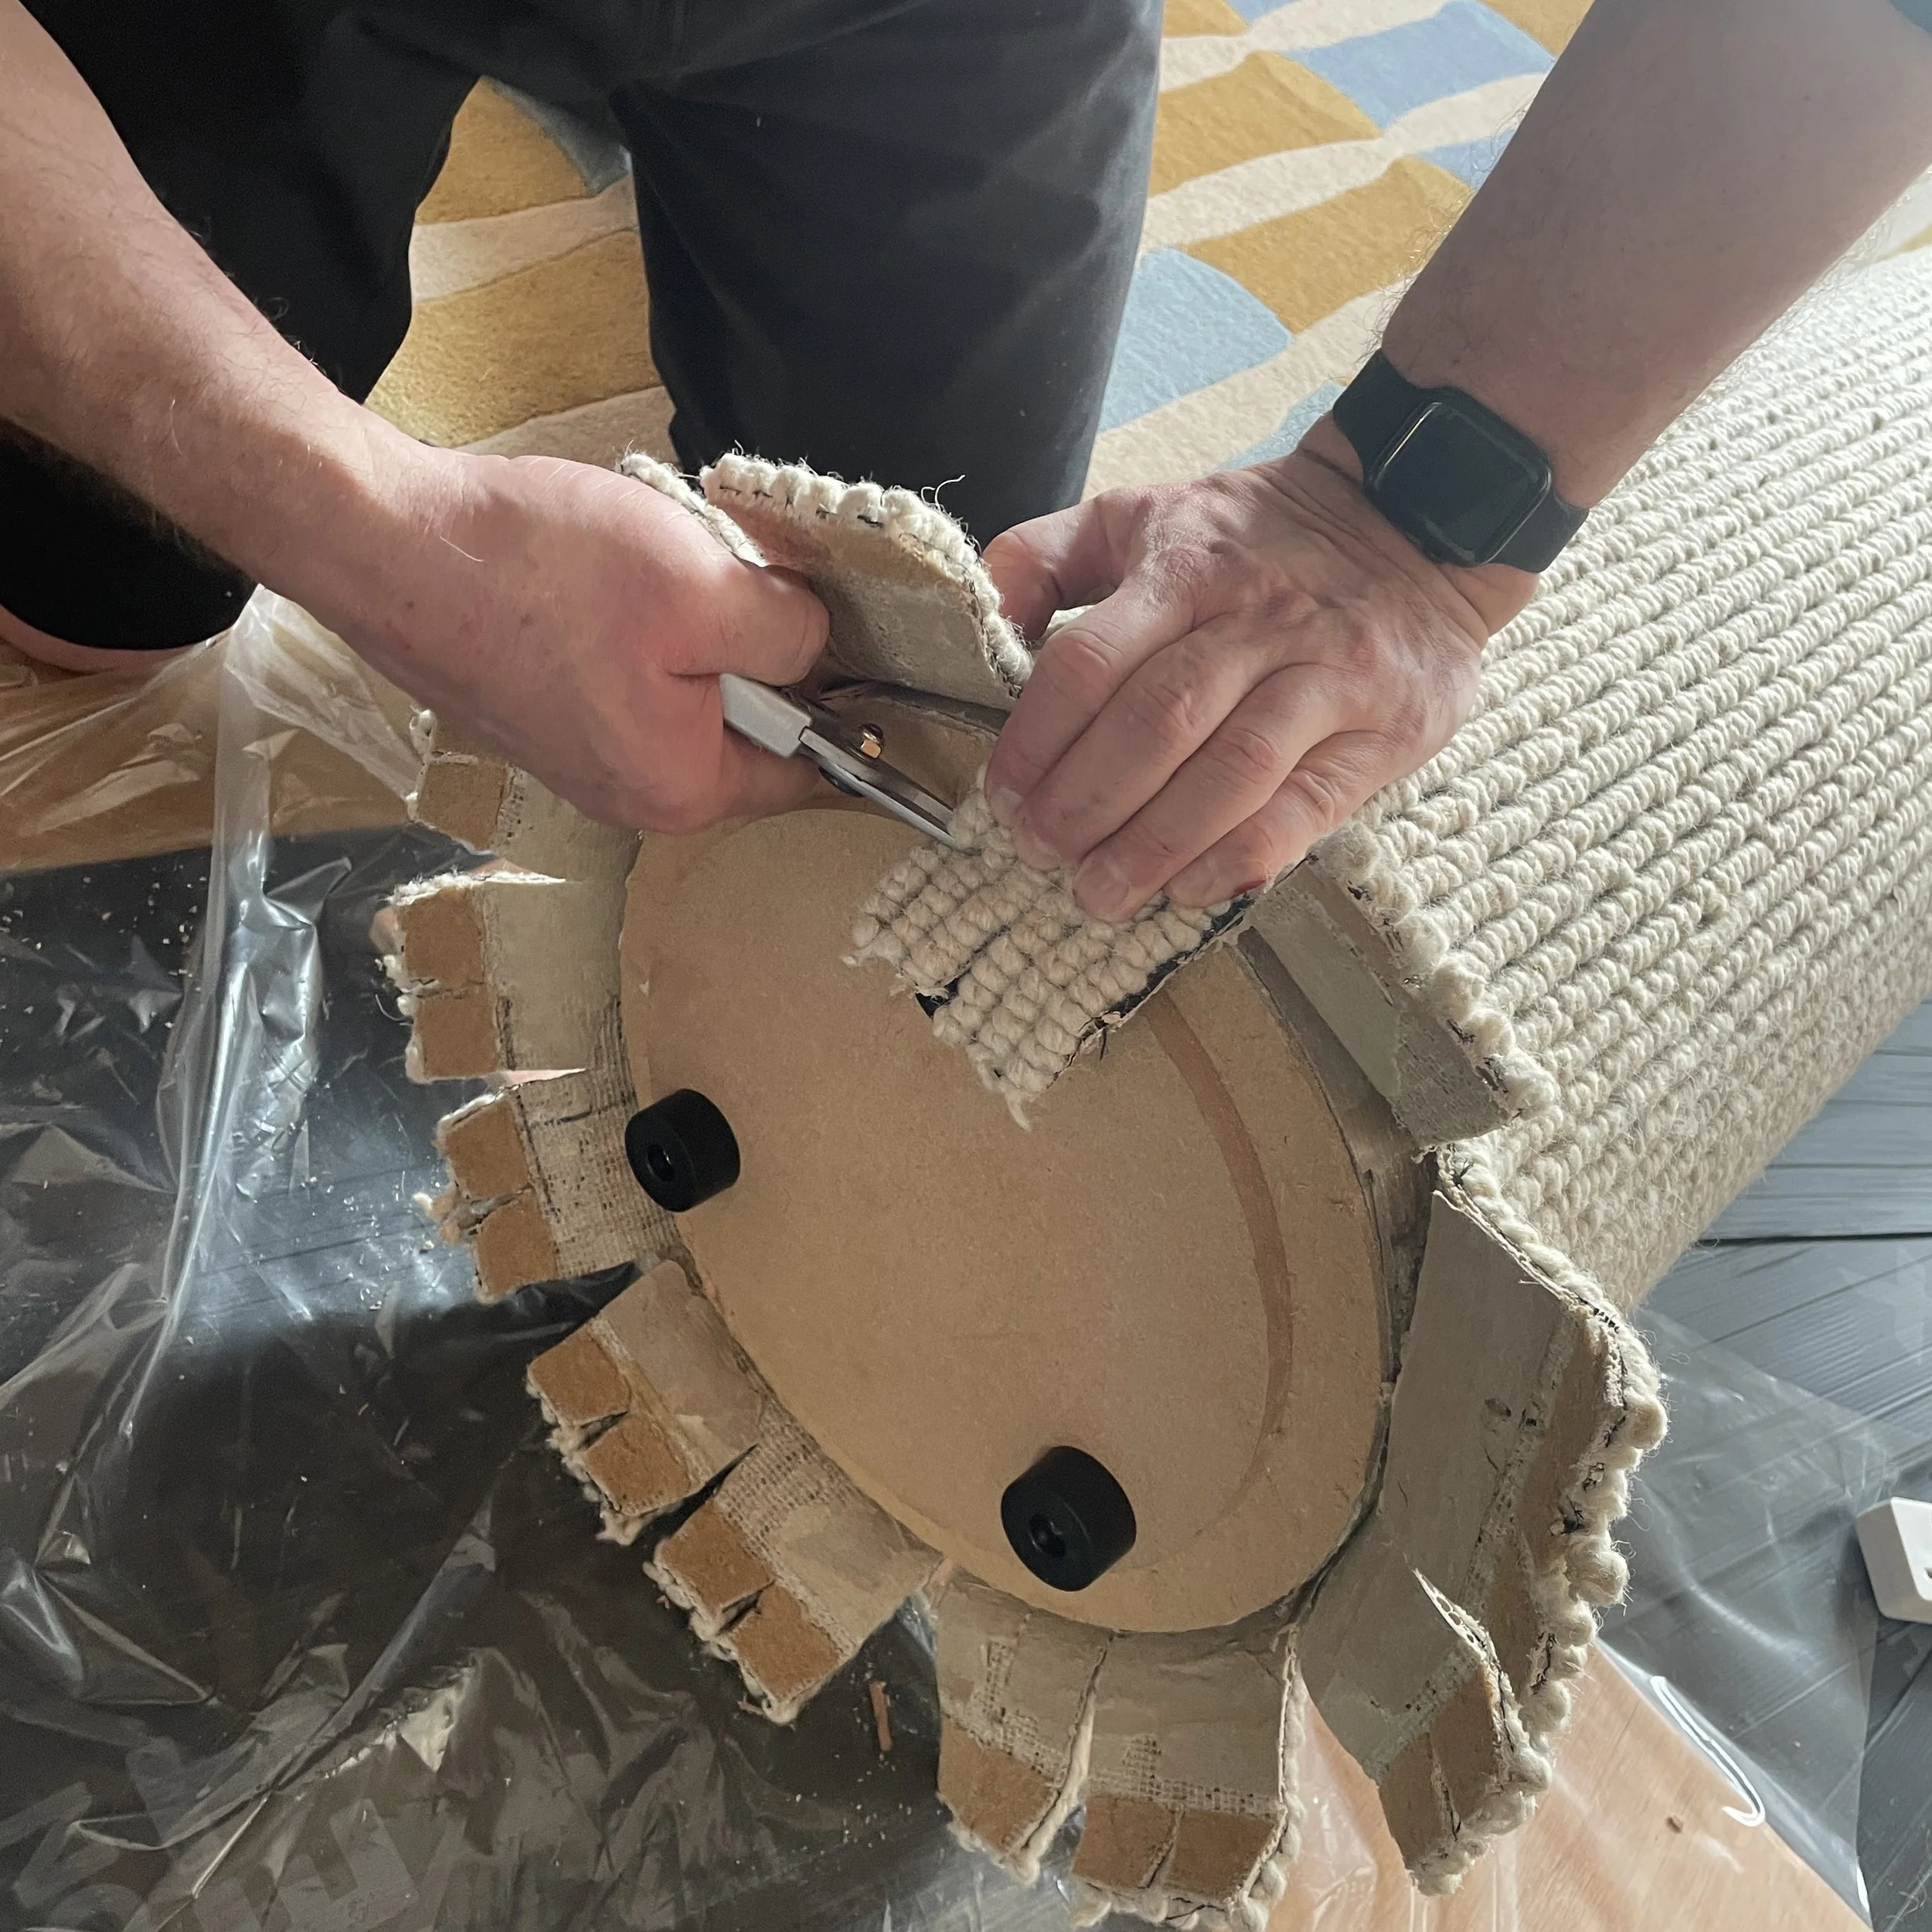
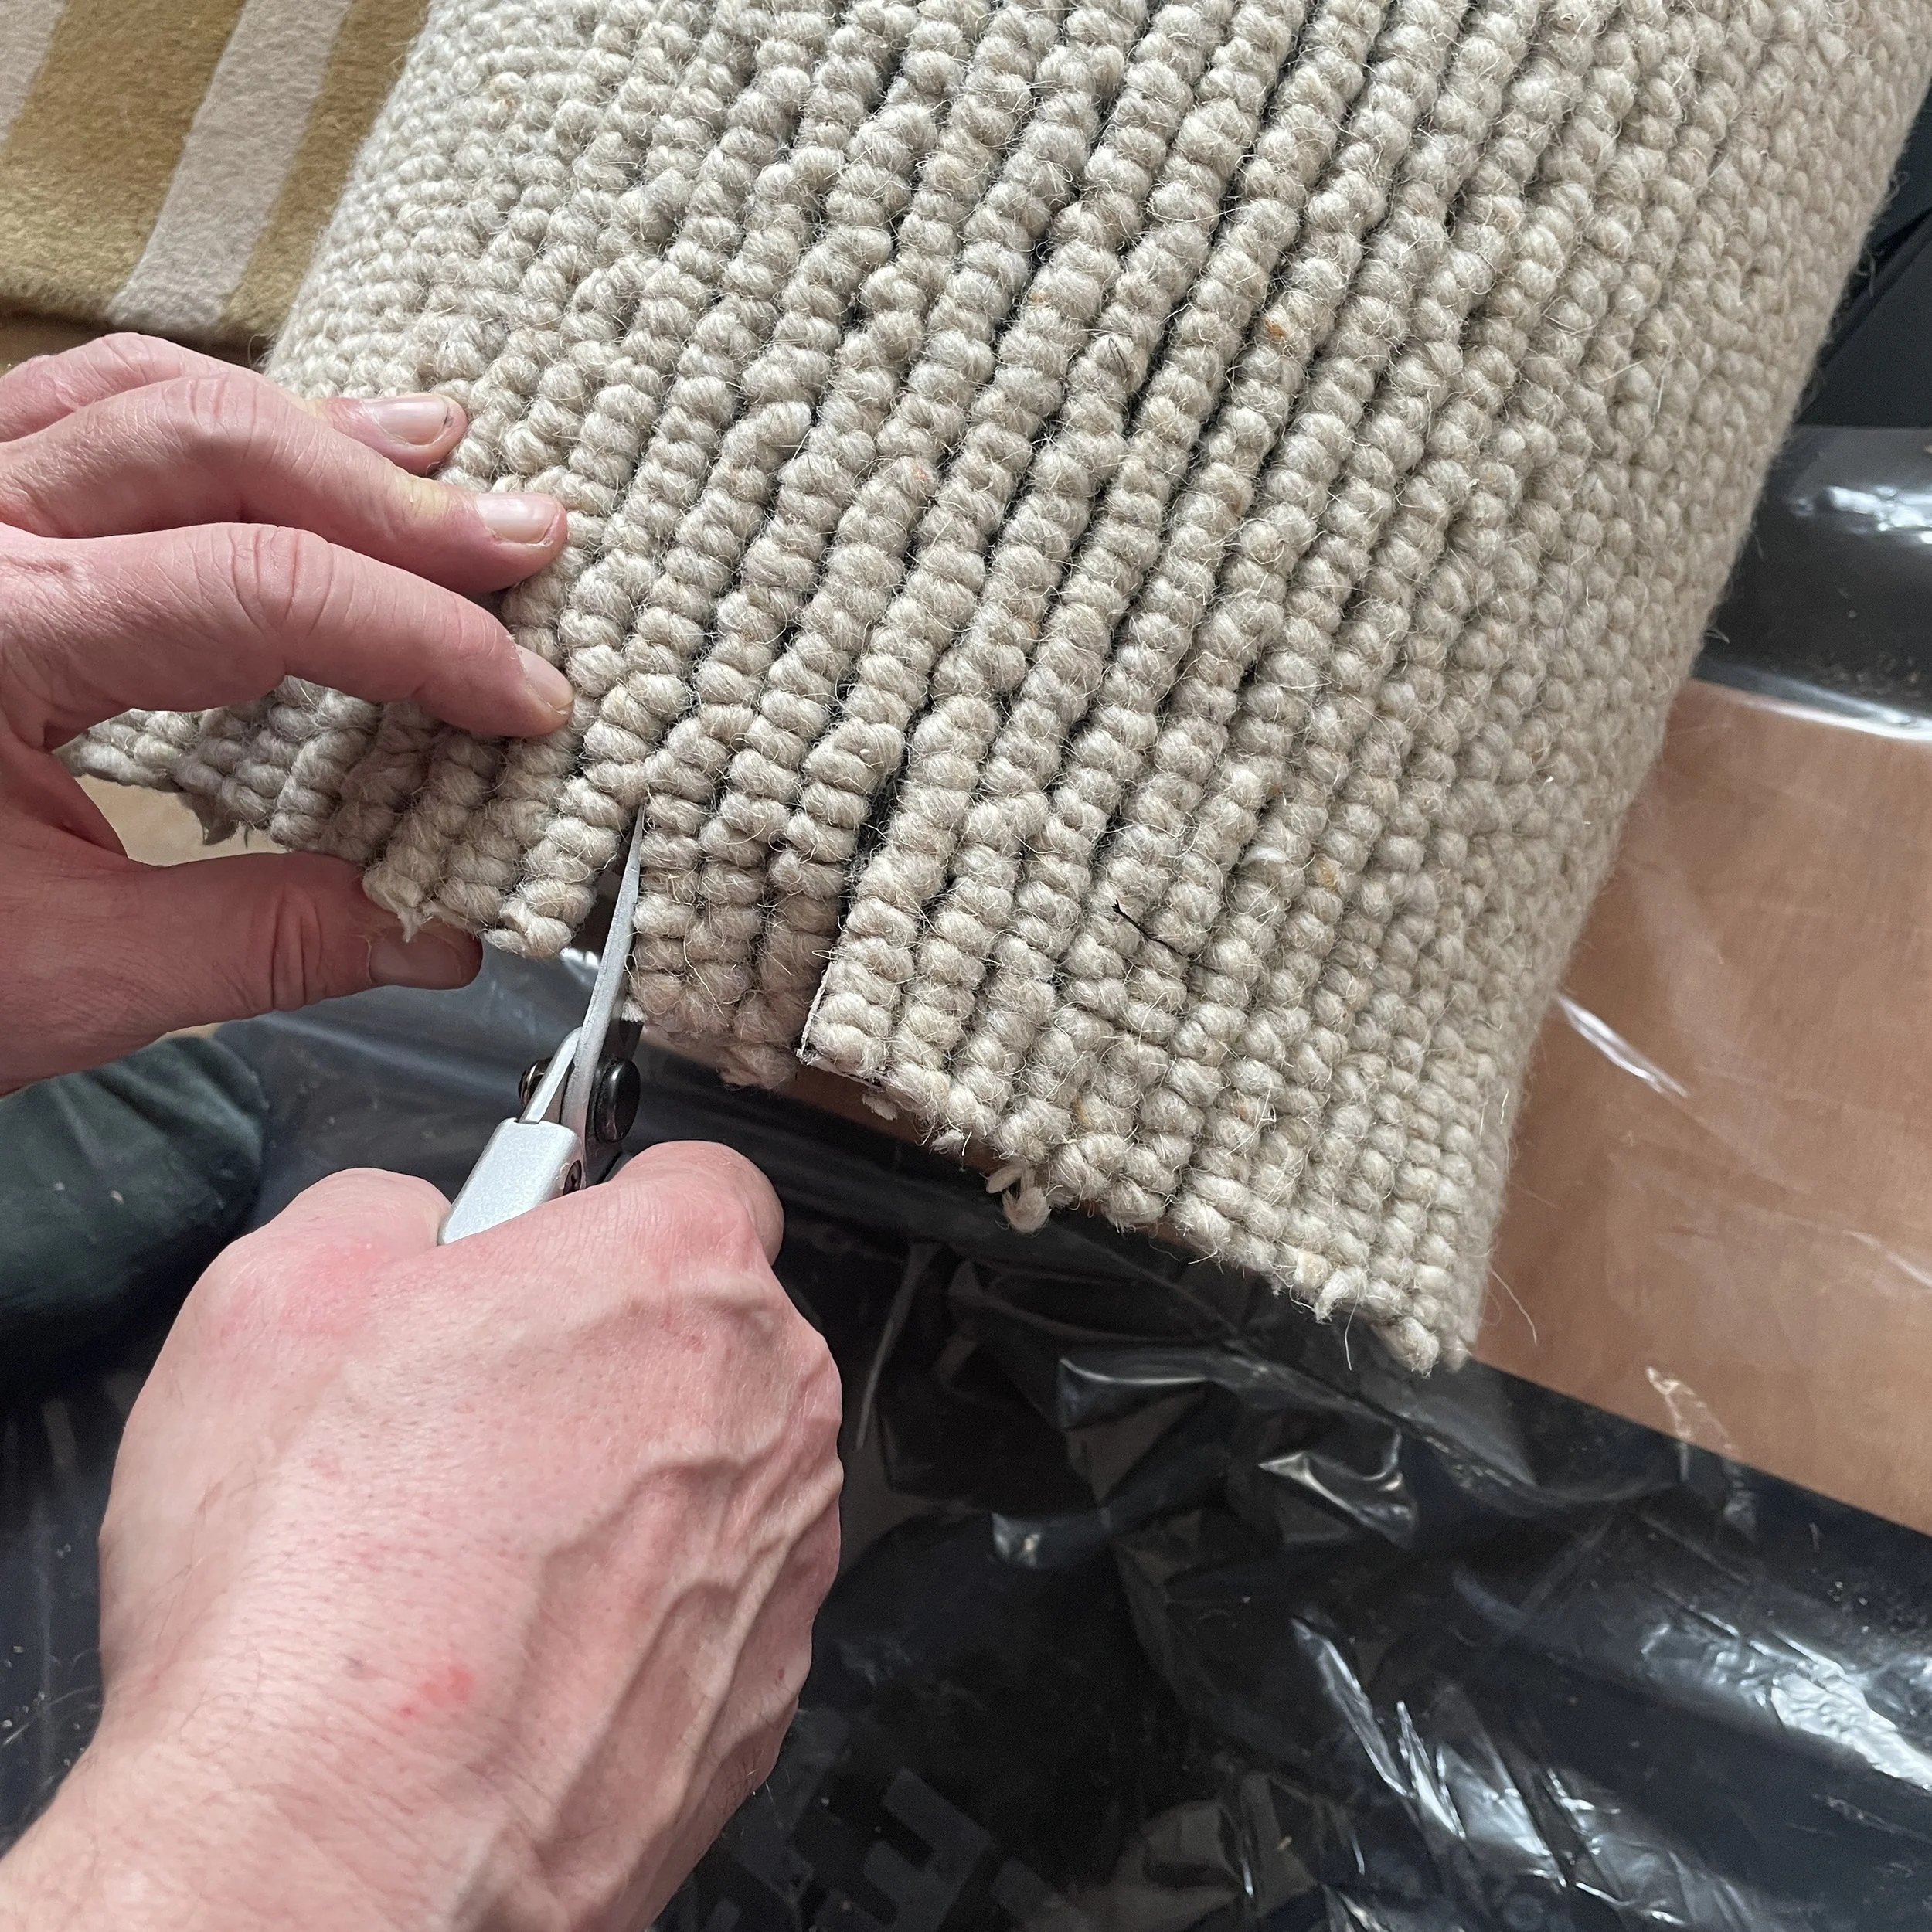
Once unwrapped we scored the edge of the tube where it meets the end cap as we planned to remove the end cap at this stage, hence fixing the feet onto the unit to use as grips for pulling the end cap away - we also cut every sixth rib to allow the carpet to be pulled back over the end of the tube so that you can then use tape to fold back the carpet whilst you measure up & cut.
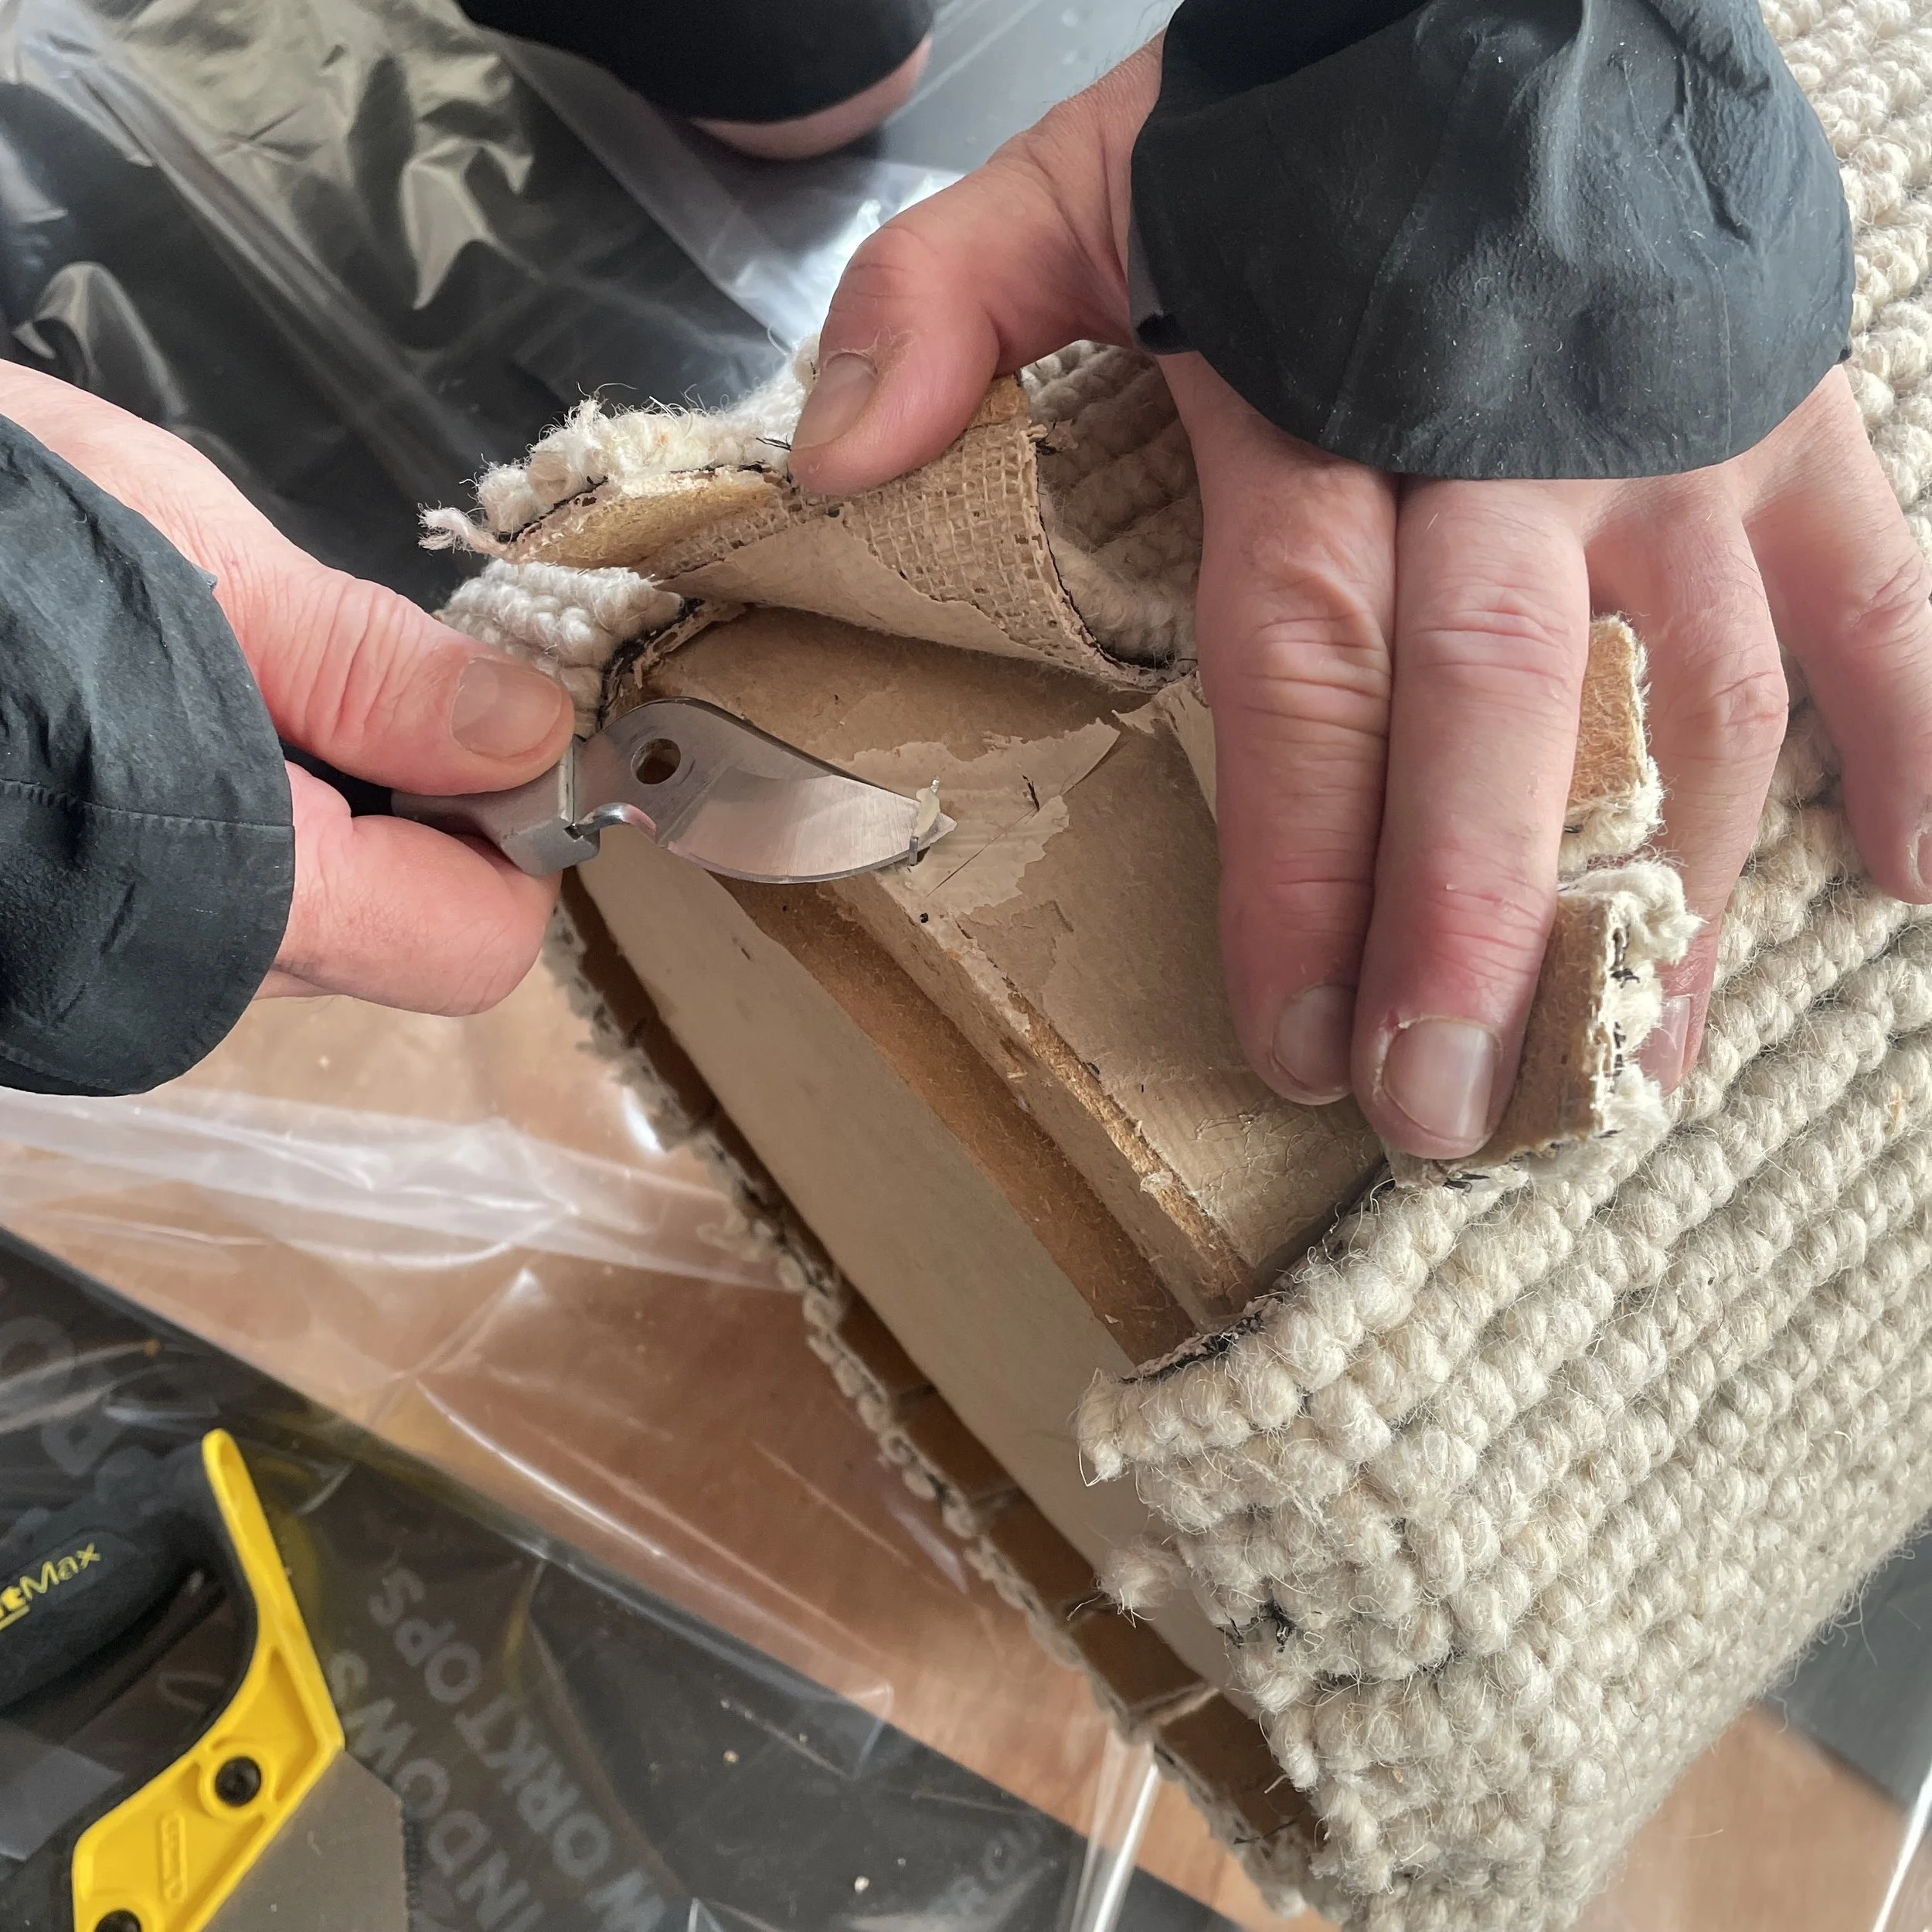
NB we nearly made a really bad school boy error here in attempting to release the end cap from the tube before we cut the tube as doing this is likely to split the end cap - instead make the tube cut & then release the cardboard tube from around the MDF end cap as shown in the next steps.
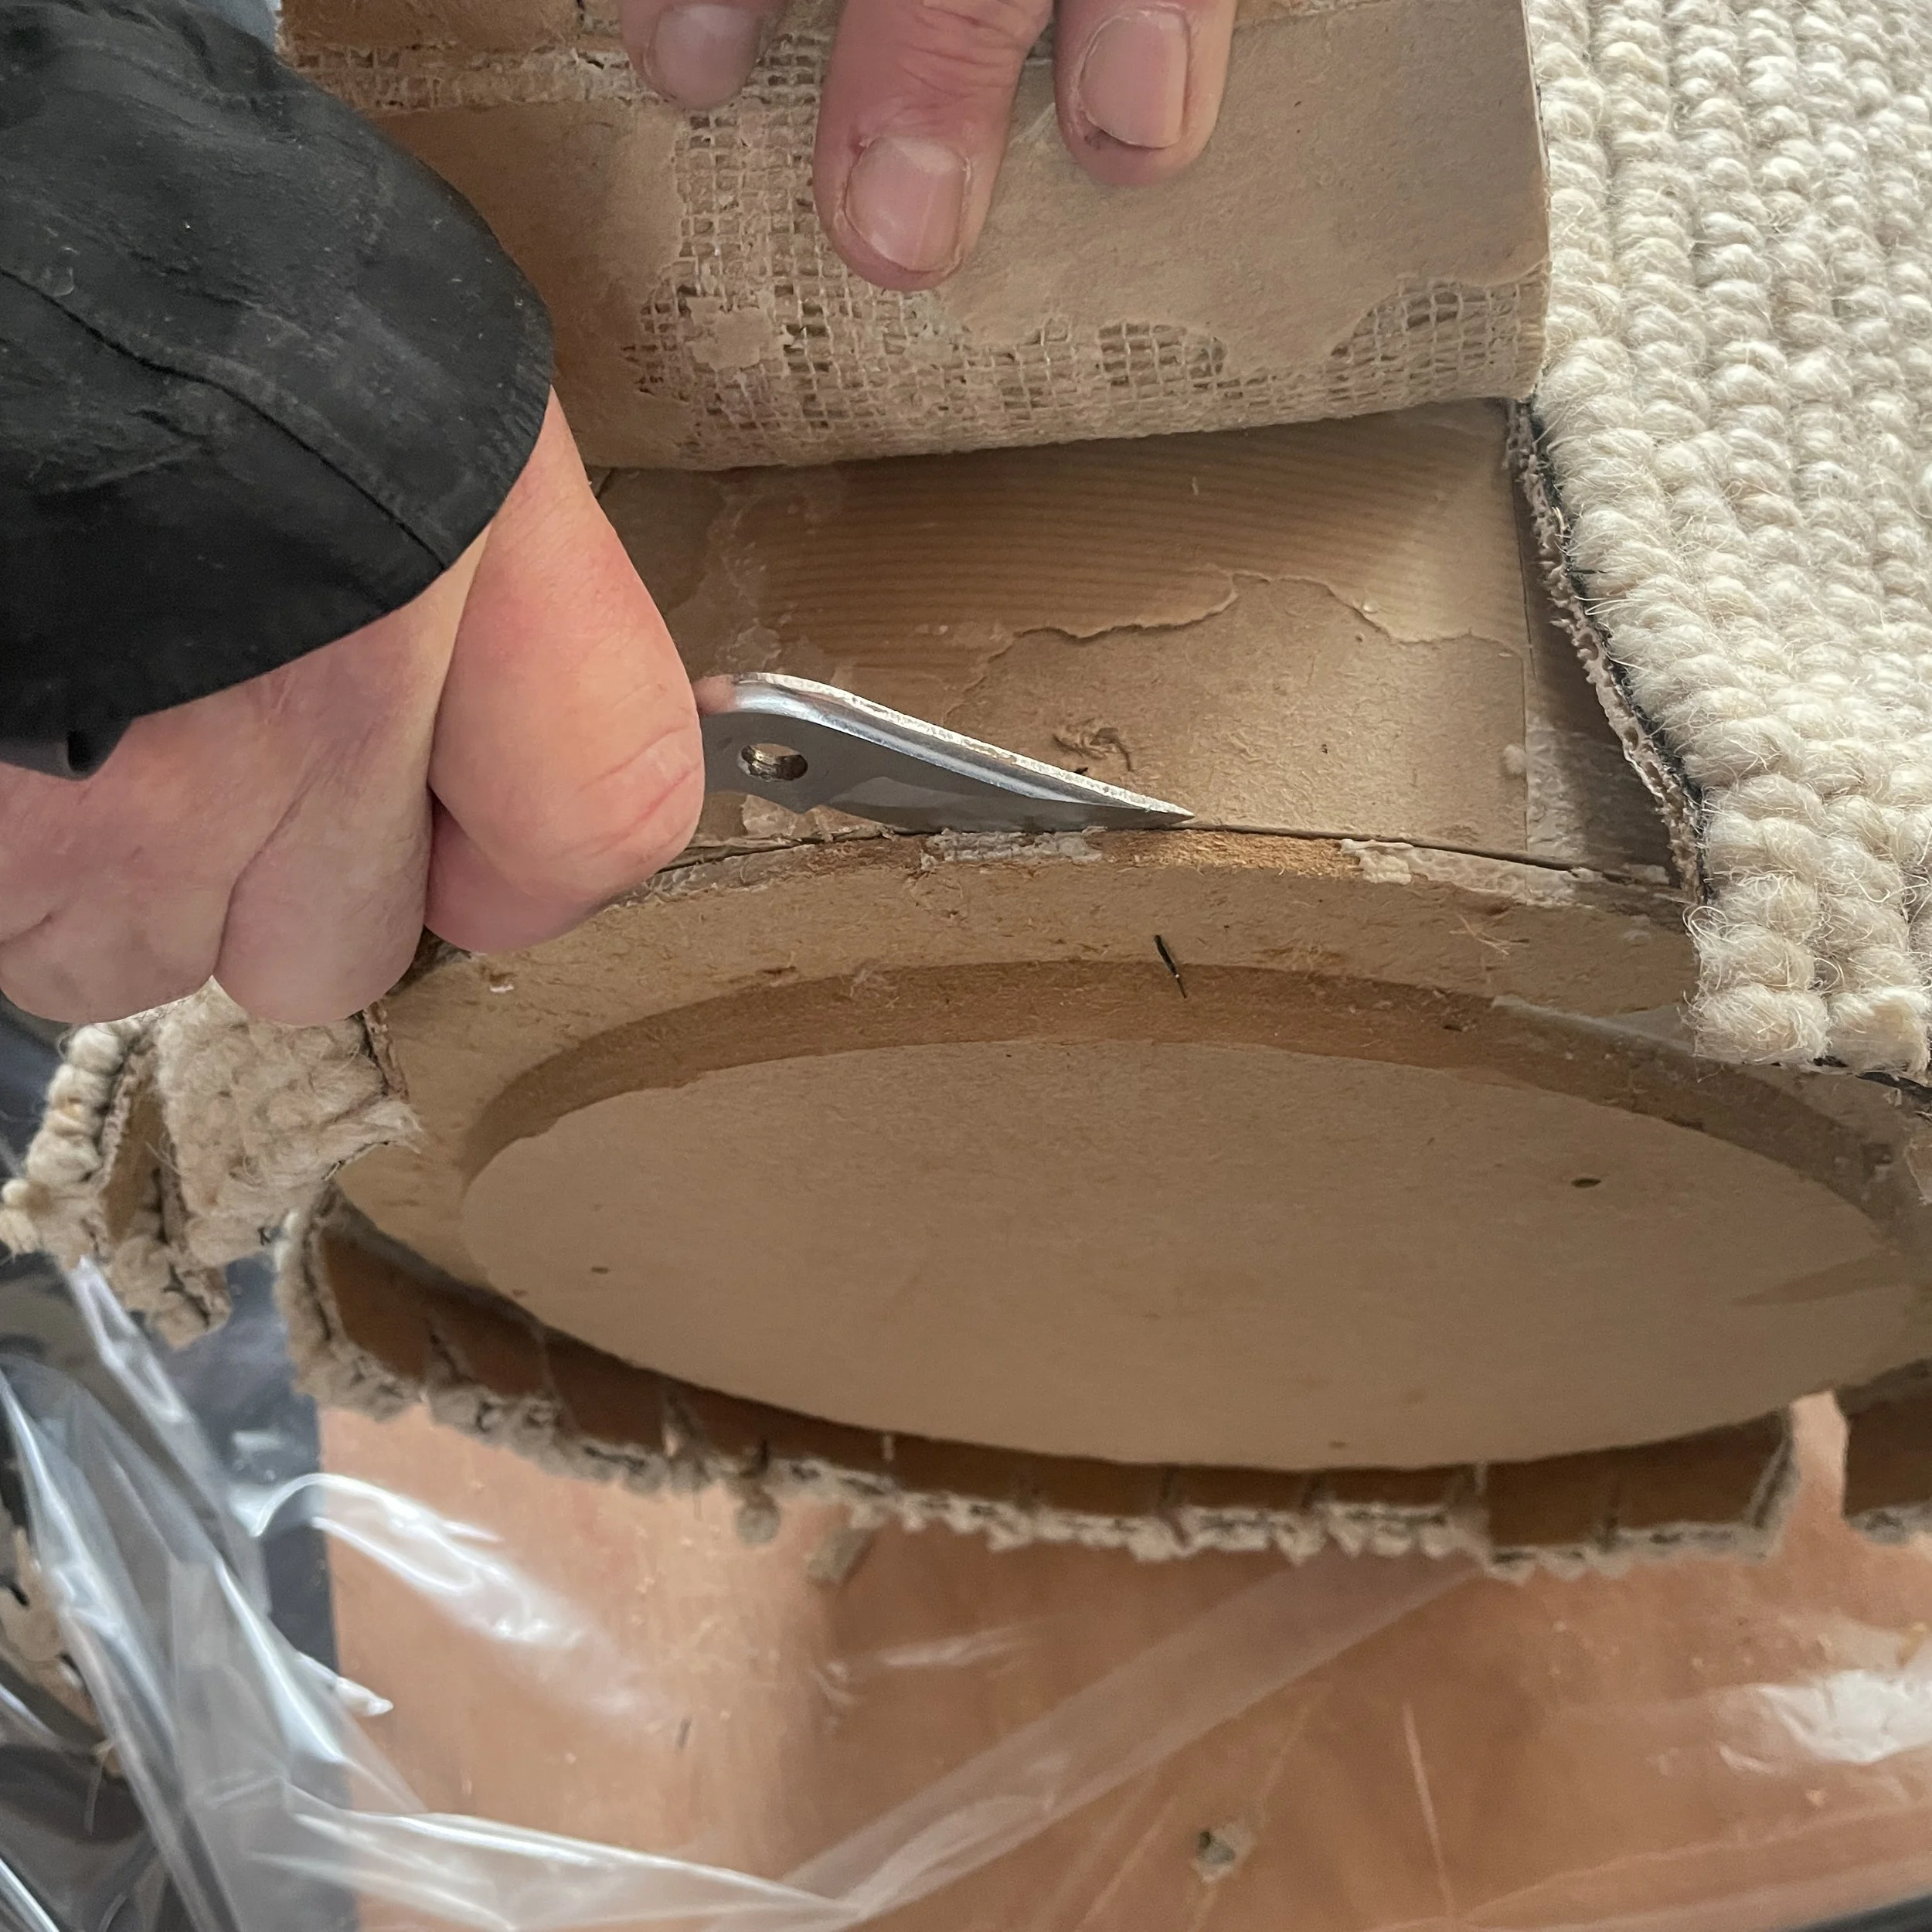
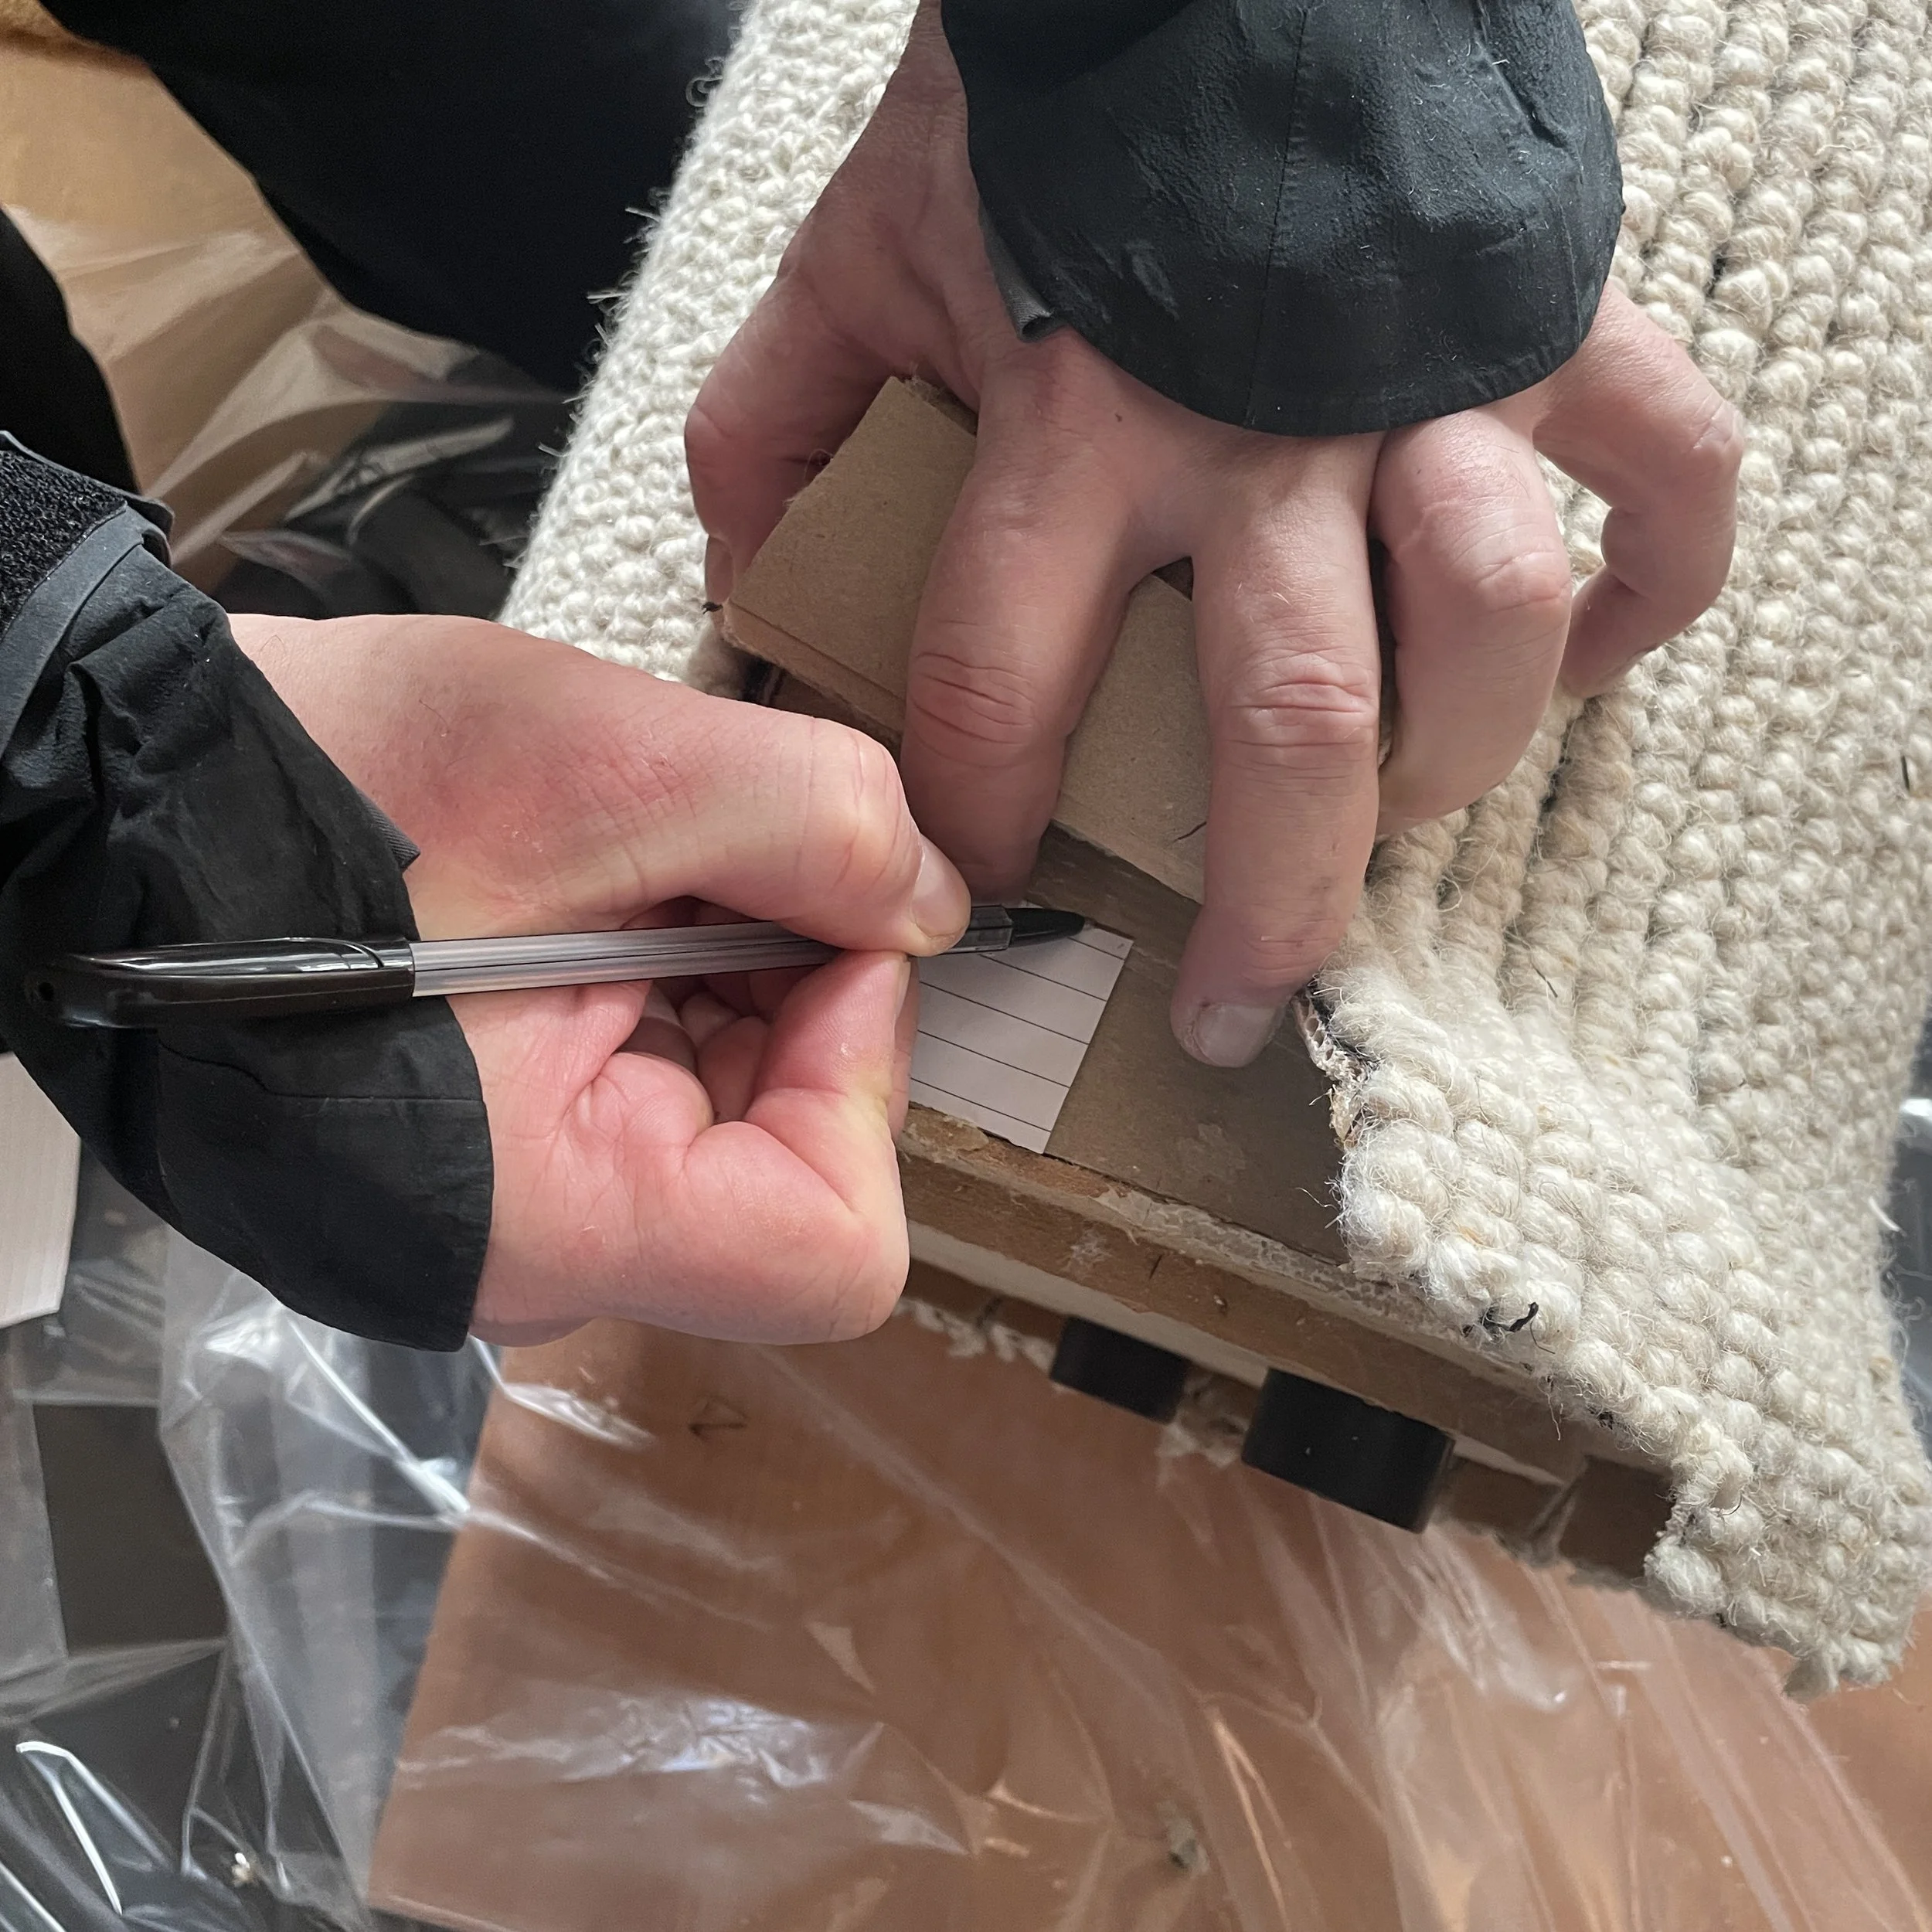
When measuring up if you don’t have a flat ruler to measure in from the edge youb can use a marked-up piece of paper to scribe the 4cm cut at the end of the tube, where the 5mm rebate of the end cap meets the tube - we could have marked up the paper at 45mm instead & scribed from the edge of the end cap, which would have been more intelligent.
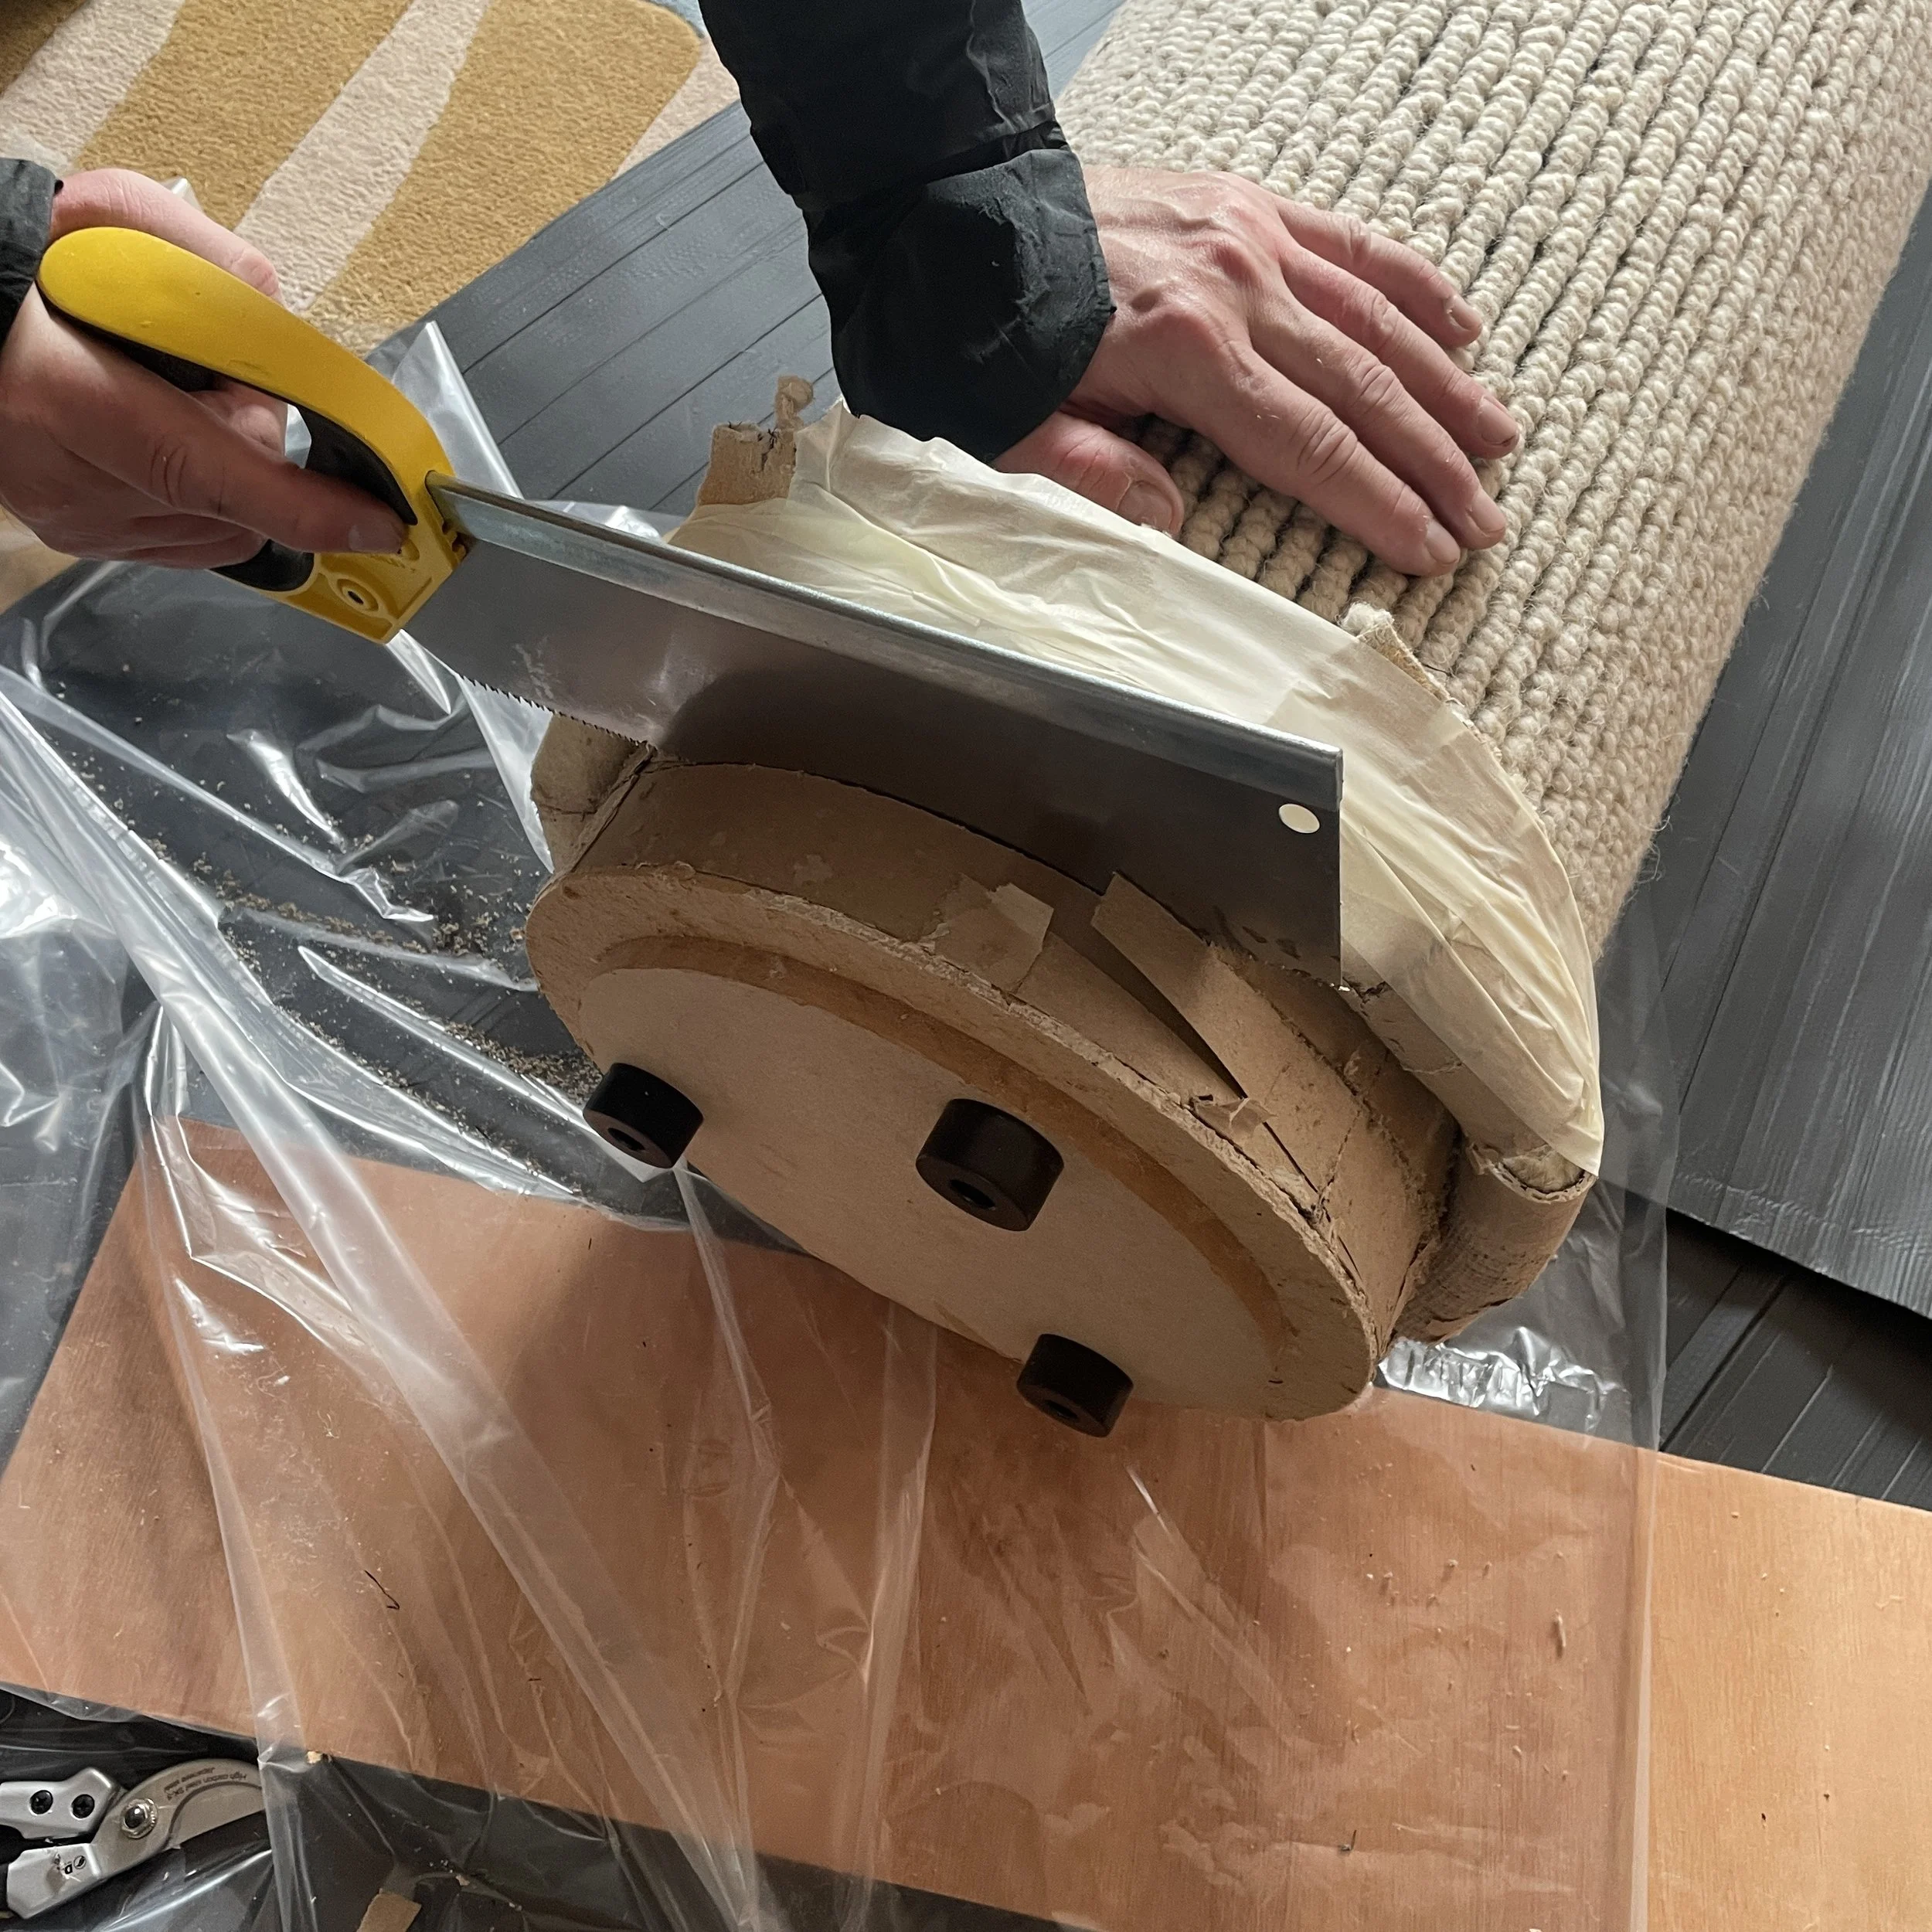
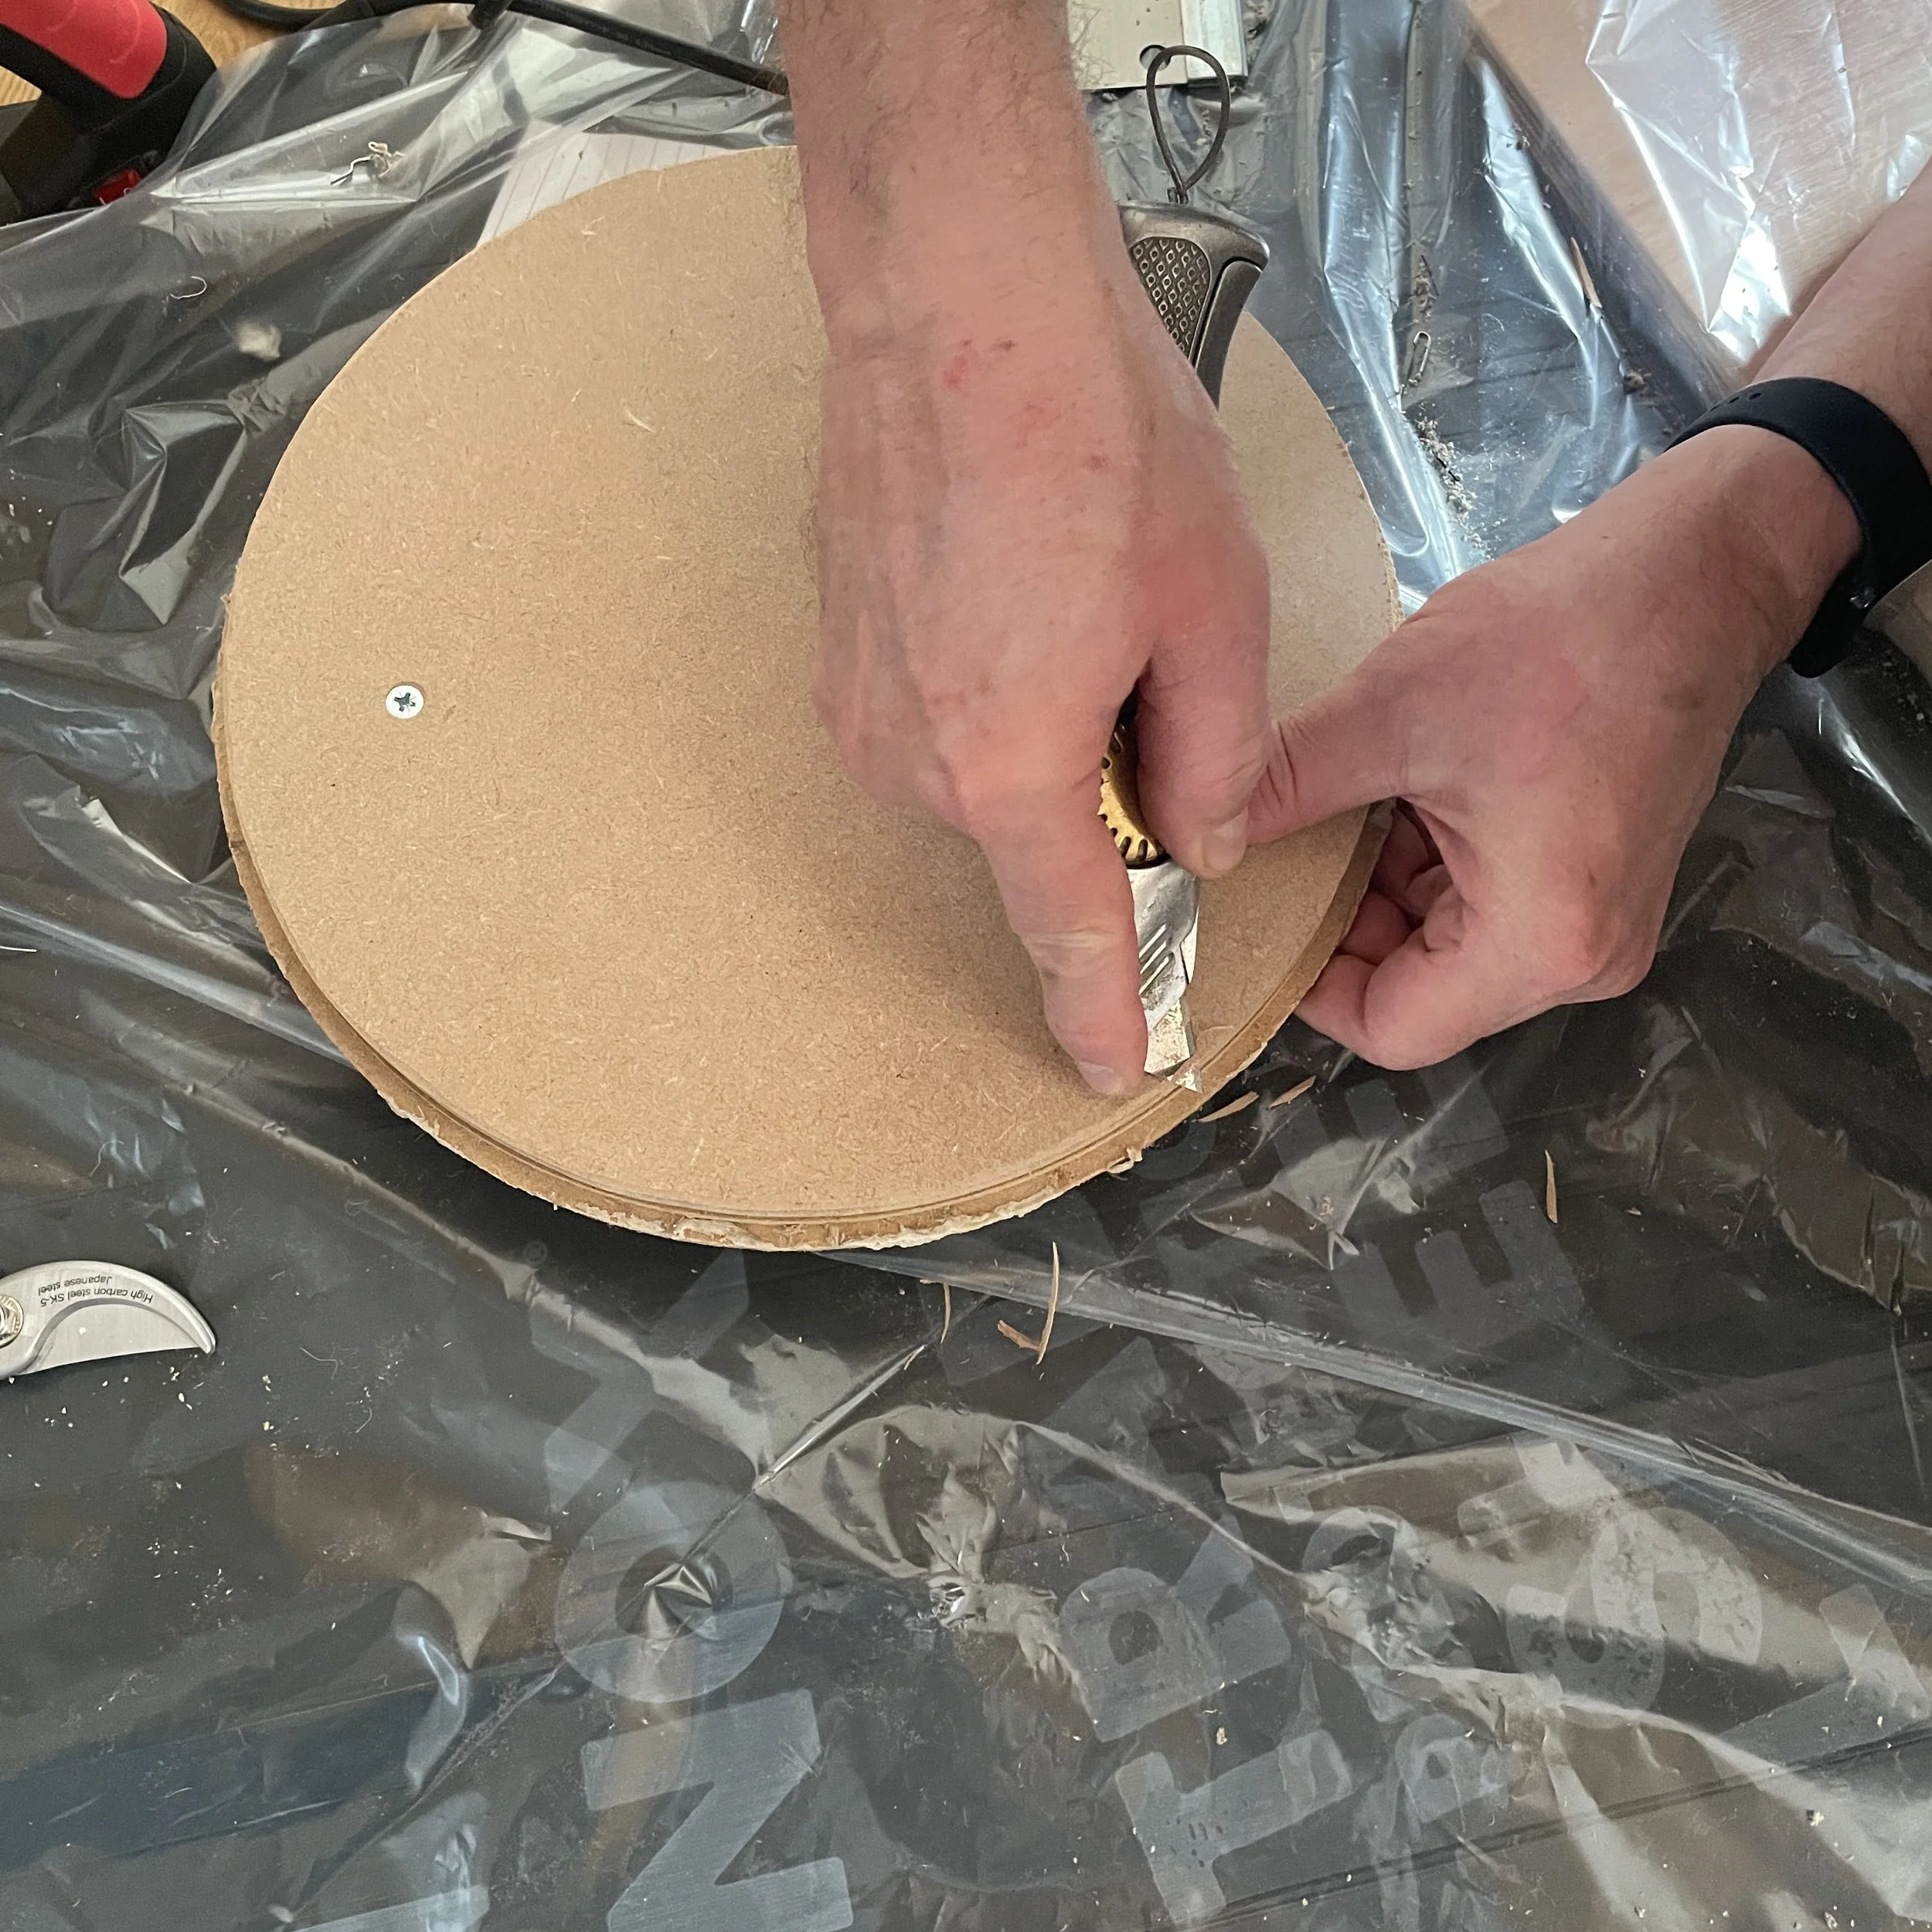
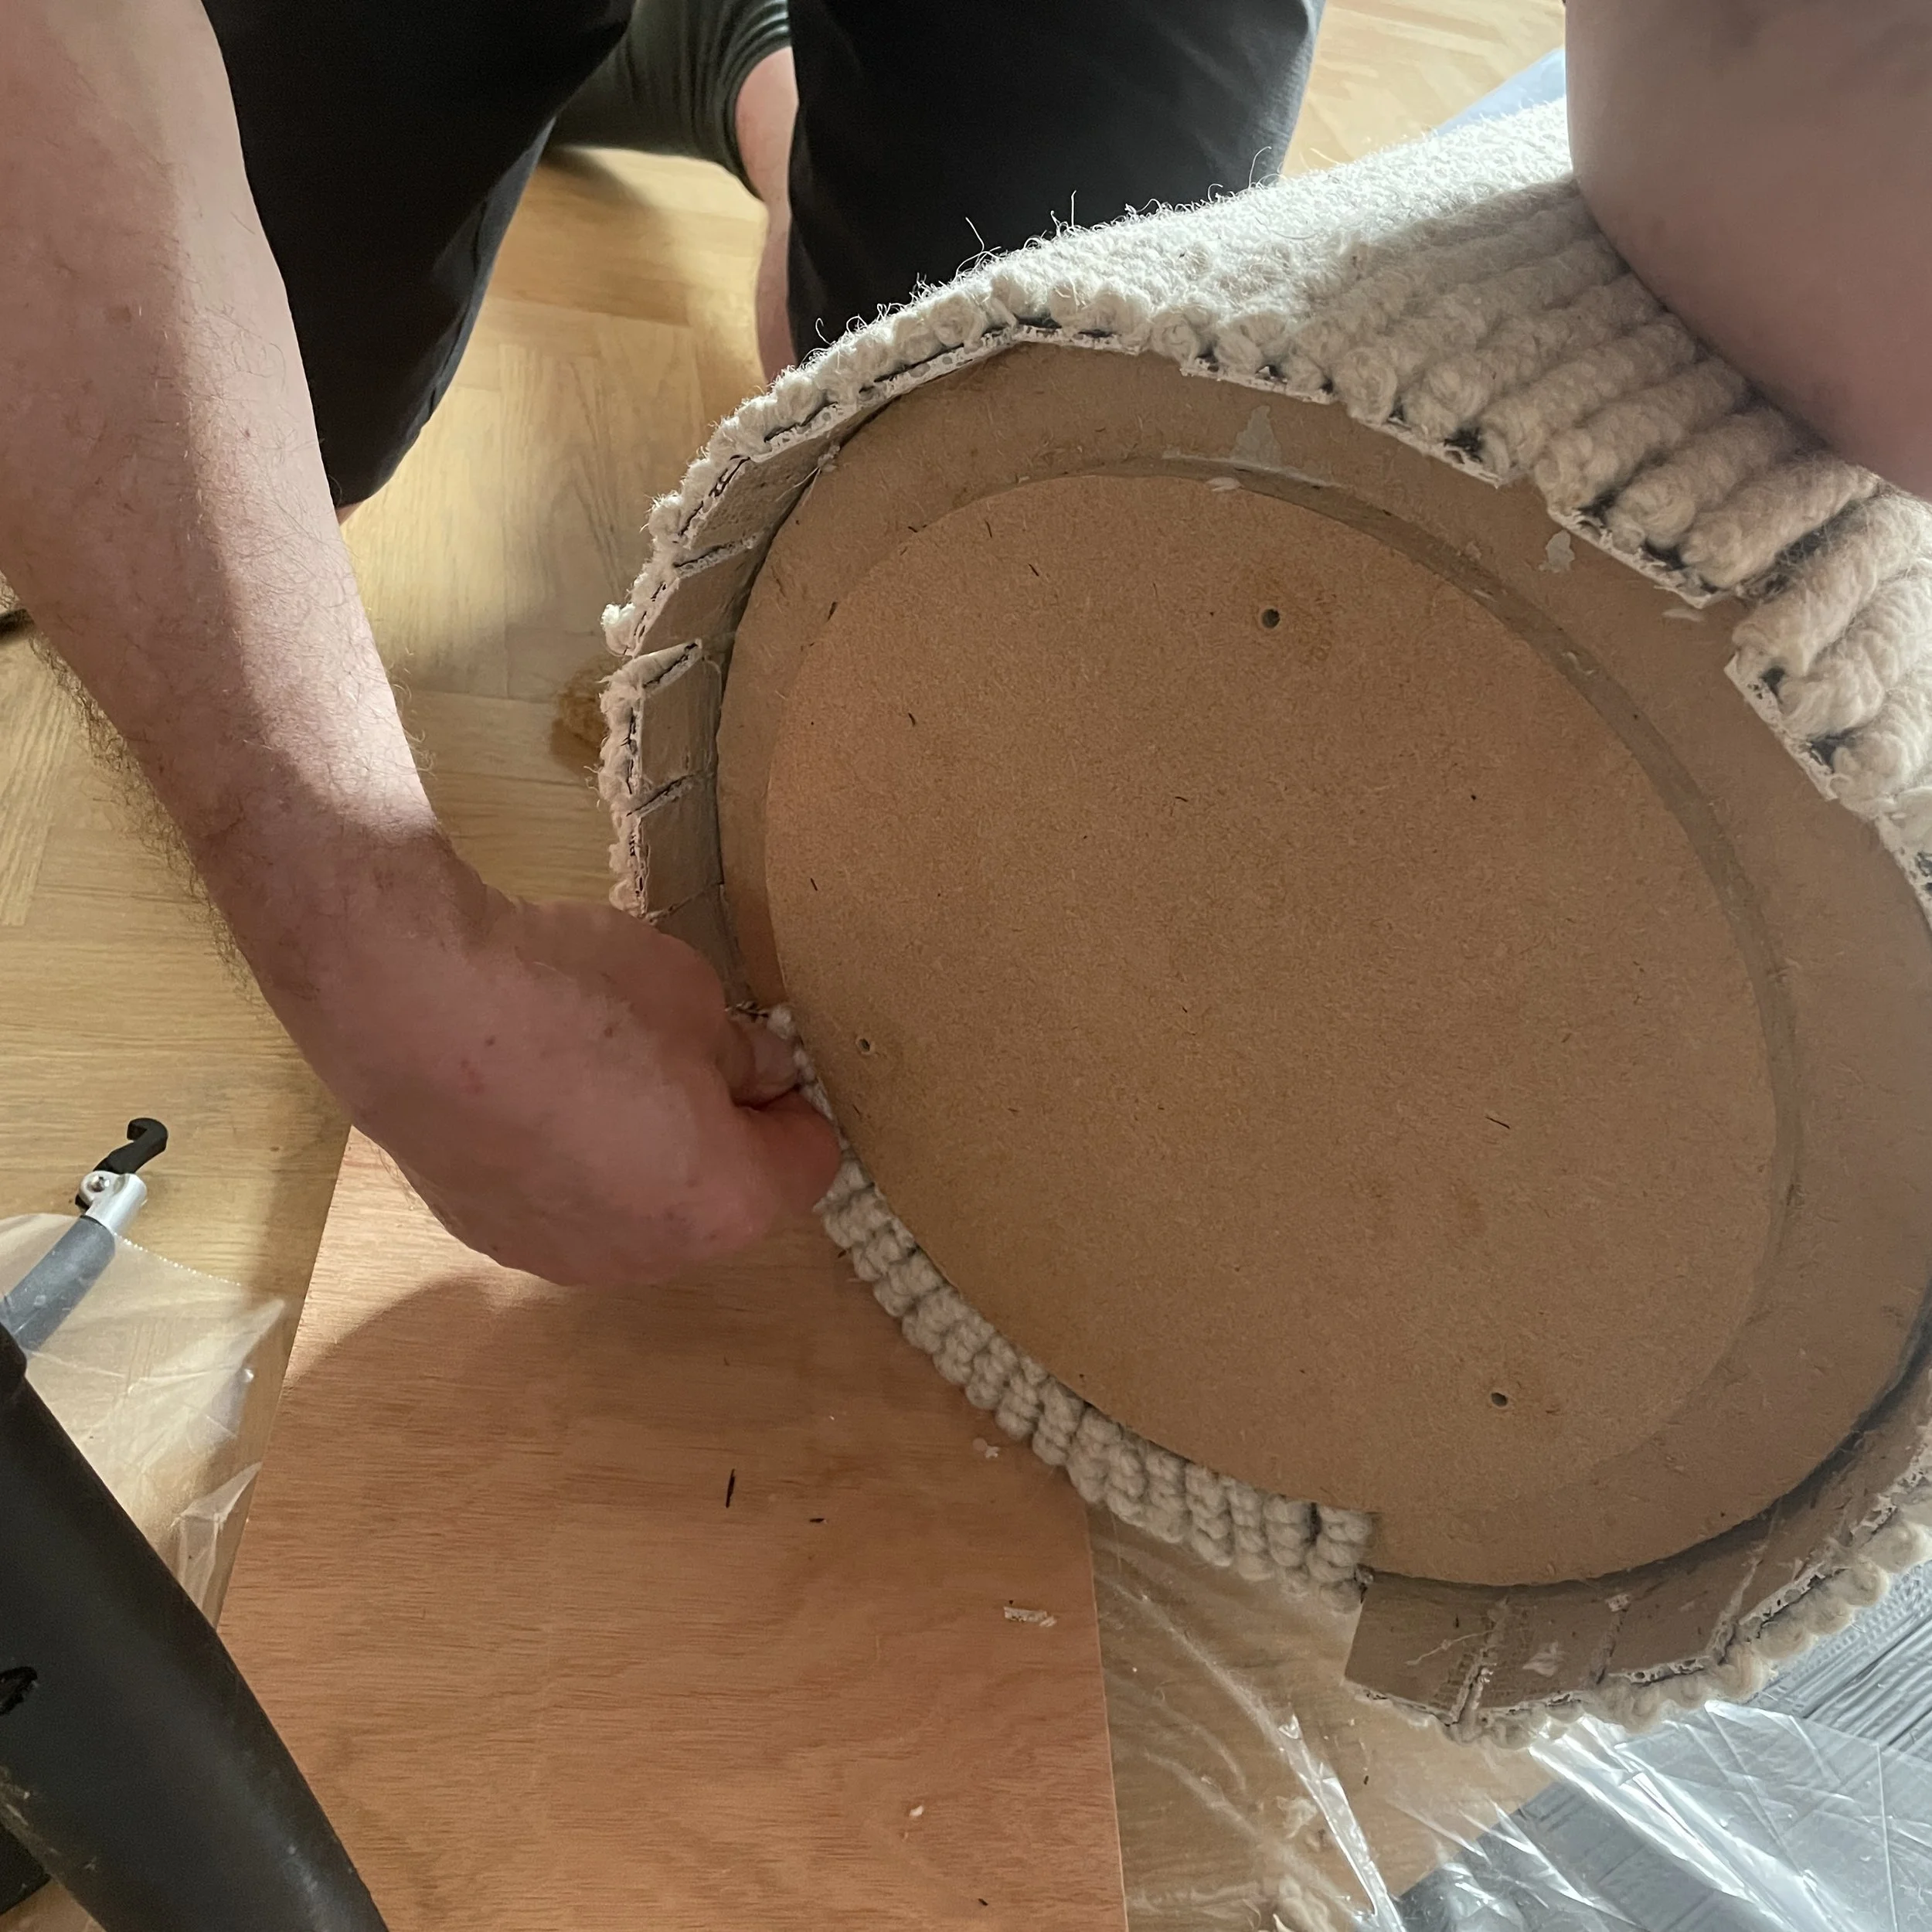
Once you’ve cut away the end cap remove the cardboard & clean up any glue spots & broken staples.
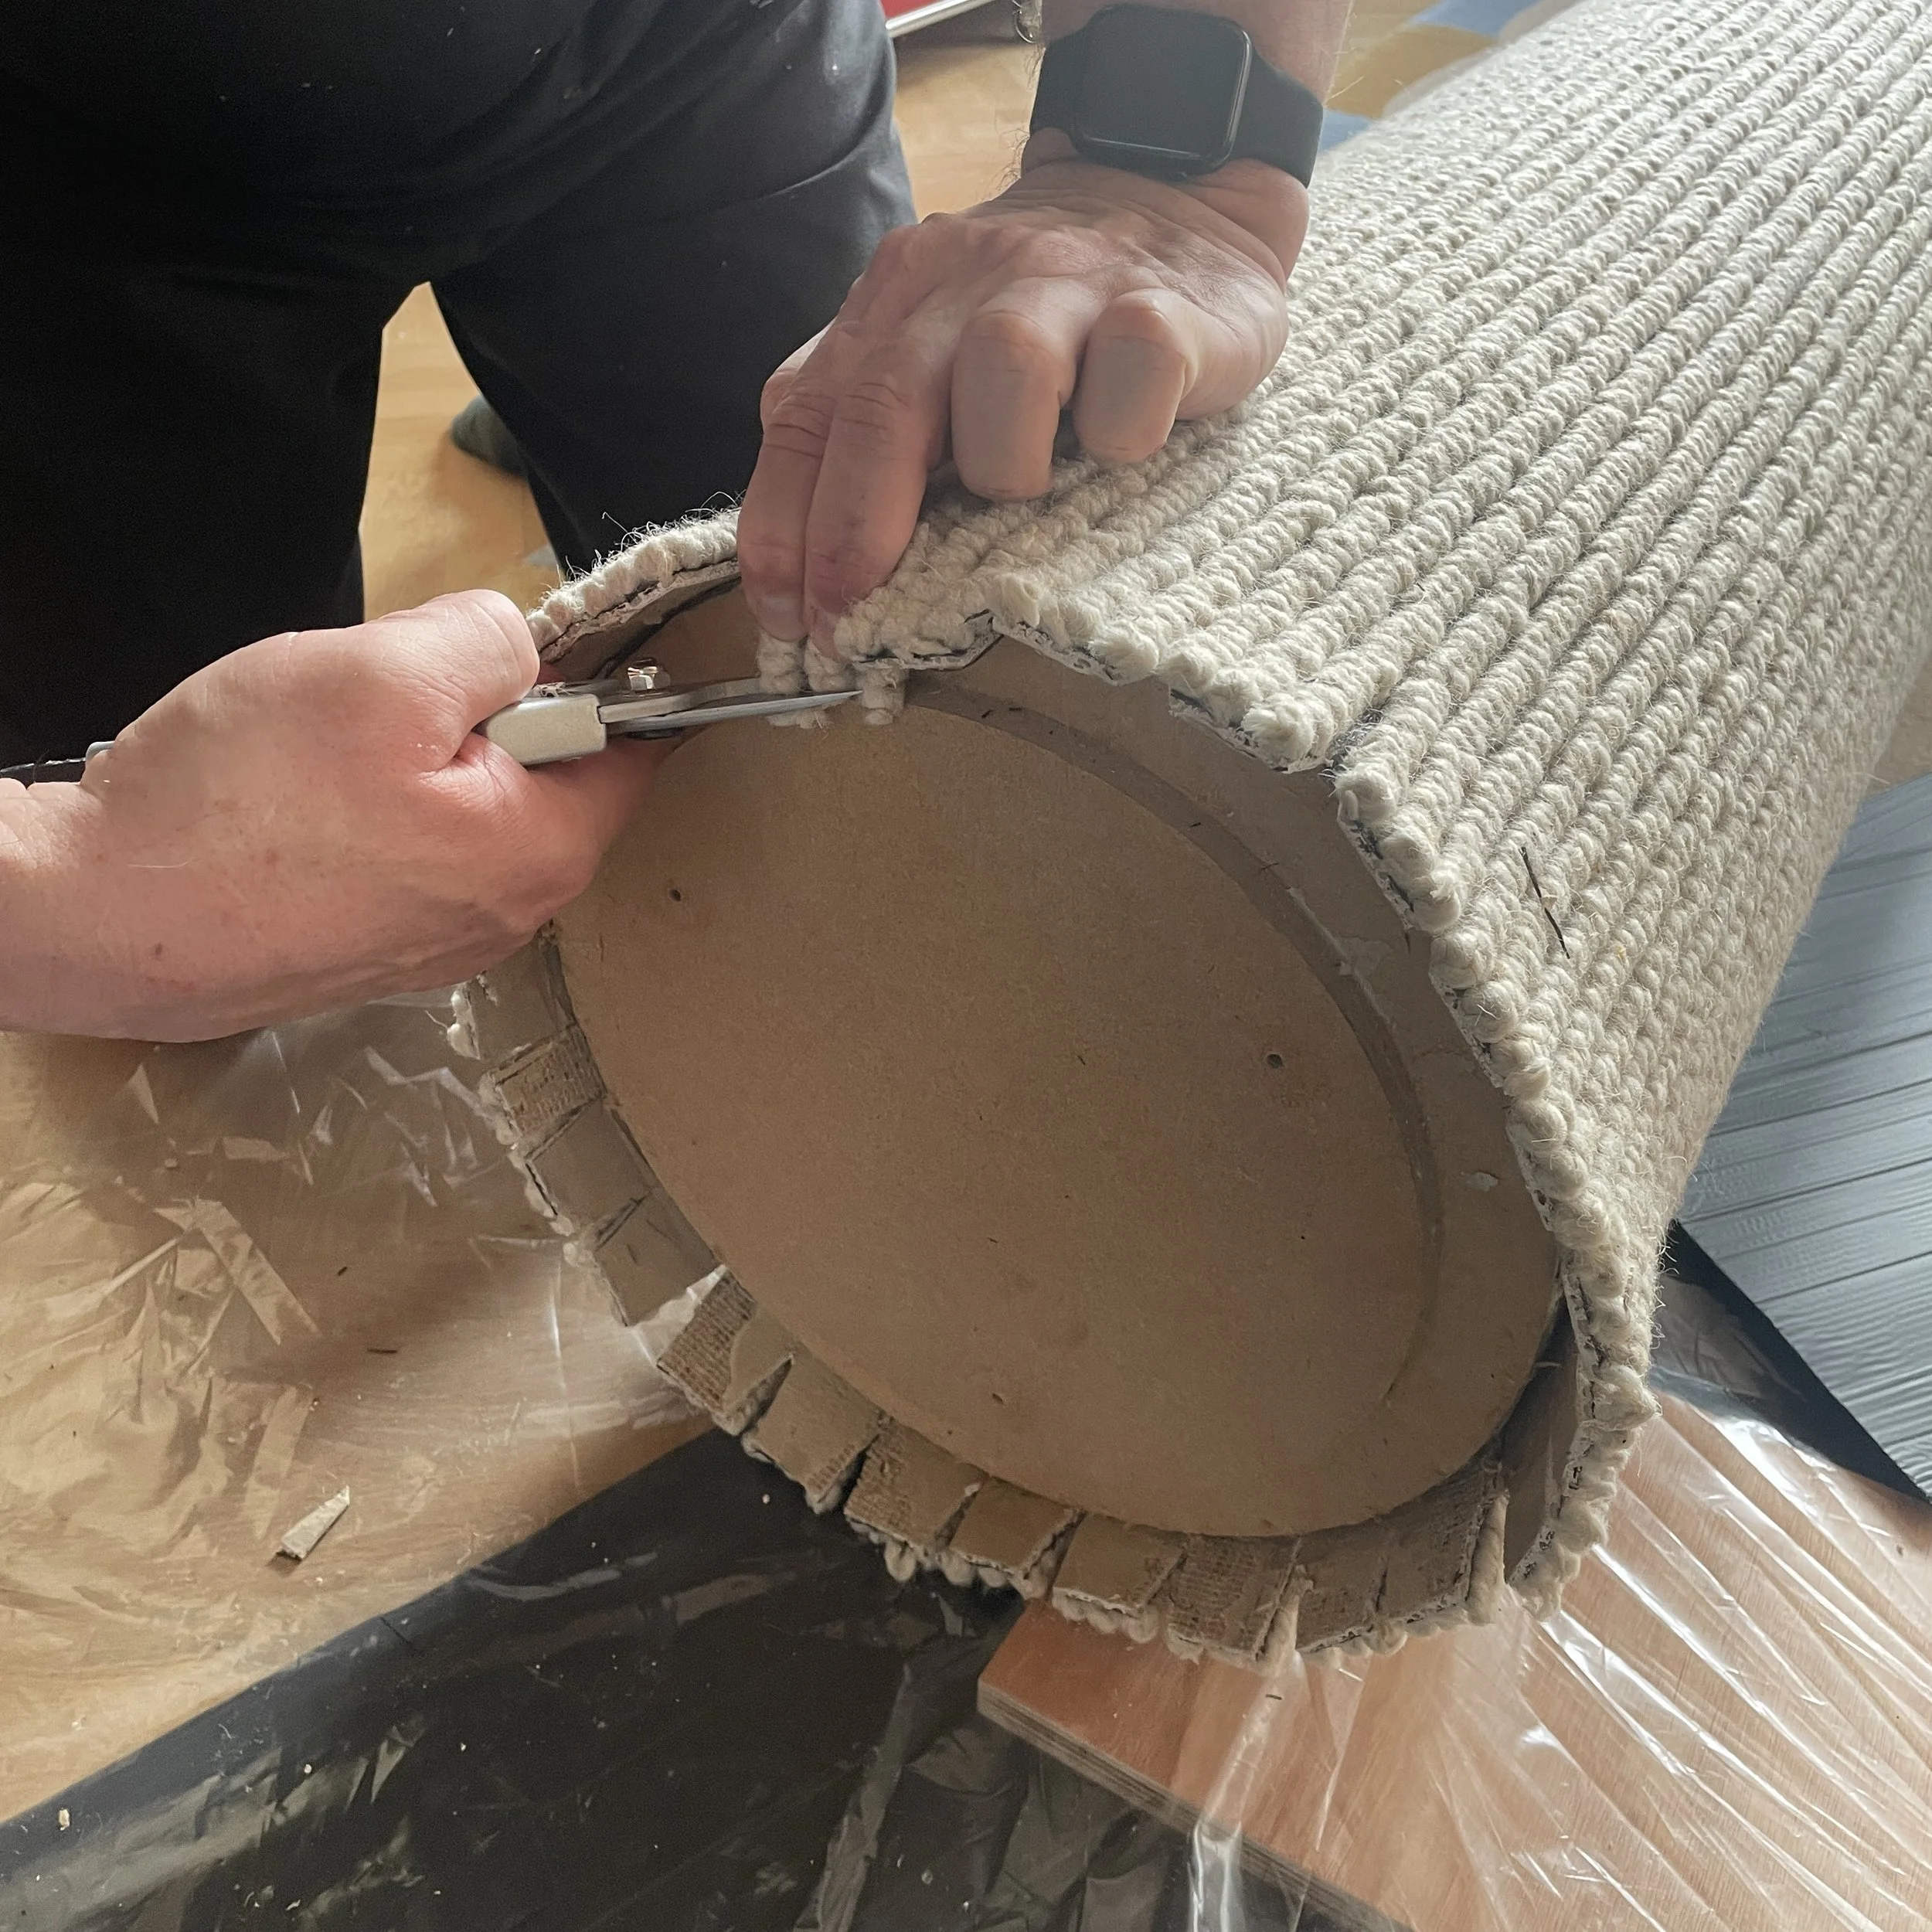
Re-installing the end cap will be tight so it’s best to cut a chamfered edge around the cap so that it easier to locate.
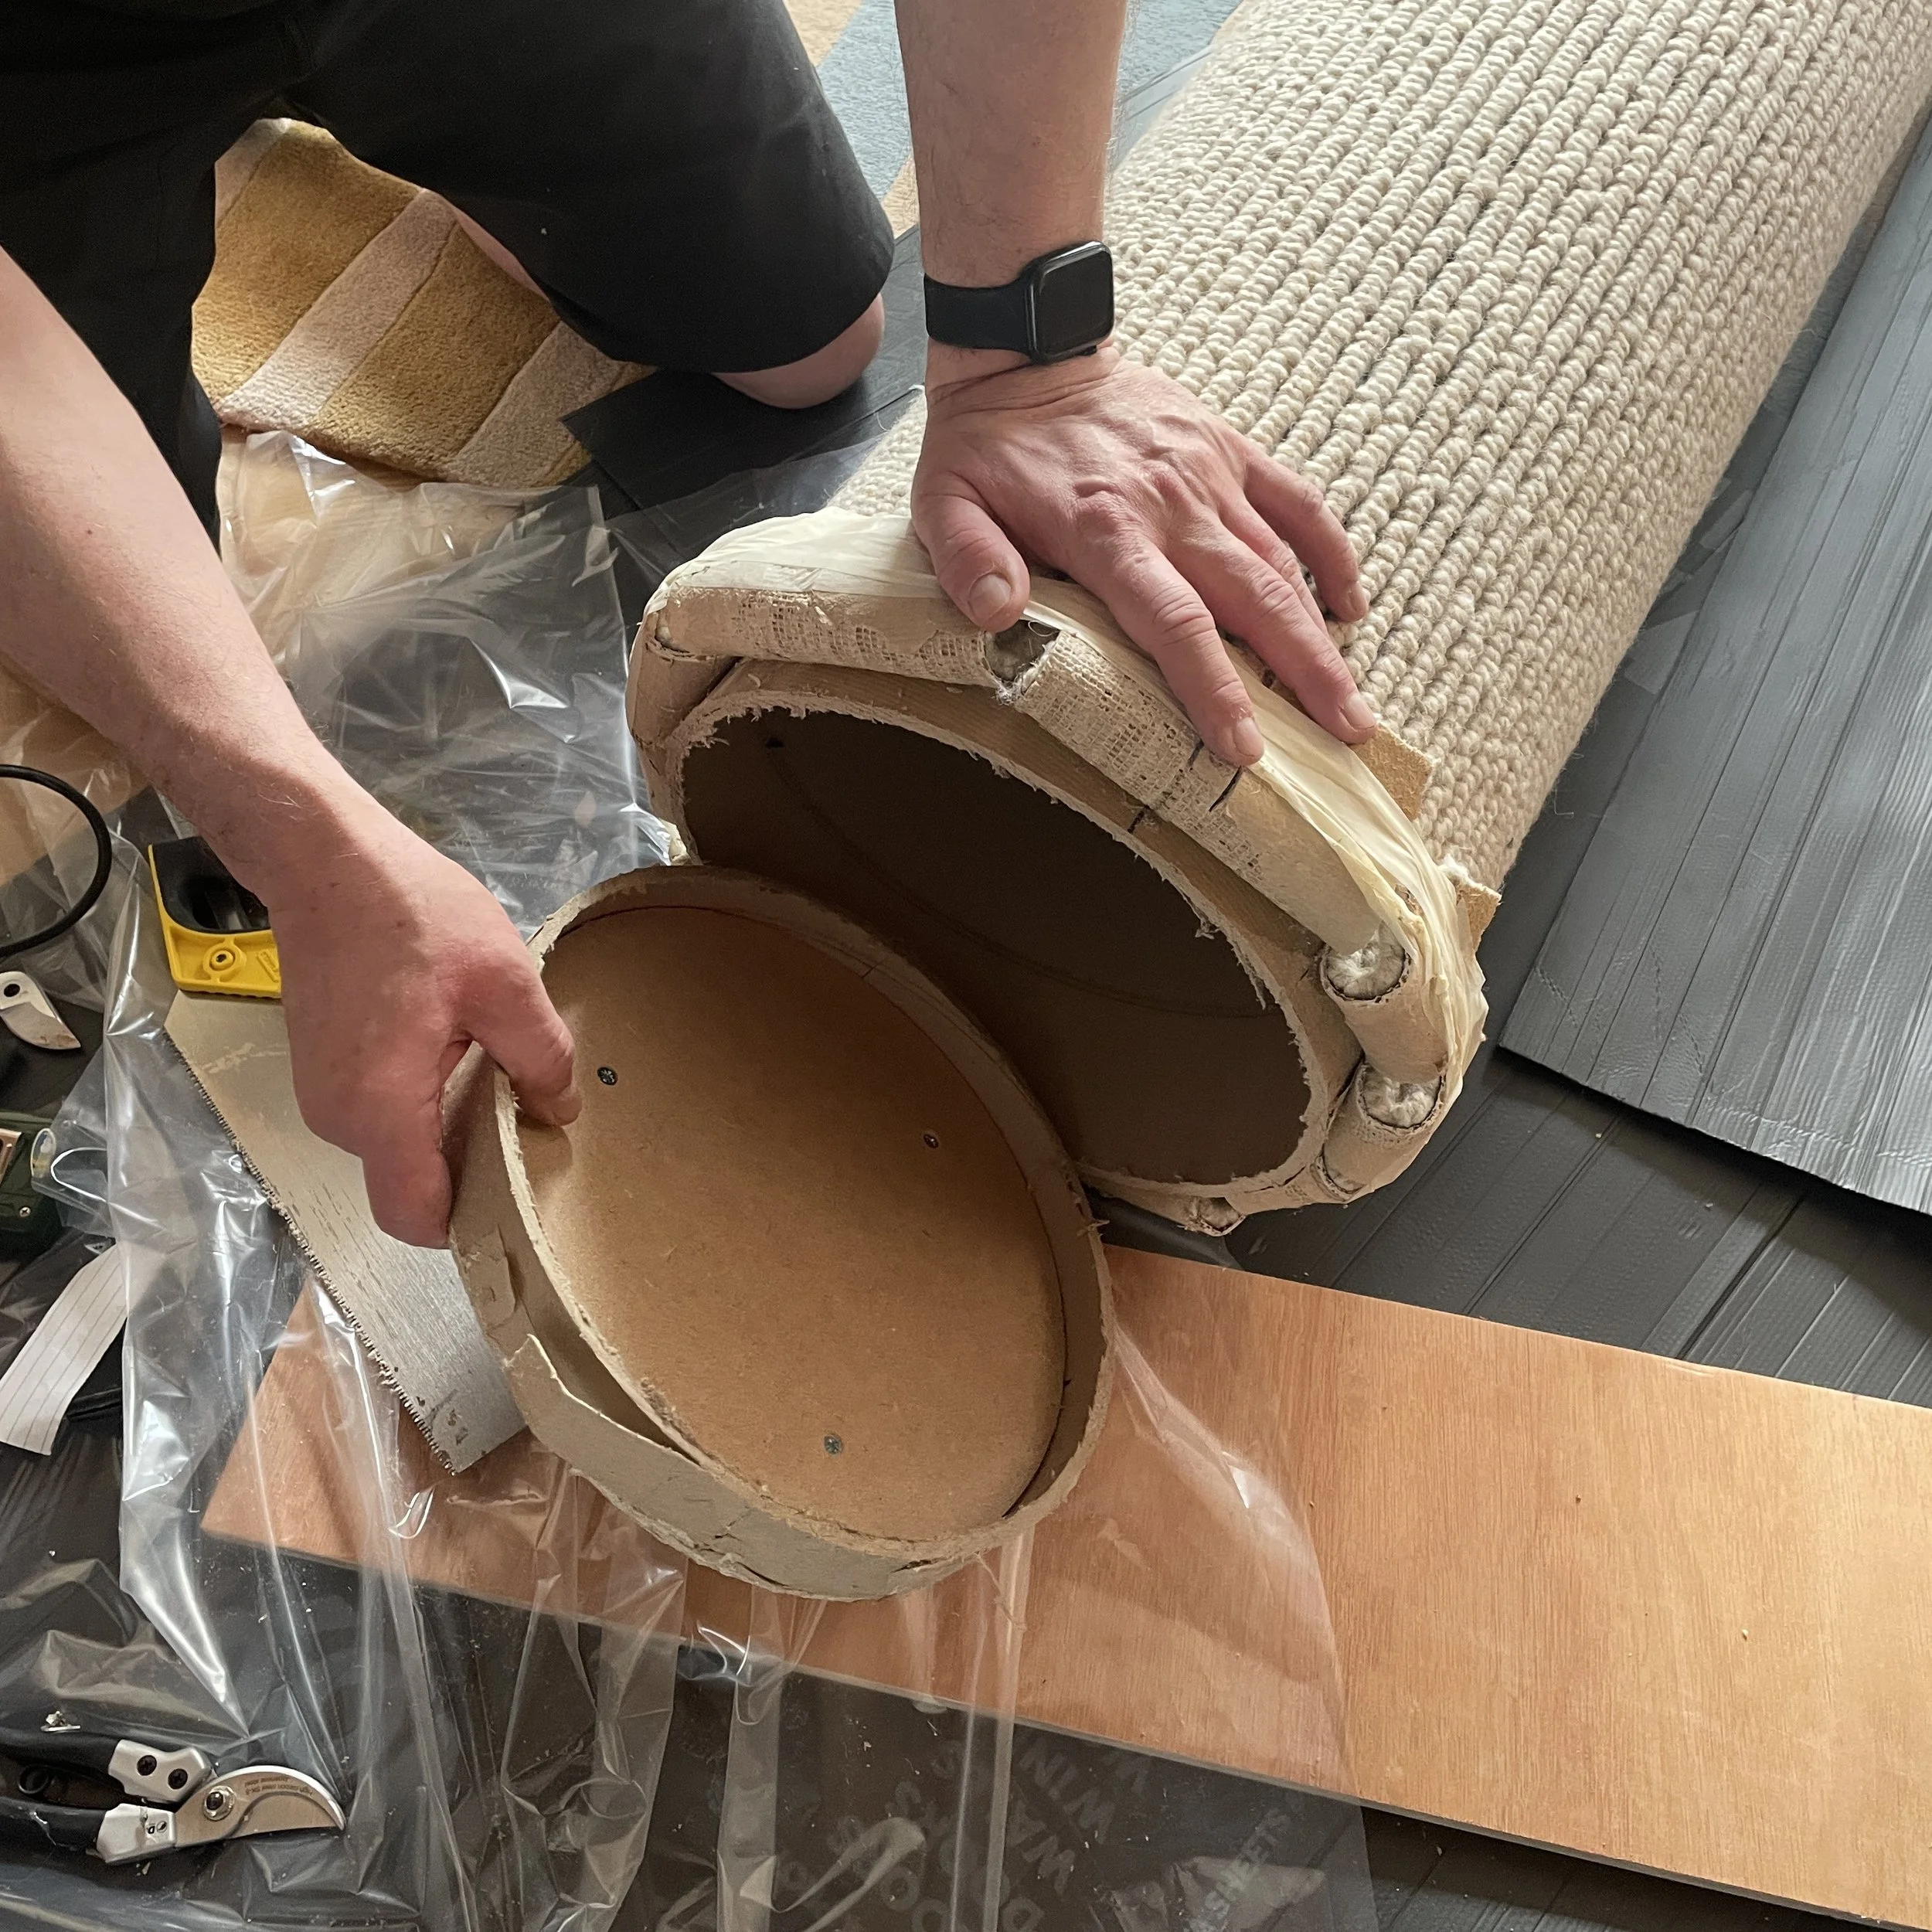
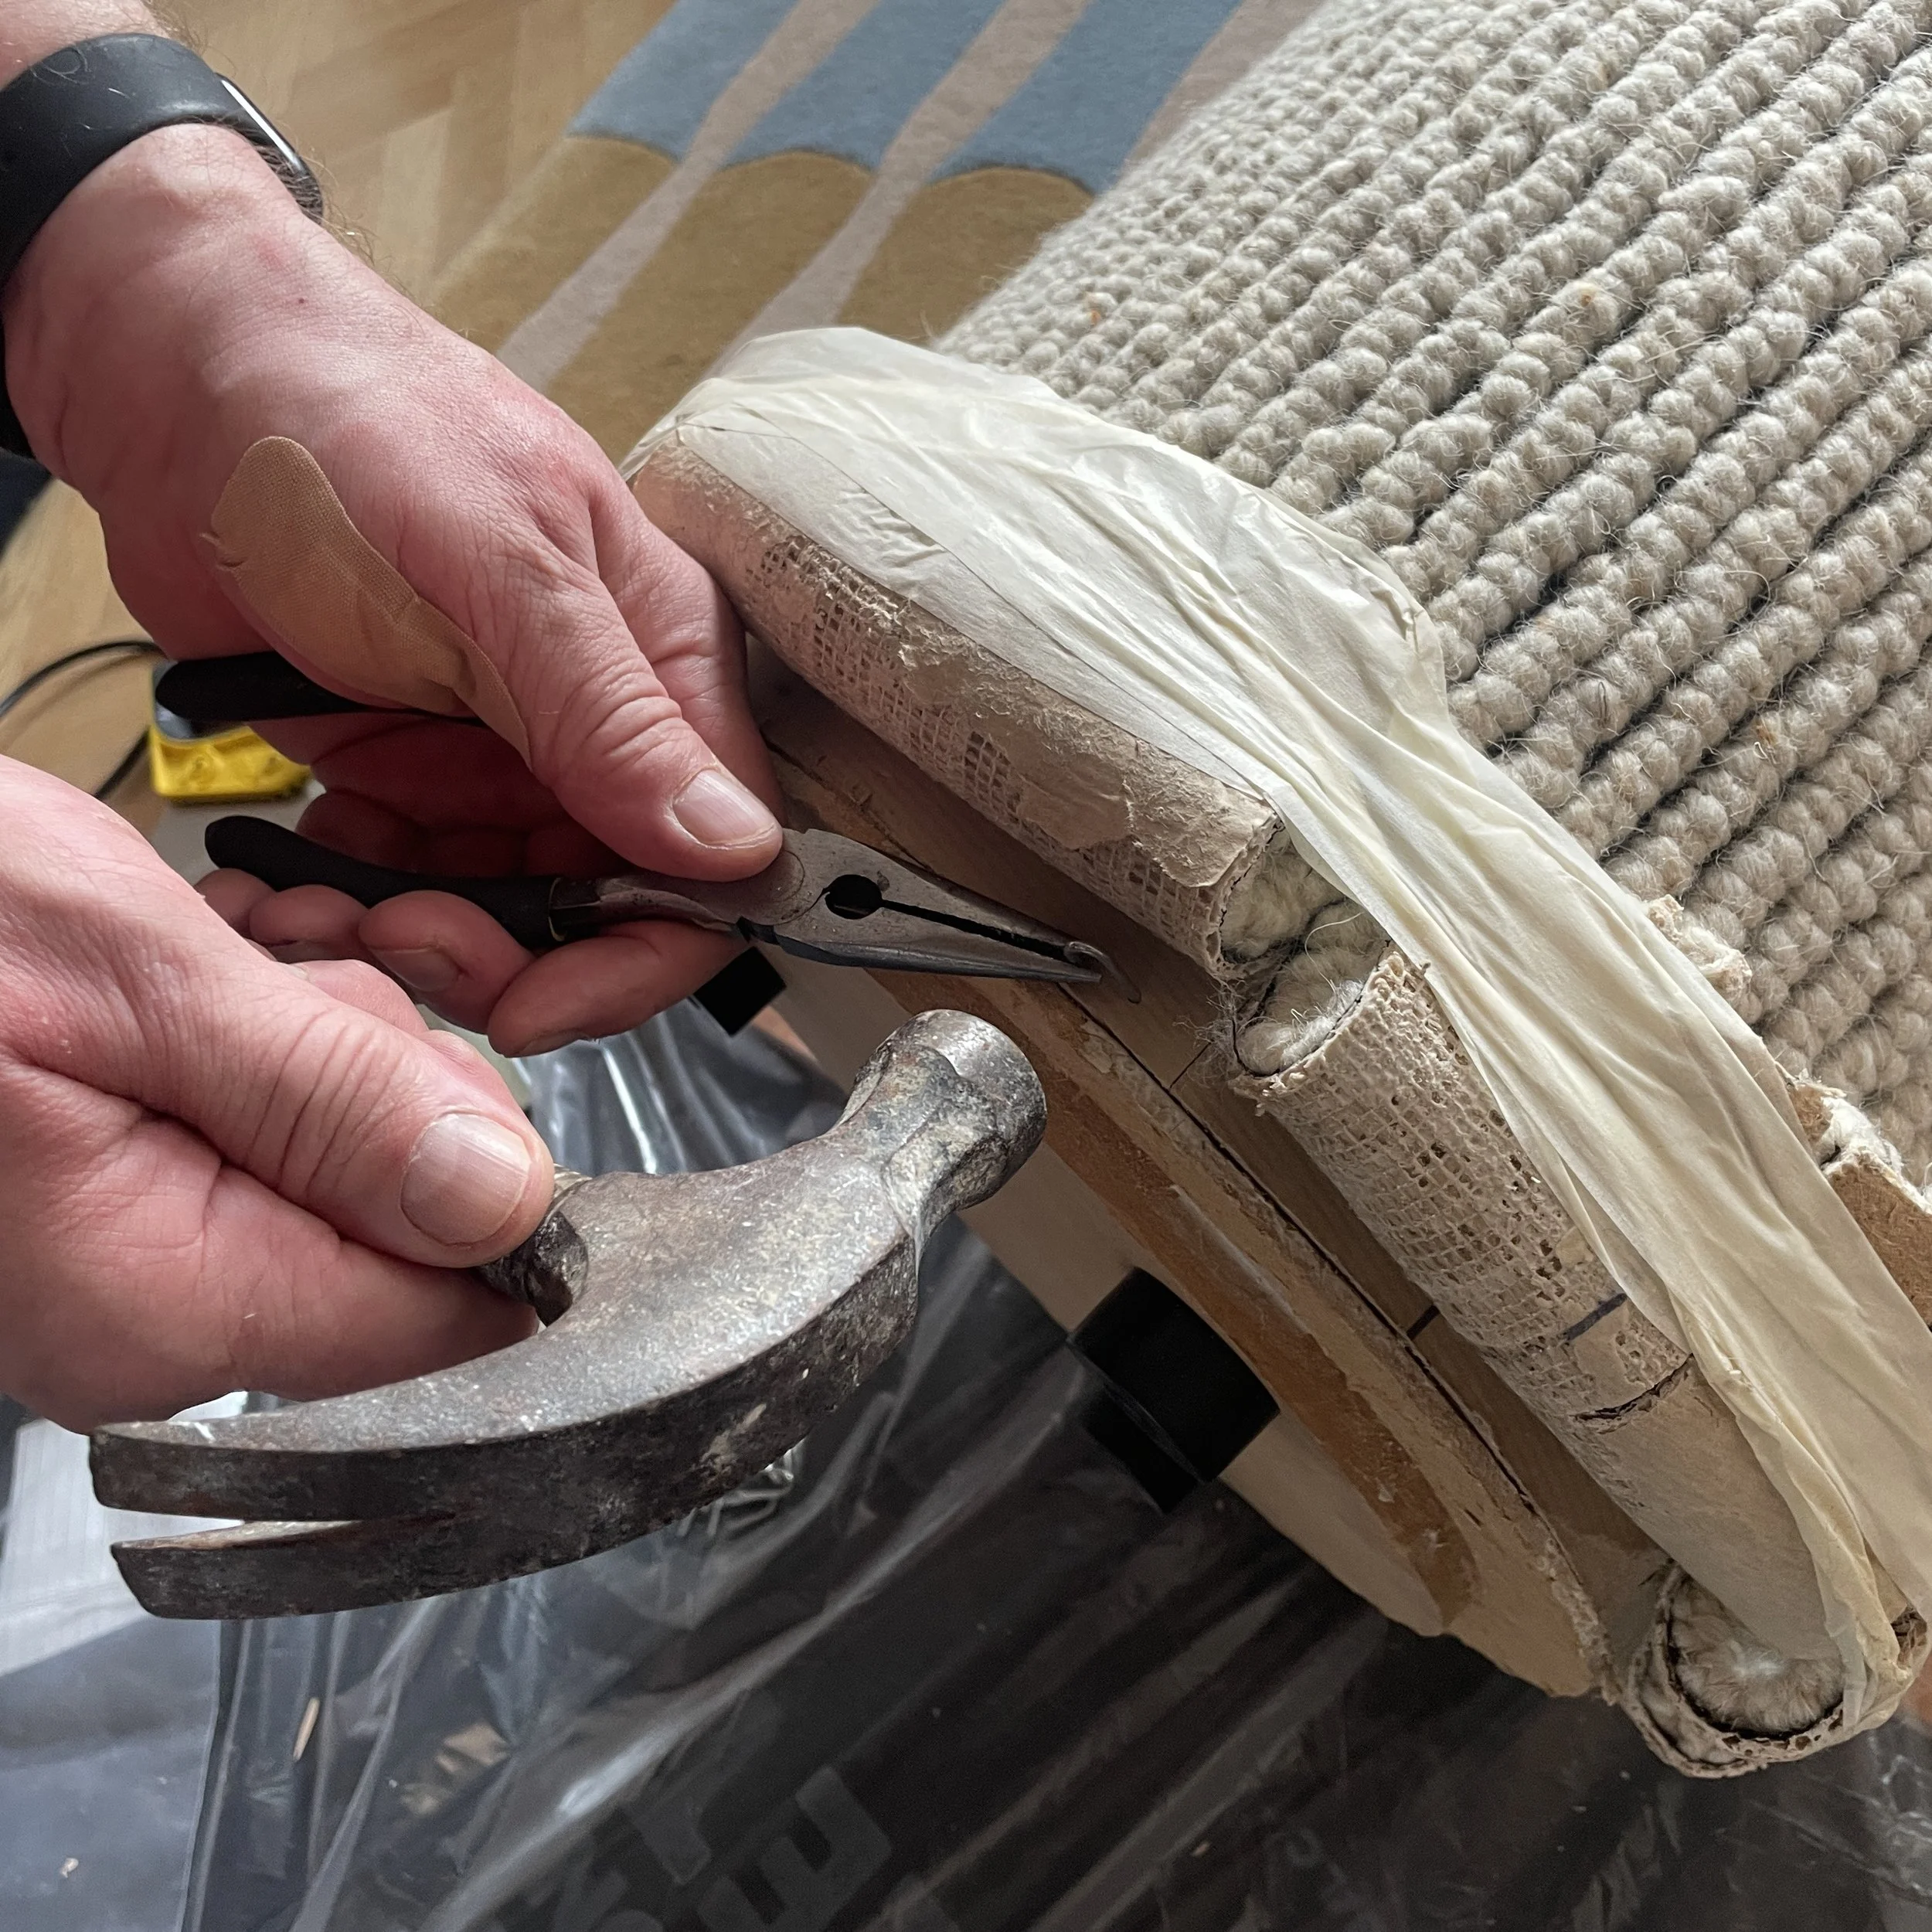
Once installed use staples to fix the end cap in place & then trim back the overlapping carpet using the edge of the collar on the end cap to form the new wrapped end detail - we found it easier to hammer the staples whilst using a pair of pliers to hold them in place.
NB it’s not absolutely essential to fix the collar if you have a snug fit but if you want to & don’t have staples you can use contact adhesive to glue the end cap into the tube.
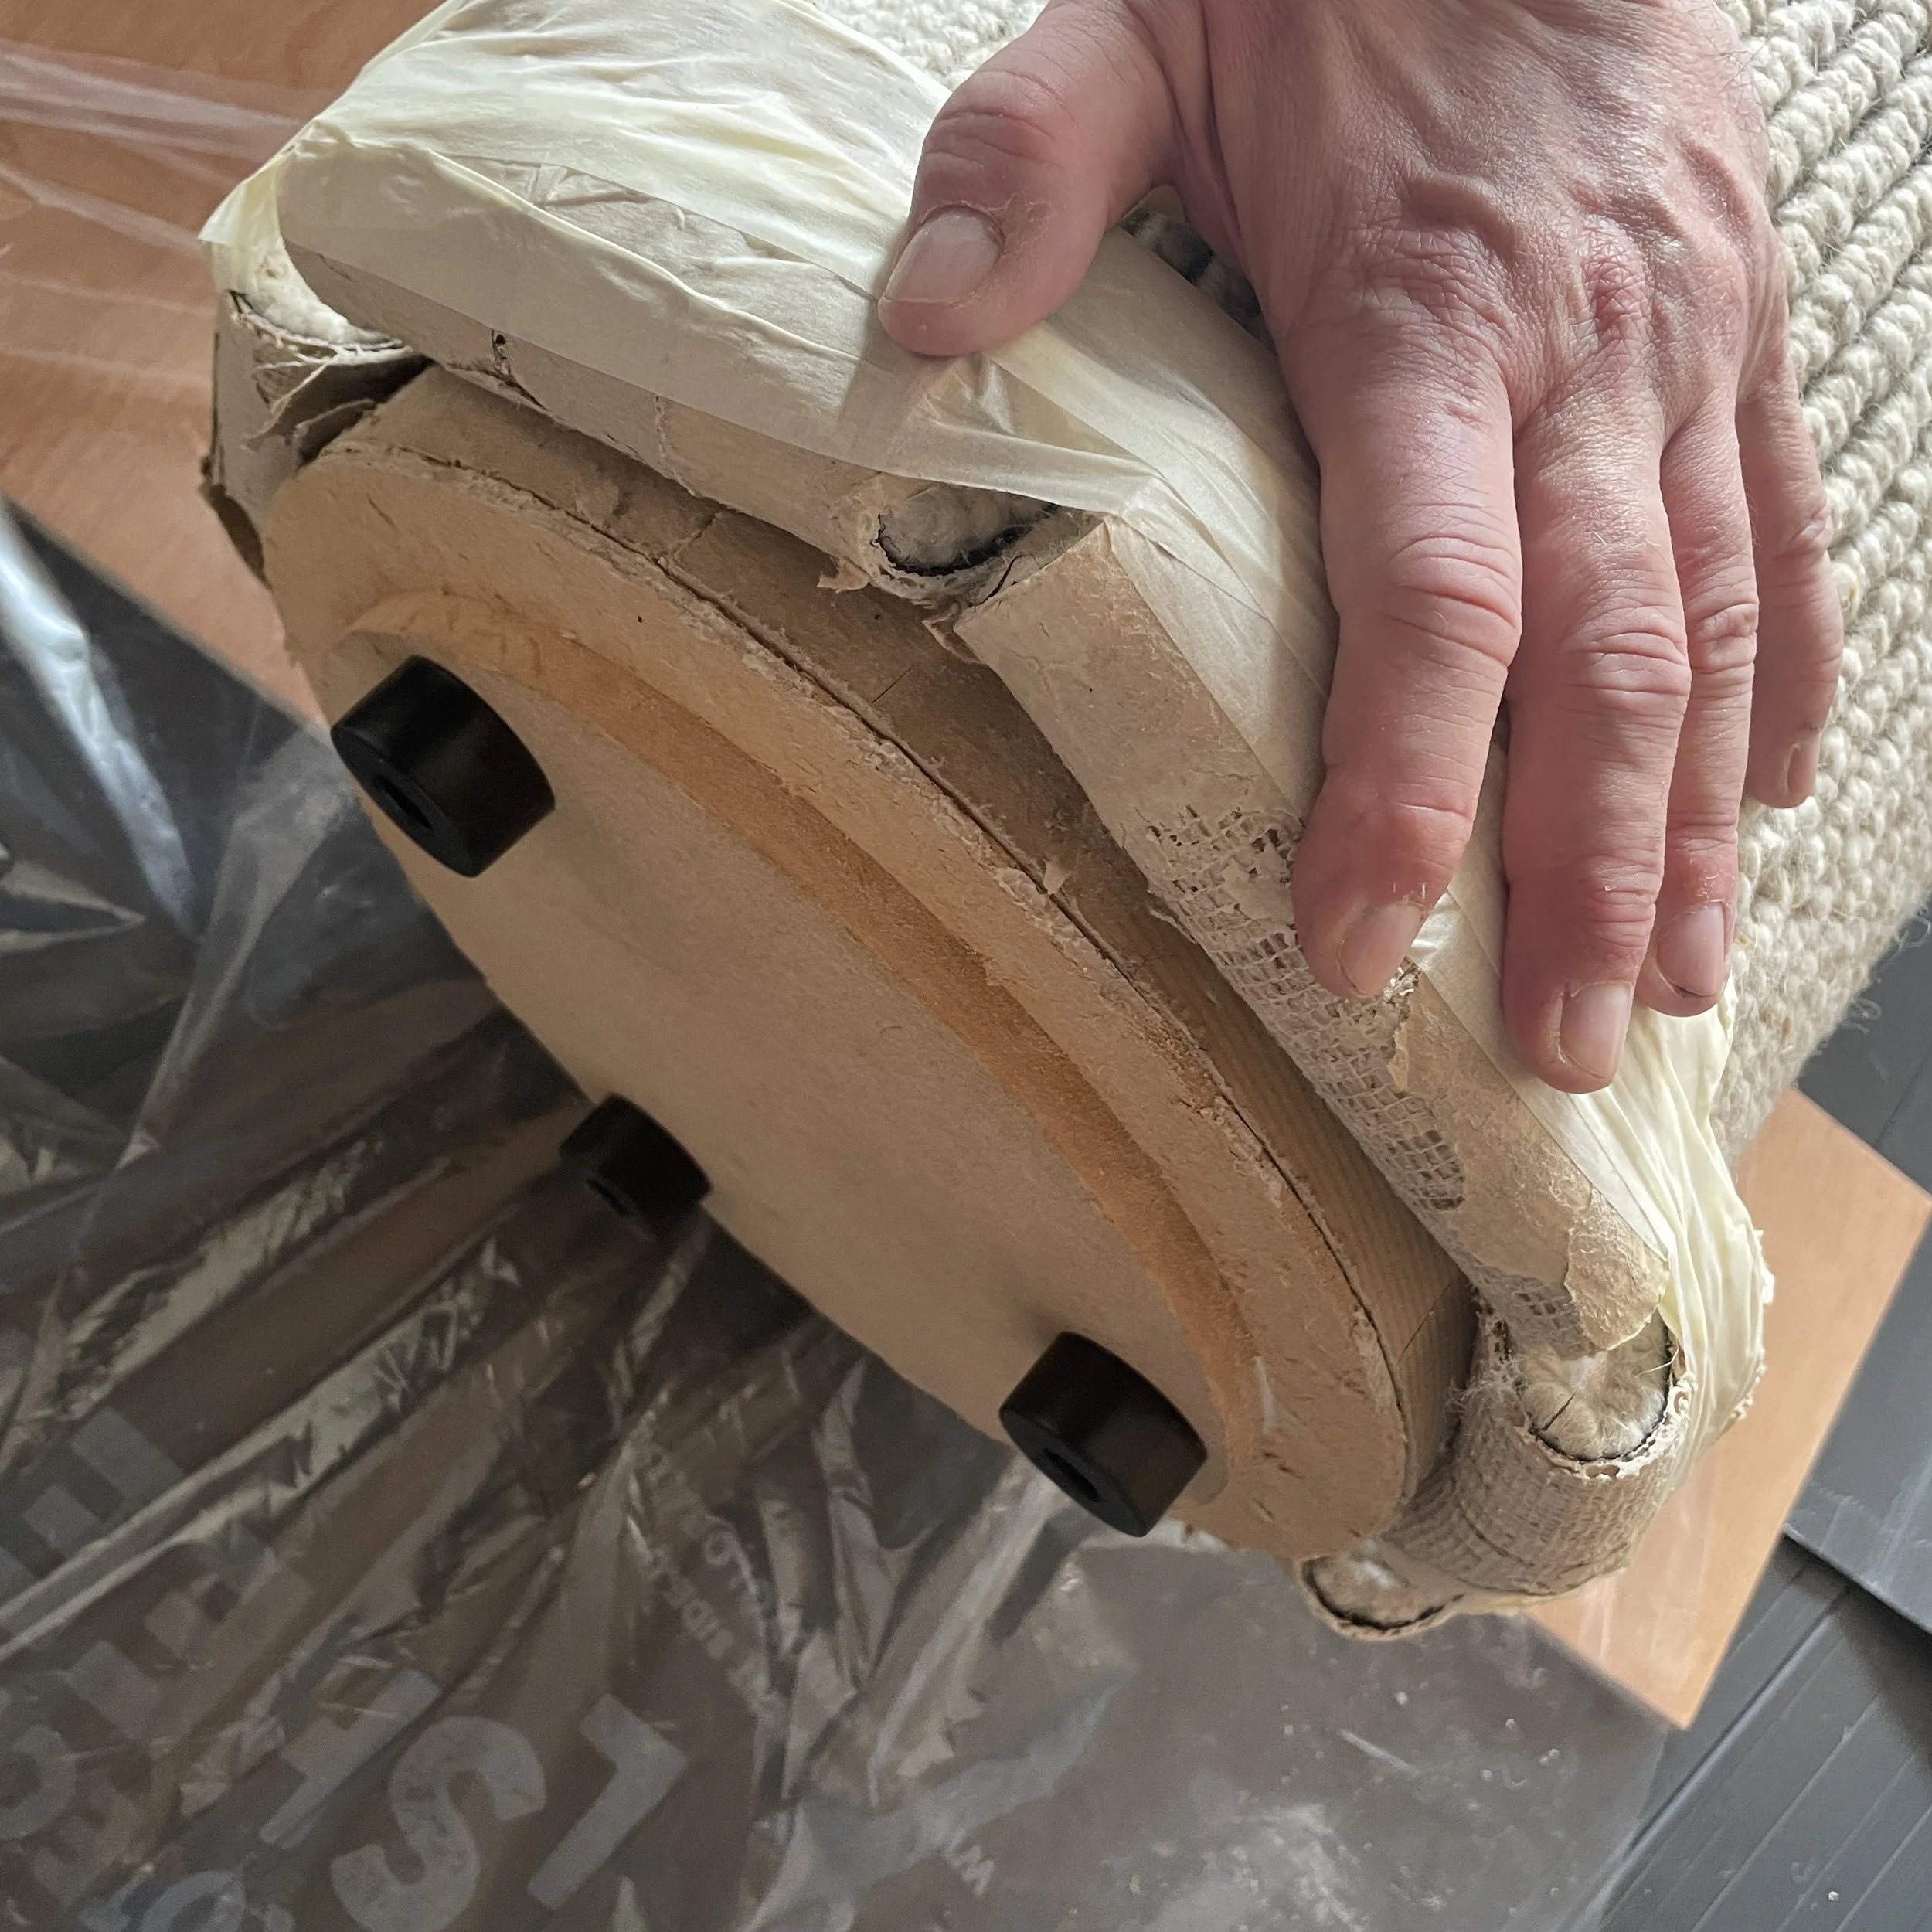
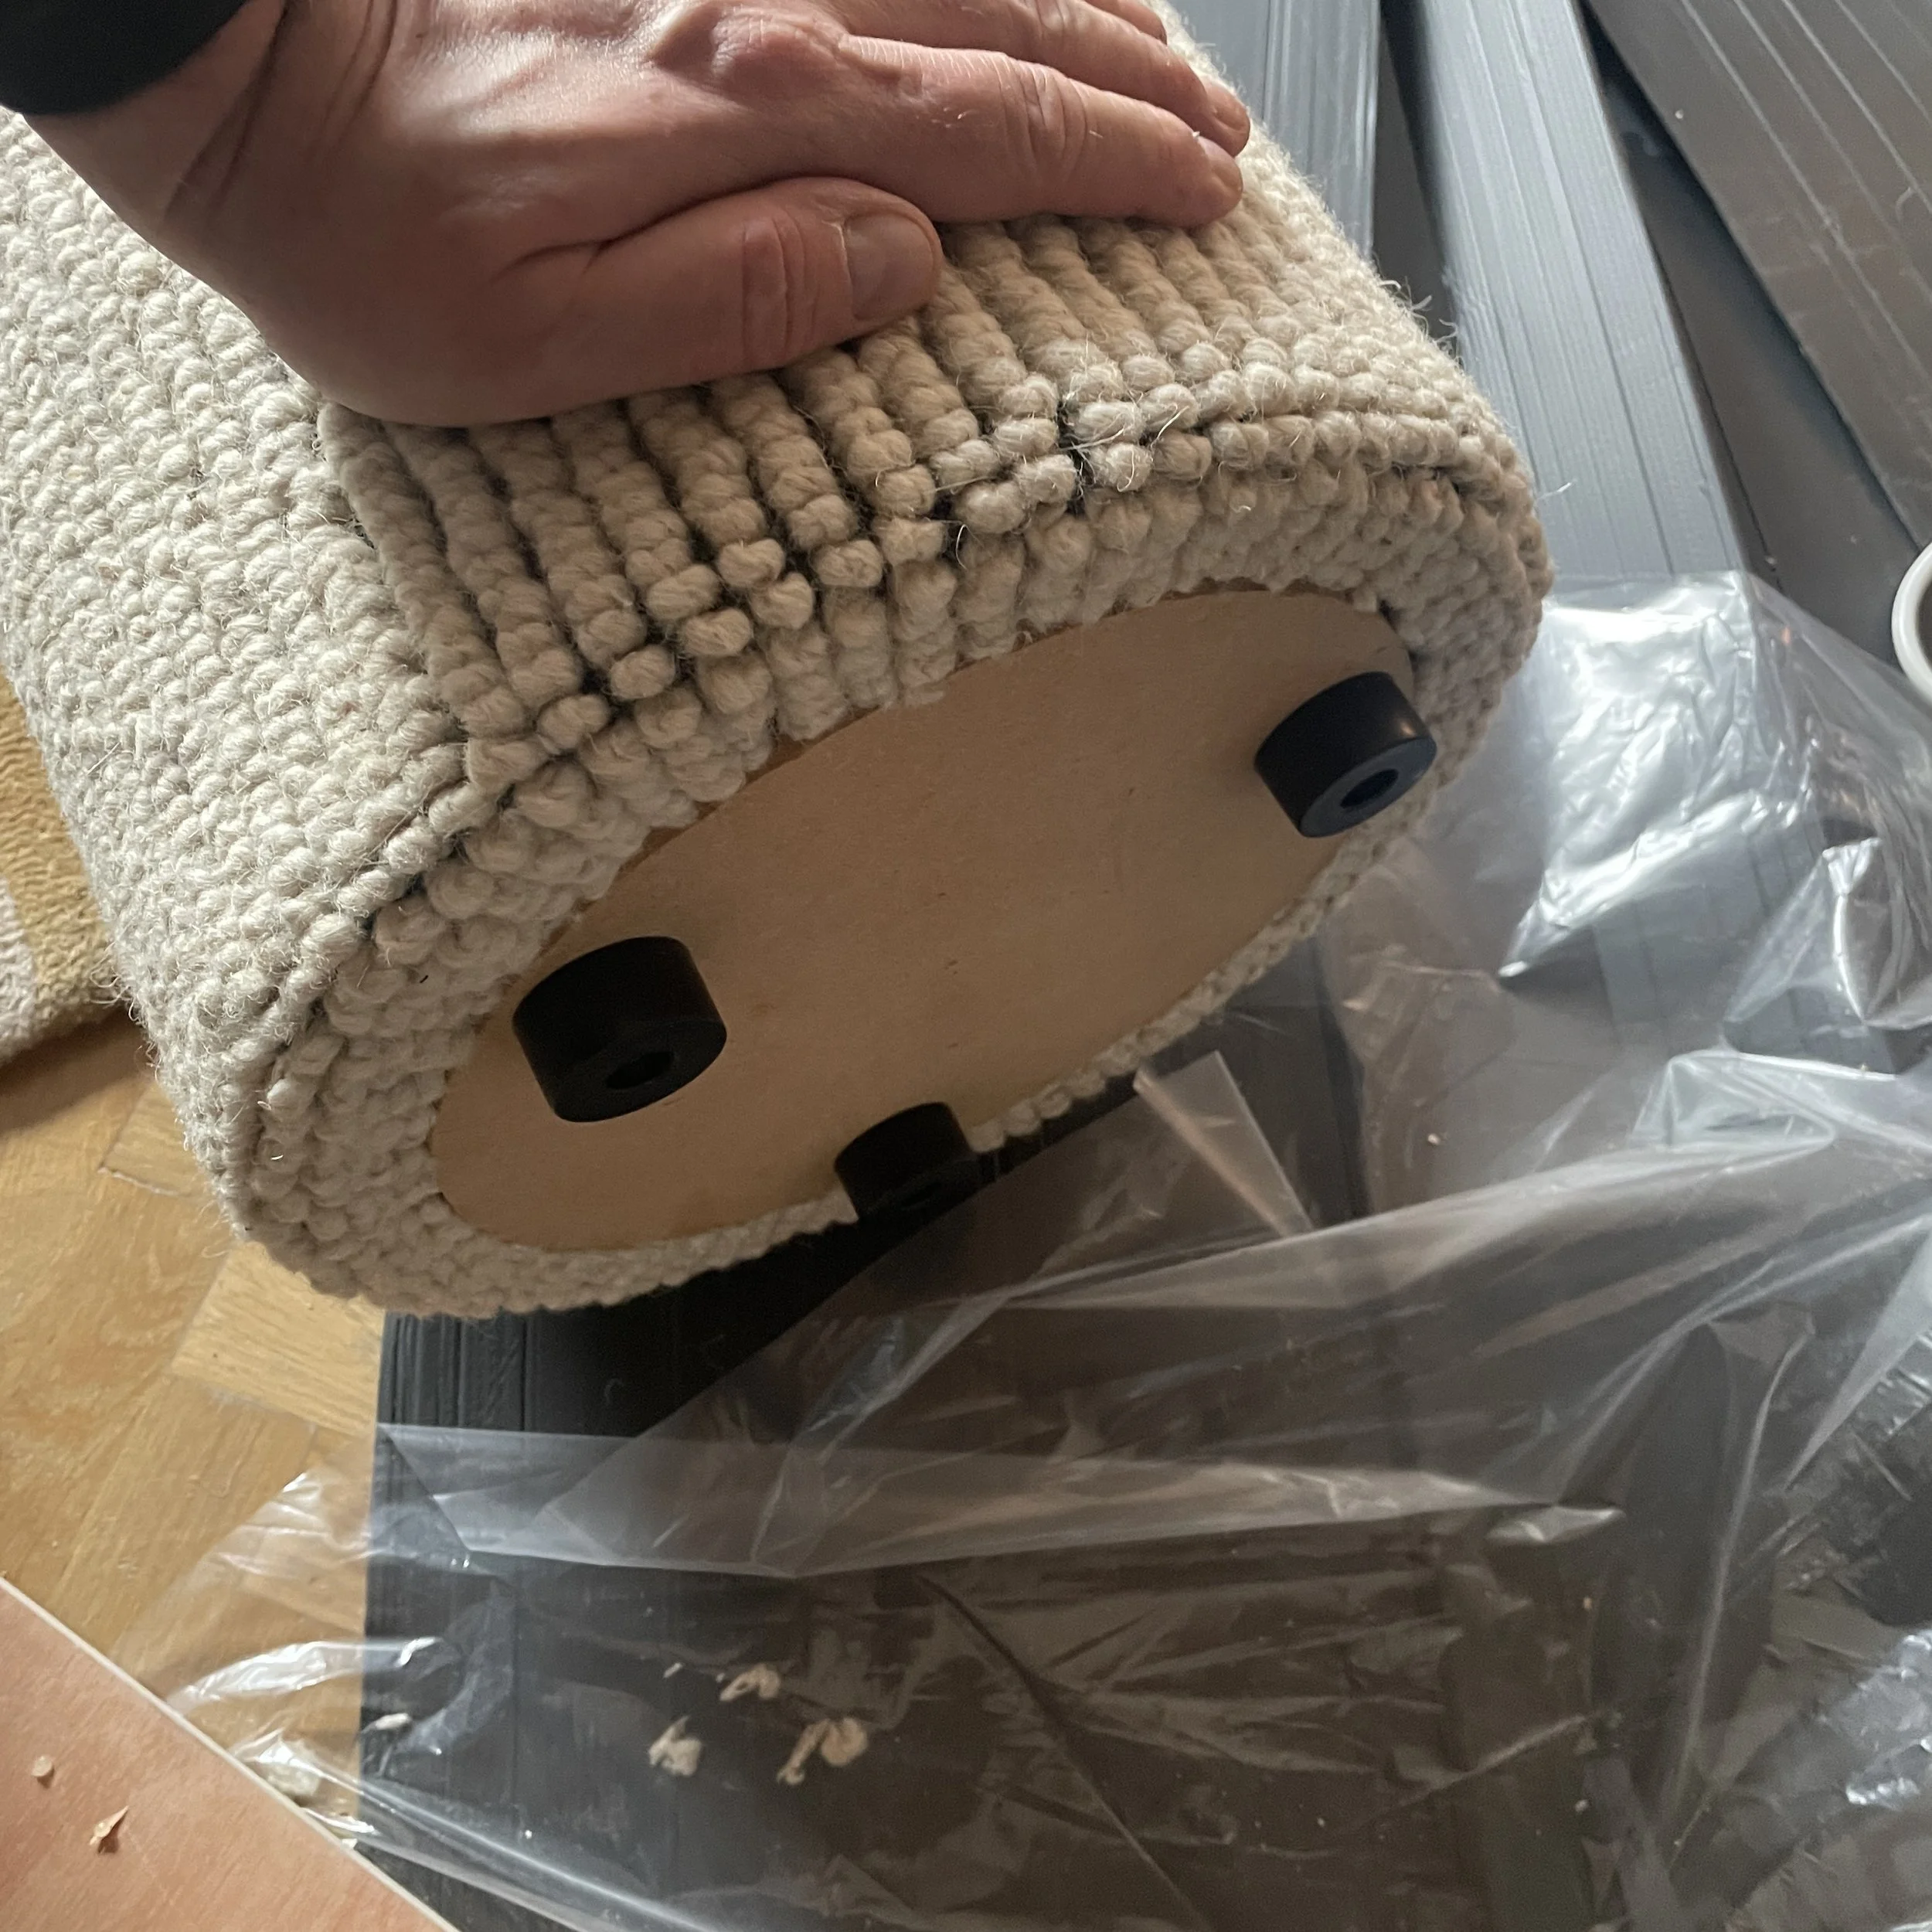
After the first trim cut a v-shaped cutout between every third rib of the carpet to allow the wrapped end to be formed without the ribs overlapping & then do a second trim around the wrapped end cap collar to make sure they are trimmed to meet the collar - you can use the end cap as a guide to cutting the v-shapes by pressing the tip of the secateurs up against the end cap when making the cuts ensuring that you are pressing up to the side of the ribs when making the left & right hand cuts to form the v-shape.
NB we removed the feet again after the first trim as these interfered with the cutting.
Glue the loose area under the carpet where it’s been cut back from the end of the tube then glue the individual flaps to form the wrapped end detail - it’s best to glue the flaps one at a time with a hot melt glue gun but you can use contact adhesive for both of these stages.
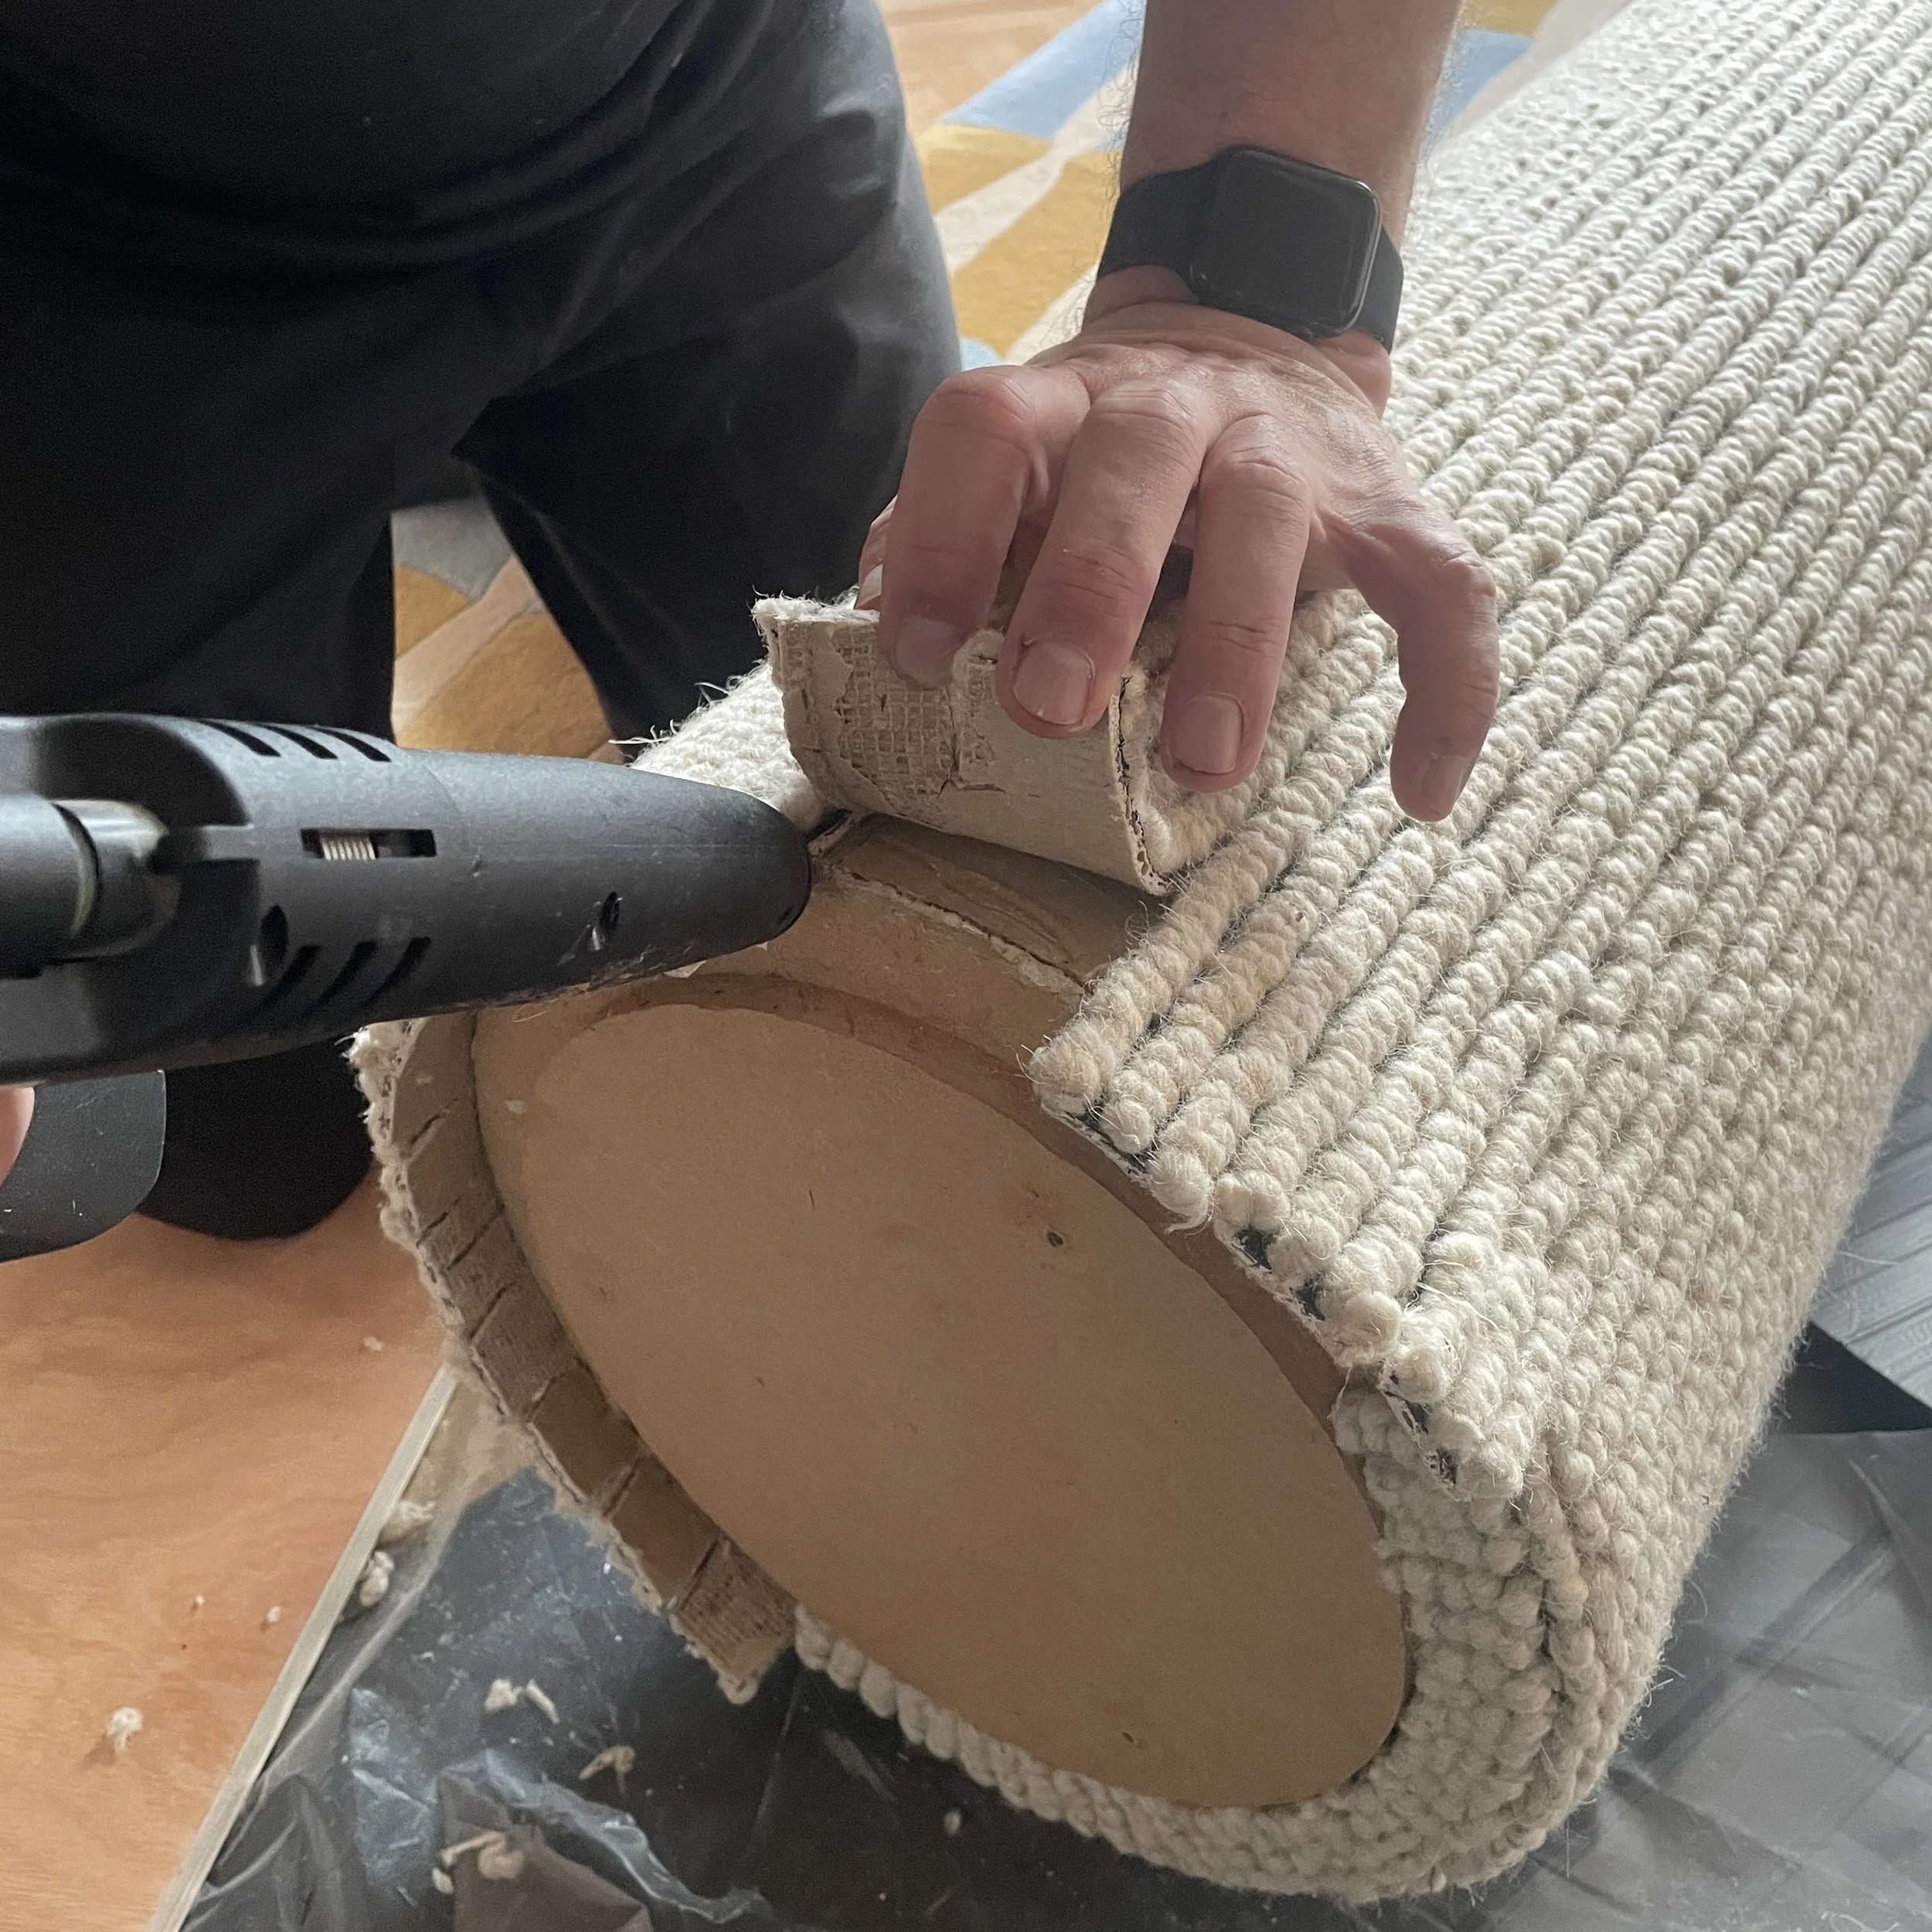
Hold the flap down for around 10 seconds to fix it, going back to the previous flap between holding to make sure that it has bonded correctly - it took about 2 hours to carry out the adaption & when we had finished it wasn’t obvious that the unit had gone under the DIY knife.
We are very happy that Mochi & Mandu didn’t have to wait to be off the ground until we returned from our break in March - after the work was done we spent some Squiggles time with Mochi & Mandu.
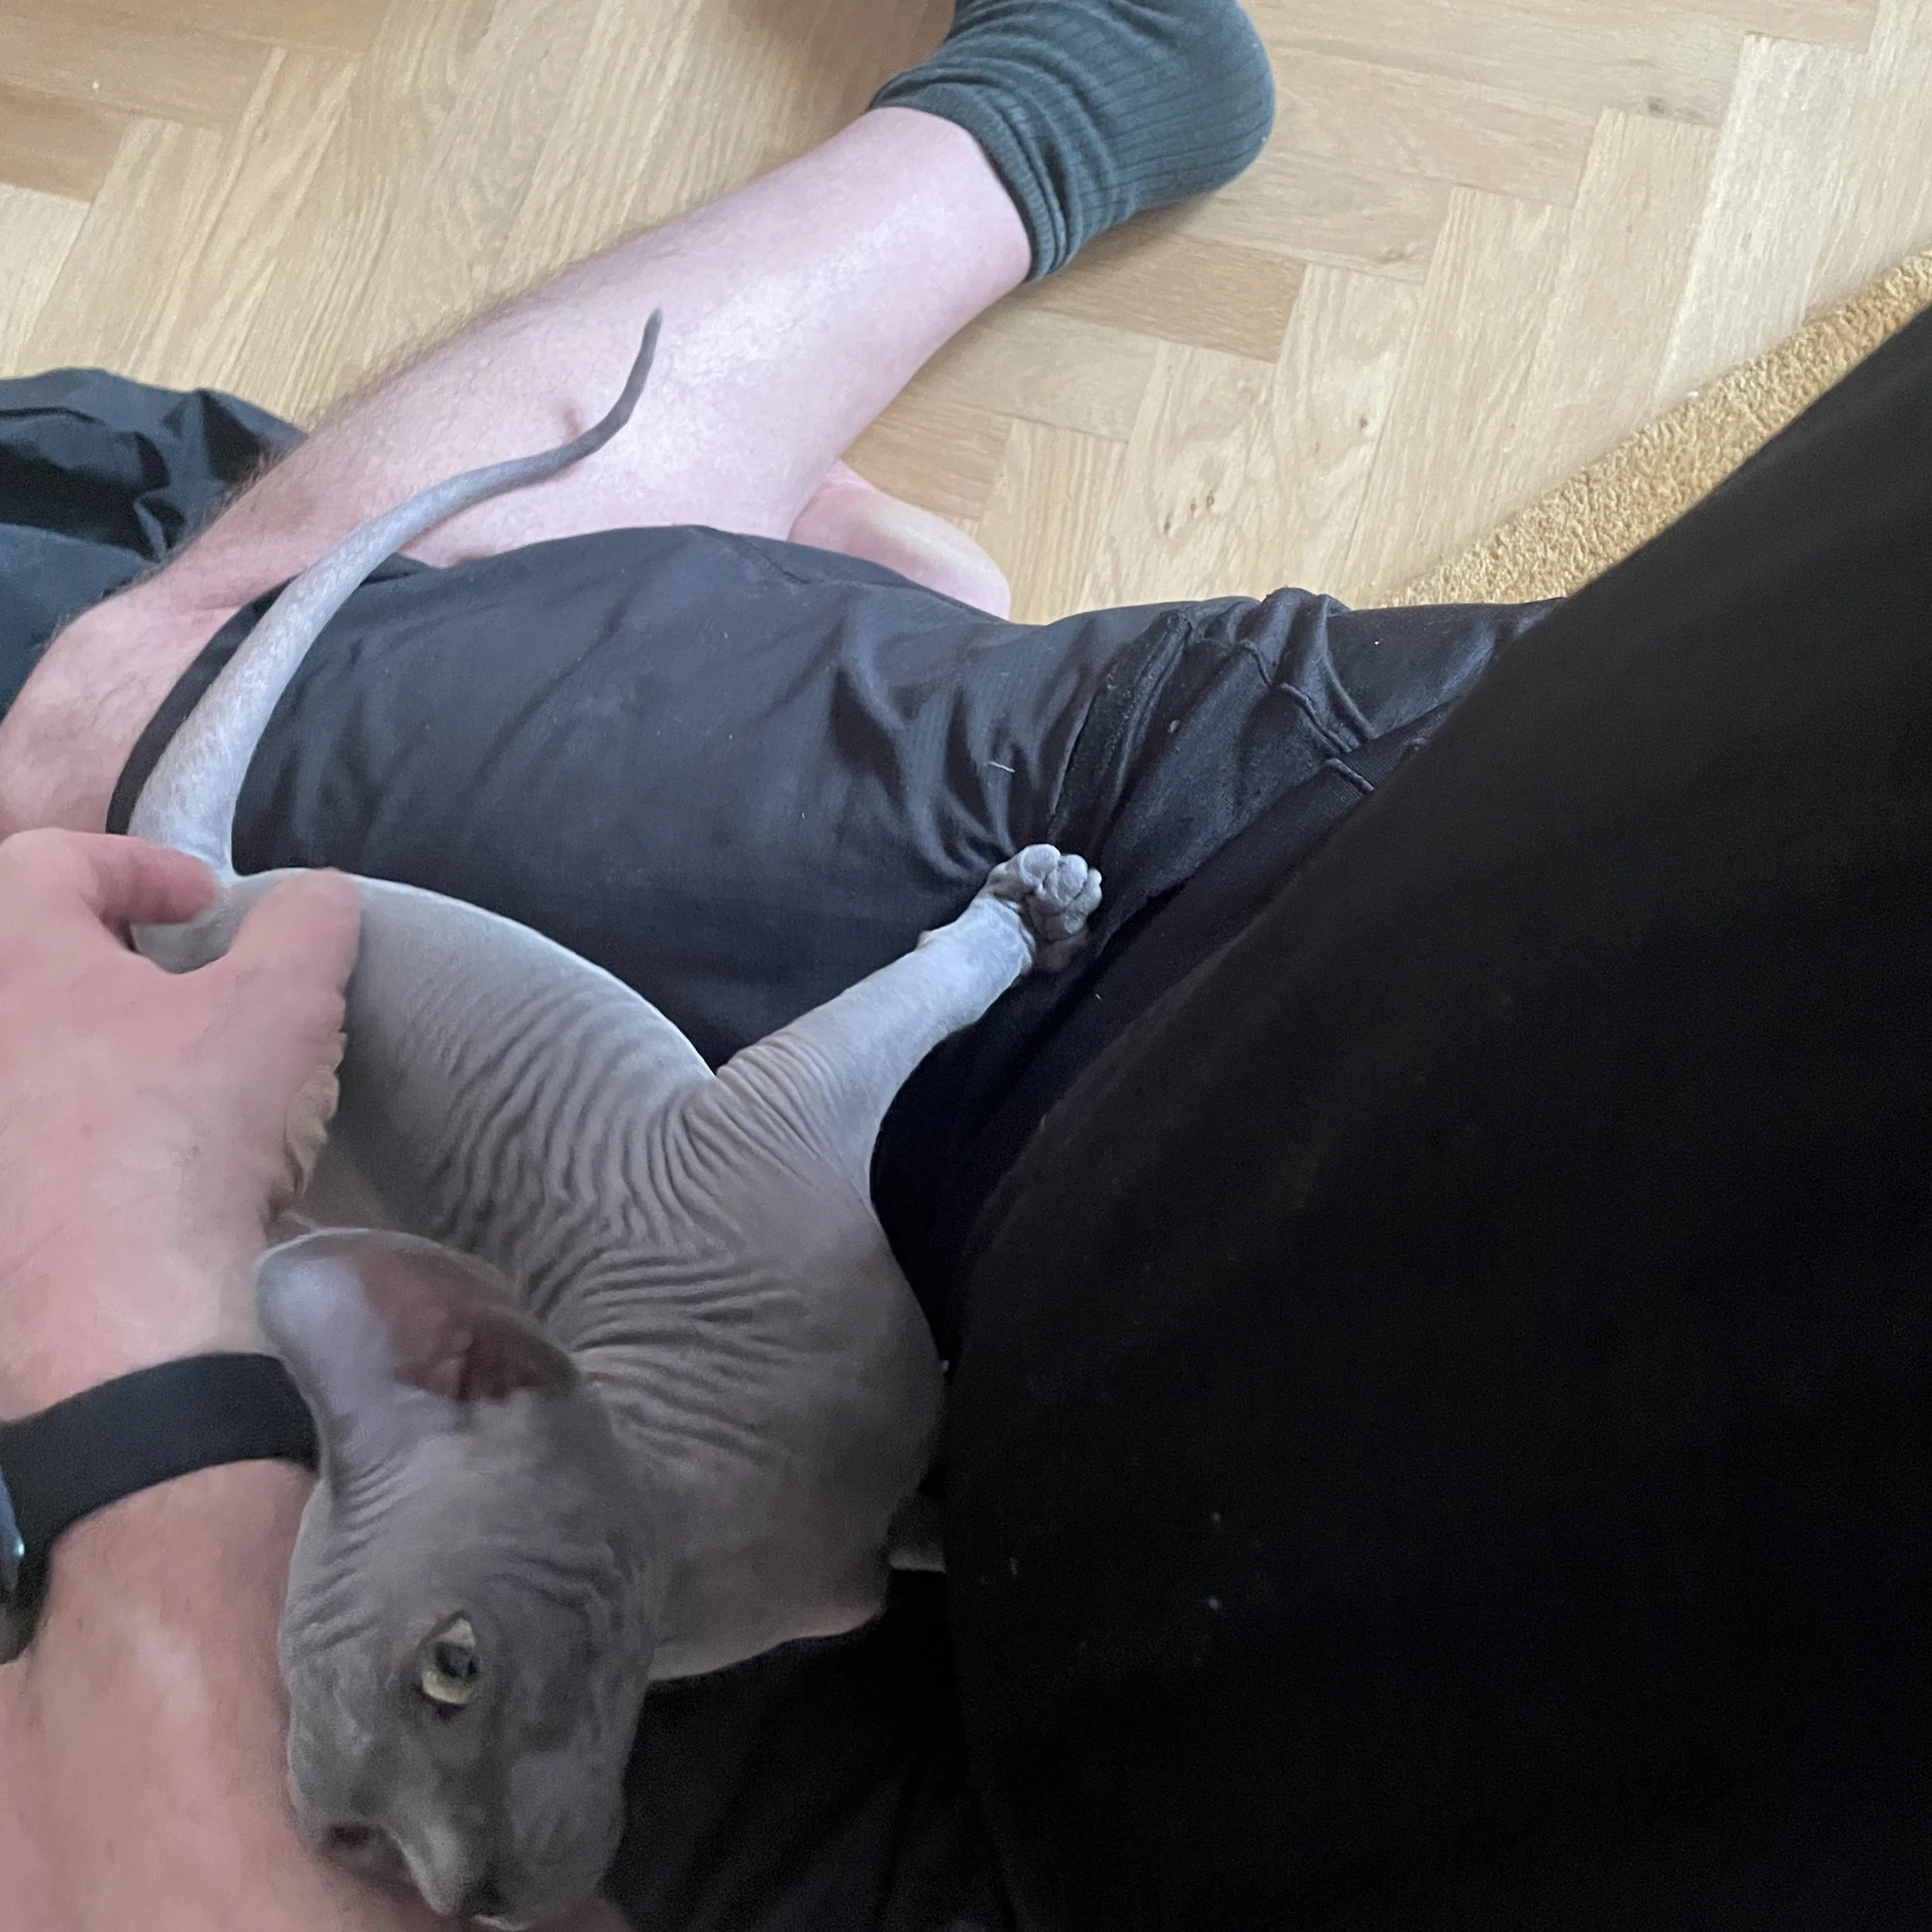
For those not familiar with Squiggles it’s a form of stroking where you wiggle your fingers on both hands up & down the back of your cat to create an audible purring sound…Mochi was particularly good & loud at this tickling technique